

 The sections below assume that reader has studied the "The Basic Knowledge of Service" and understands the concept of the service and knows how to create scripts.
 Refer to "Log Level"for log levels.
Refer to "Types"for types.
Refer to"DataSpider filesystem" for DataSpider Filesystem.
Refer to "Log Level"for log levels.
Refer to "Types"for types.
Refer to"DataSpider filesystem" for DataSpider Filesystem.
 Refer to"Restrictions on characters used in DataSpider" for restricted characters.
Refer to "Monitor Exception operation" for monitoring exceptions.
Refer to"Application Log Output Settings" for application logs.
Other development standards that are not discussed above should be set to meet your need.
For more details about installation settings, refer to the "DataSpider Servista Installation Guide" available in PDF. For settings after installation, refer to the "Repository DB Management".
One repository DB must prepare one DataSpiderServer. It is not possible to connect it with same repository DB with two or more DataSpiderServer.
The instance of the data base used as repository DB is made only for repository DB, and it doesn't use it with another system.
Refer to "Team development" for details.
For details on PSP, please refer to "Parallel Stream Processing".
For details on components corresponding to PSP, please refer to "Components corresponding to Parallel Stream Processing".
For details on how to change the heap size of DataSpiderServer, please refer to "Property reference".
For details on Mass data processing settings, please refer to "Parallel Stream Processing".
If both PSP and mass data processing are valid, PSP is prioritized and mass data processing will not be conducted.
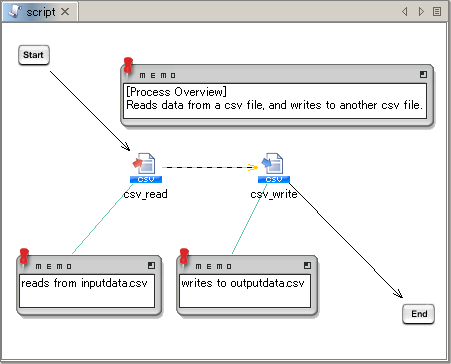
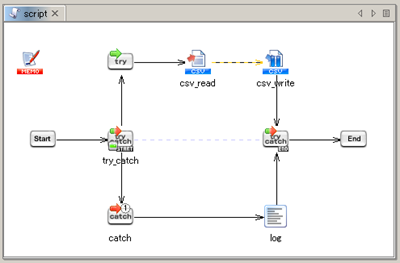
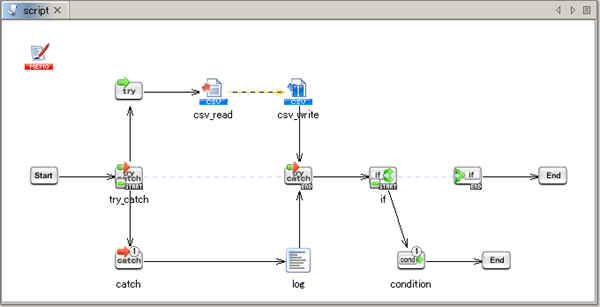
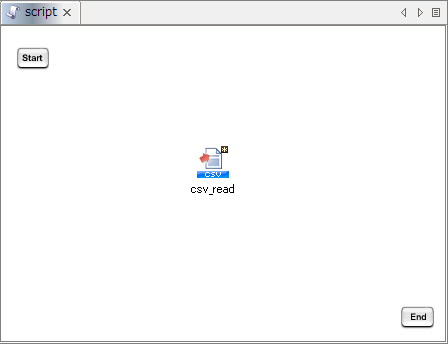
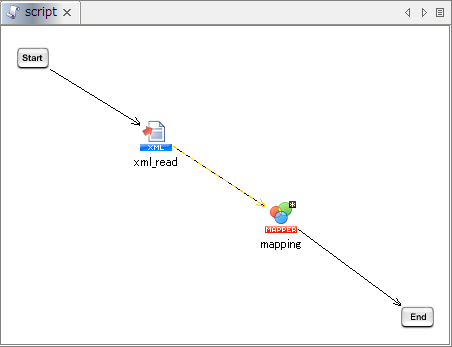
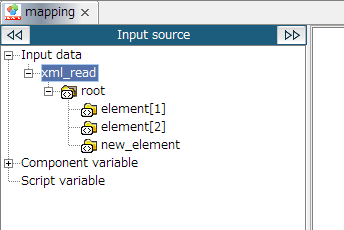
This section will use the the script that you created in tutorial "Tutorial" on page "The Basic Knowledge of Service".
Refer to"Restrictions on characters used in DataSpider" for restricted characters.
Refer to "Monitor Exception operation" for monitoring exceptions.
Refer to"Application Log Output Settings" for application logs.
Other development standards that are not discussed above should be set to meet your need.
For more details about installation settings, refer to the "DataSpider Servista Installation Guide" available in PDF. For settings after installation, refer to the "Repository DB Management".
One repository DB must prepare one DataSpiderServer. It is not possible to connect it with same repository DB with two or more DataSpiderServer.
The instance of the data base used as repository DB is made only for repository DB, and it doesn't use it with another system.
Refer to "Team development" for details.
For details on PSP, please refer to "Parallel Stream Processing".
For details on components corresponding to PSP, please refer to "Components corresponding to Parallel Stream Processing".
For details on how to change the heap size of DataSpiderServer, please refer to "Property reference".
For details on Mass data processing settings, please refer to "Parallel Stream Processing".
If both PSP and mass data processing are valid, PSP is prioritized and mass data processing will not be conducted.
This section will use the the script that you created in tutorial "Tutorial" on page "The Basic Knowledge of Service".


| Log Level | |
|---|---|
| ↑ High Low ↓ |
NOTICE |
| INFO | |
| FINFO | |
| FINEST | |
| DEBUG |
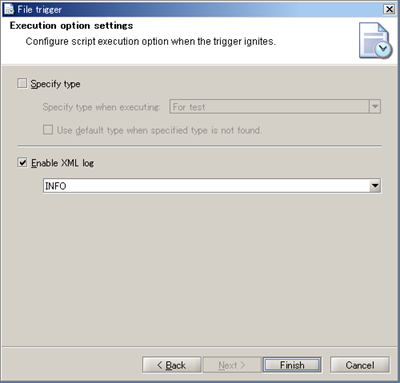
 If the [Enable] of the [XML log] is left unchecked, logging is not performed.
 See Log Level for any further details.
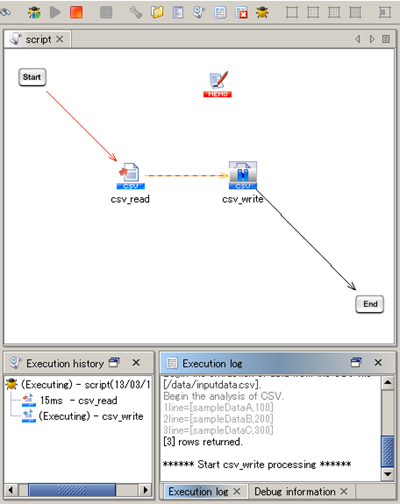 When paused at the breakpoint, finished process flows are shown in red.
Executing the script in debug mode differs from executing the script in test mode in the following particulars:
When paused at the breakpoint, finished process flows are shown in red.
Executing the script in debug mode differs from executing the script in test mode in the following particulars:
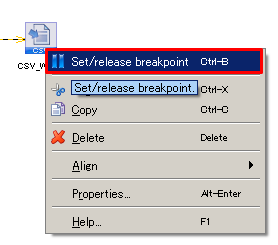
| The appearance of the icon | Status |
|---|---|
|
A breakpoint is toggled on |
|
A break point is toggled off |
See "Designer" for any details.
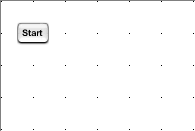
| 32*32 | 16*16 | 8*8 |
|---|---|---|
 |
 |
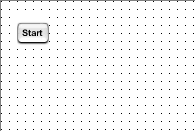 |
If the components are not aligned correctly, do [Undo/Redo] to reverse the position of them.
See Environment Variable Settings for any further details.
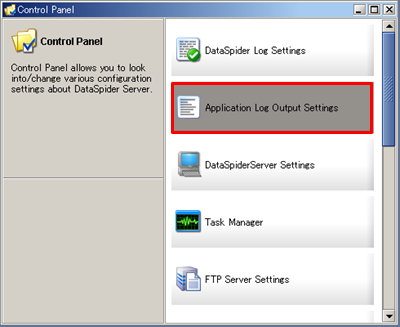
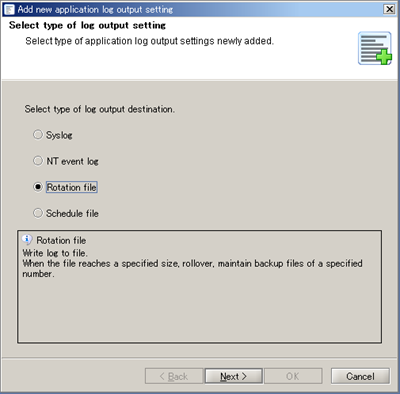
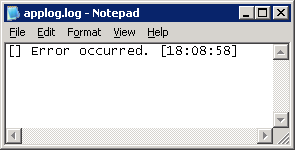
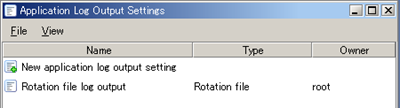 Refer to Application Log Output Settings for any further details.
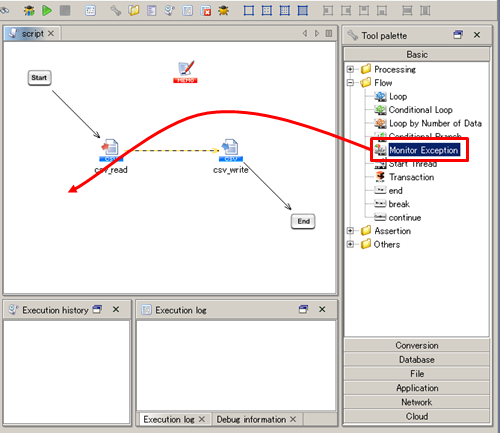
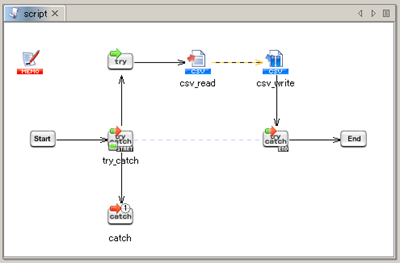
 See Monitor Exception operation for any details.
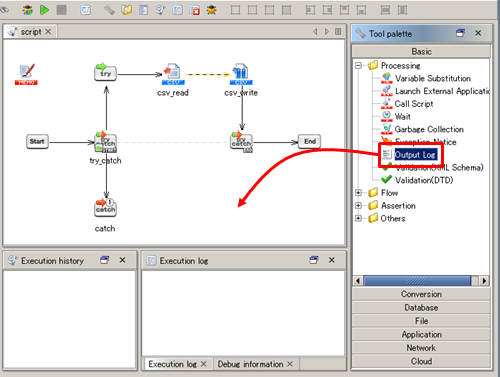
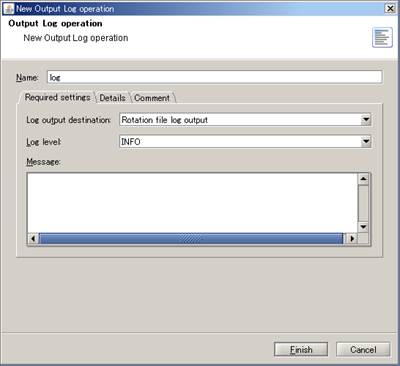
See Output Log operation for any details.
See Monitor Exception operation for any details.
See Output Log operation for any details.
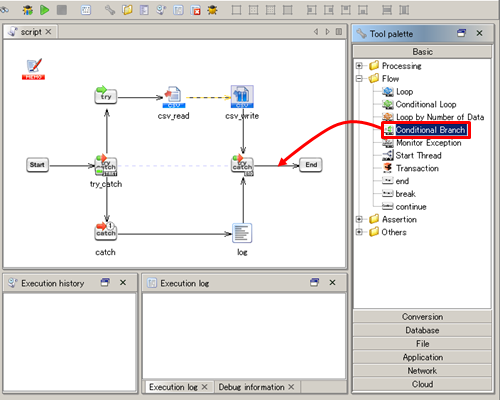
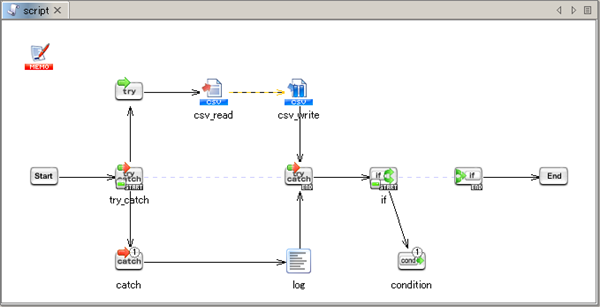
 See Conditional Branch operation for any details.
See End operation for any details.
See Conditional Branch operation for any details.
See End operation for any details.
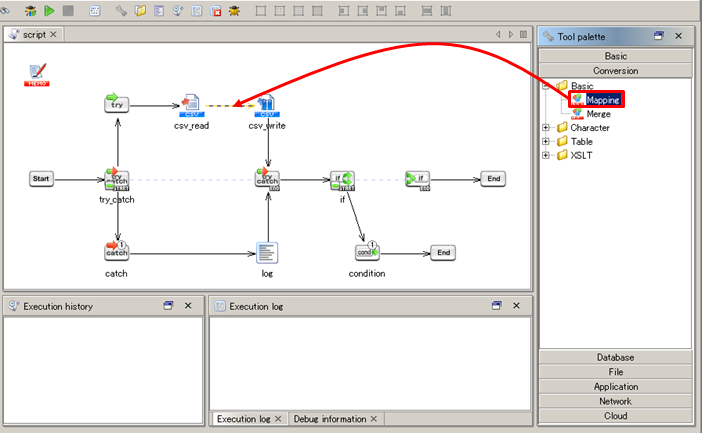
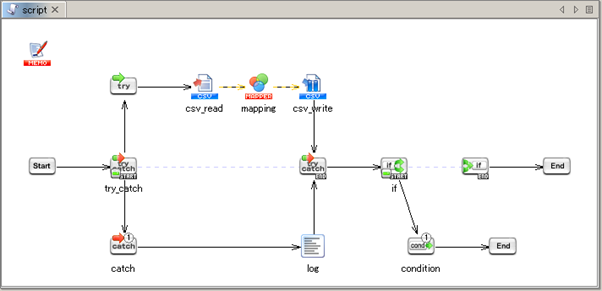

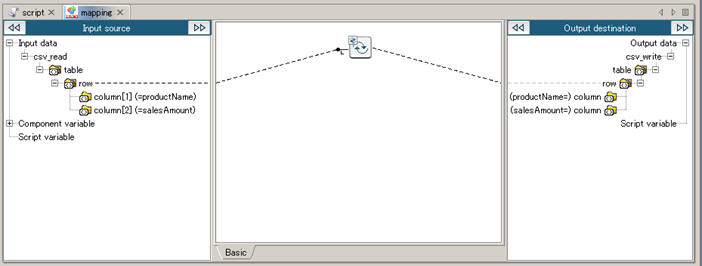
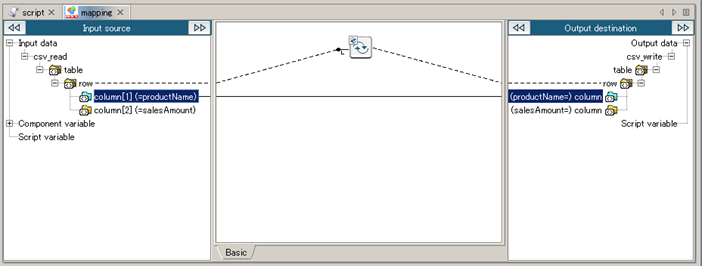
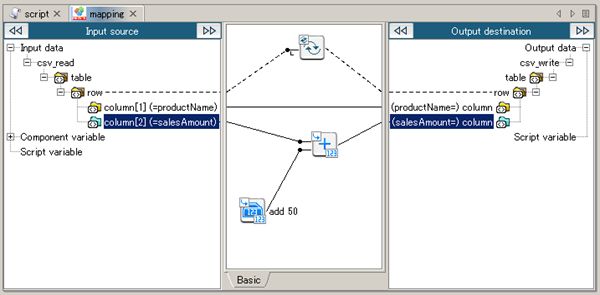
 See Mapper for any details.
See Mapper , for any information regarding Variable Mapper.
See Merge Mapper for details regarding Merge Mapper.
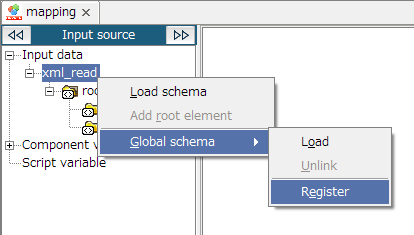
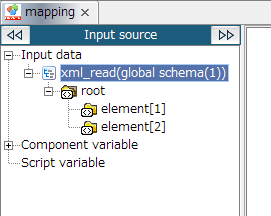
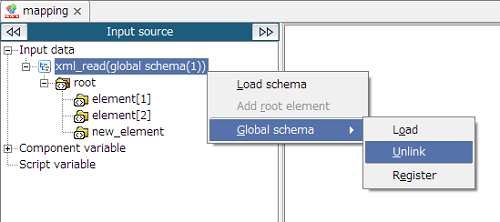
Global Schema can only be used with document mapper.
For Global Schema overview, refer to "Global Schema".
For details, refer to "Components from which you can register Global Schema in Script canvas".
Mapper schema cannot be registered from script canvas. Register from Mapper editor.
See Mapper for any details.
See Mapper , for any information regarding Variable Mapper.
See Merge Mapper for details regarding Merge Mapper.
Global Schema can only be used with document mapper.
For Global Schema overview, refer to "Global Schema".
For details, refer to "Components from which you can register Global Schema in Script canvas".
Mapper schema cannot be registered from script canvas. Register from Mapper editor.

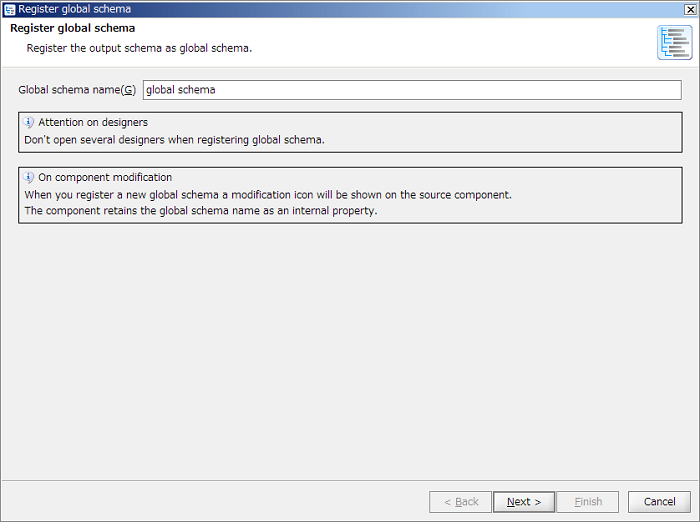
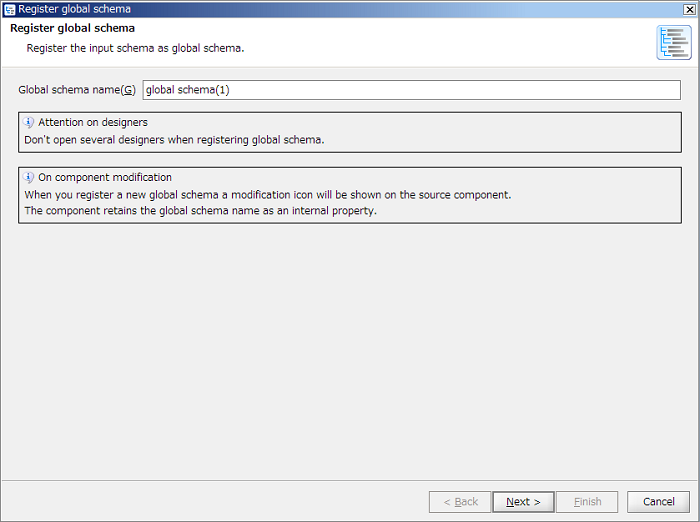
 Global Schema is referred to by Global Schema name. For Global Schema name, use a unique name within DataSpiderServer.
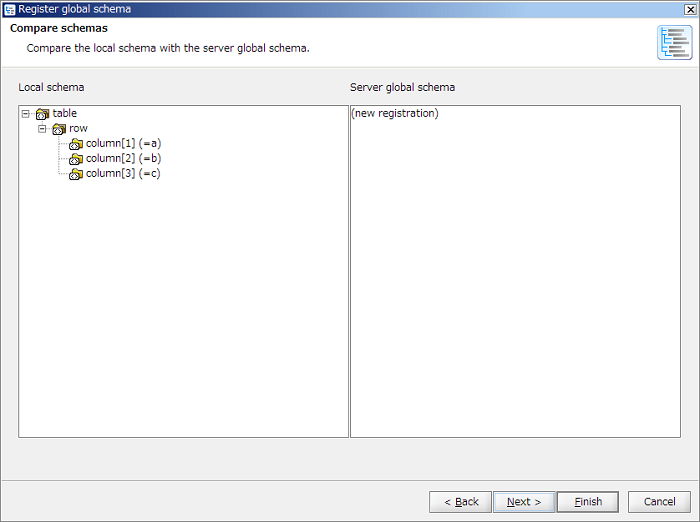
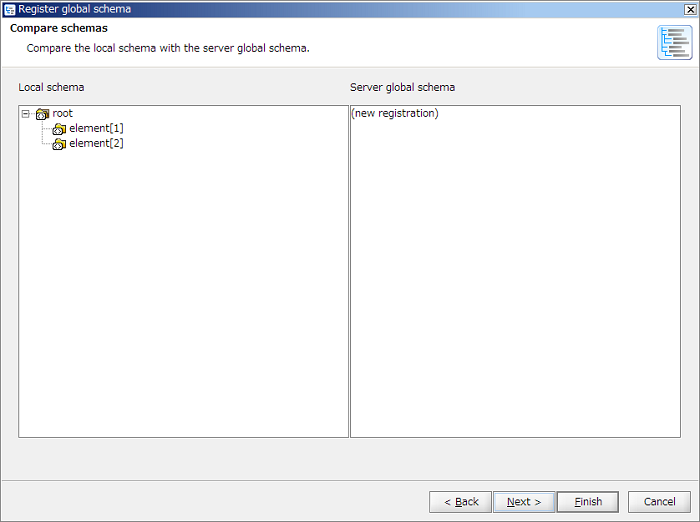
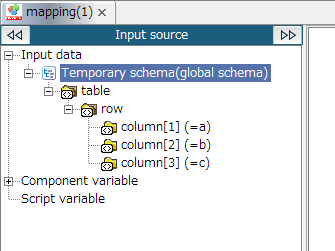
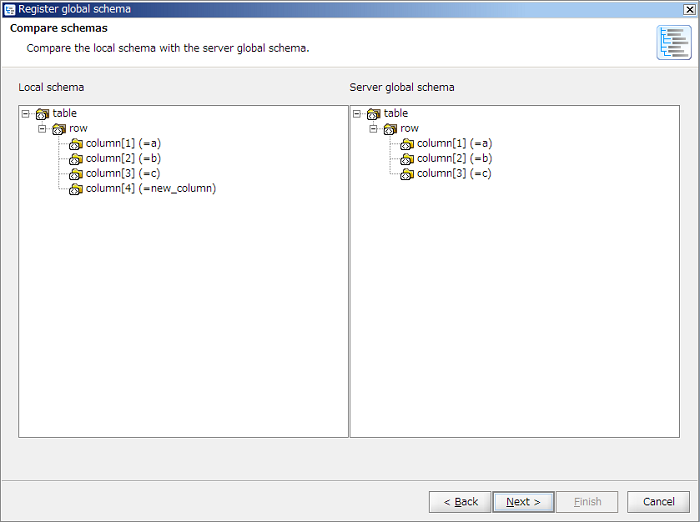
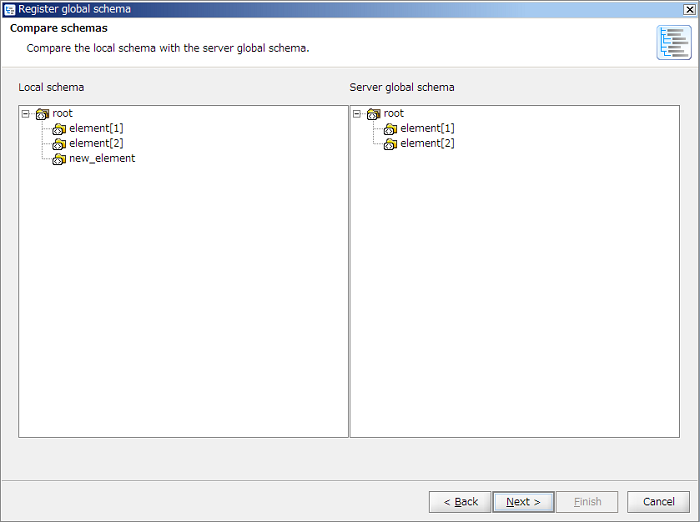
 In case of new registration, displayed as "(new registration)" since [Server global schema] does not exist.
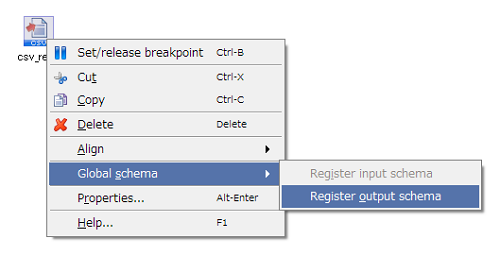
 Registered Global Schema can be confirmed with the control panel "Global Schema Settings".
Registeration is only available from document mapper. Registeraion cannot be performed from variable mapper and merge mapper.
Registered Global Schema can be confirmed with the control panel "Global Schema Settings".
Registeration is only available from document mapper. Registeraion cannot be performed from variable mapper and merge mapper.
 Global Schema is referred to by Global Schema name. For Global Schema name, use a unique name within DataSpiderServer.
 In case of new registration, displayed as "(new registration)" since [Server global schema] does not exist.
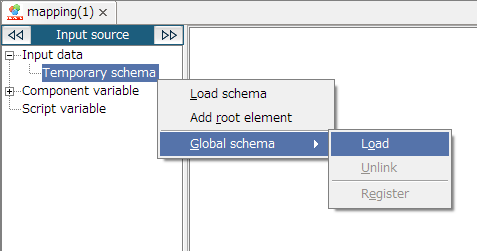
 If a Global Schema is registered from mapper editor, then the schema starts to refer to Global Schema simultaneously.
Registered Global Schema can be confirmed in the control panel "Global Schema Settings".
Reference is only available from document mapper. Reference cannot be performed from variable mapper and merge mapper.
If a Global Schema is registered from mapper editor, then the schema starts to refer to Global Schema simultaneously.
Registered Global Schema can be confirmed in the control panel "Global Schema Settings".
Reference is only available from document mapper. Reference cannot be performed from variable mapper and merge mapper.
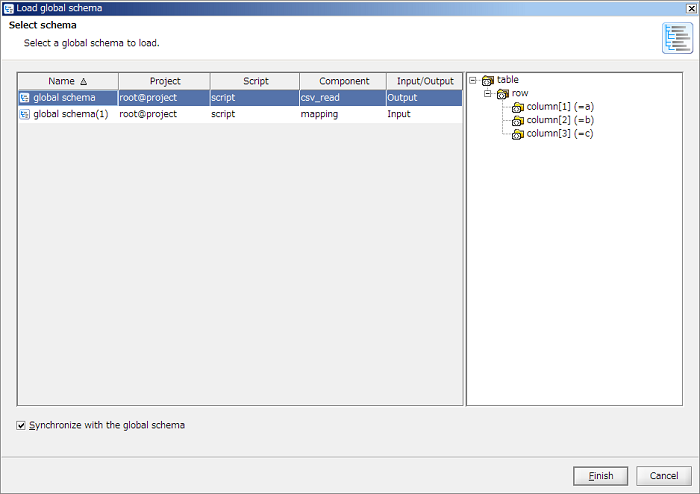
 If unchecked [Synchronize with the global schema] in "Select schema" screen and [Finish] button is clicked, only a schema is loaded and the global schema will not be referred to.
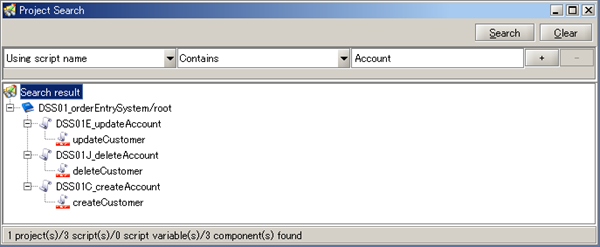
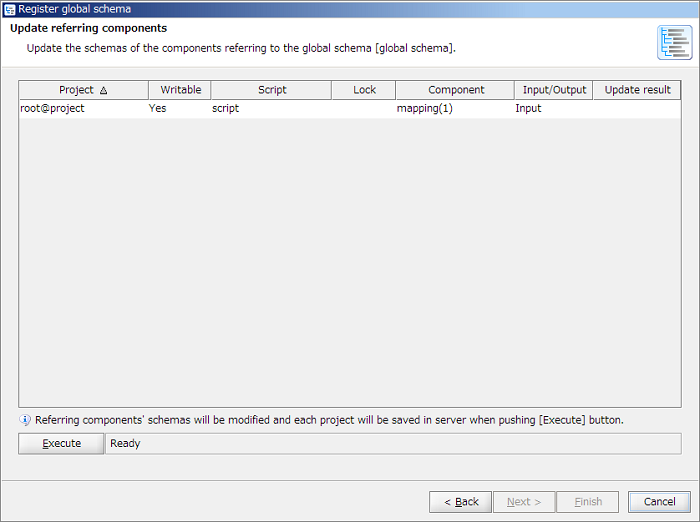
 The list is created based on the project on a server. If Team Development function is enabled, targeted projects needs to be commited to a server in advance.
 If Team Development function is enabled, projects are saved to local. Commitment to server is not performed.
If many referring components is to be updated, performance of the client machine is required. For details, refer to "Performance required to update referring components".
If Team Development function is enabled, projects are saved to local. Commitment to server is not performed.
If many referring components is to be updated, performance of the client machine is required. For details, refer to "Performance required to update referring components".
 At this time, if you've opened the target projects to be updated, all scripts in the projects are closed.

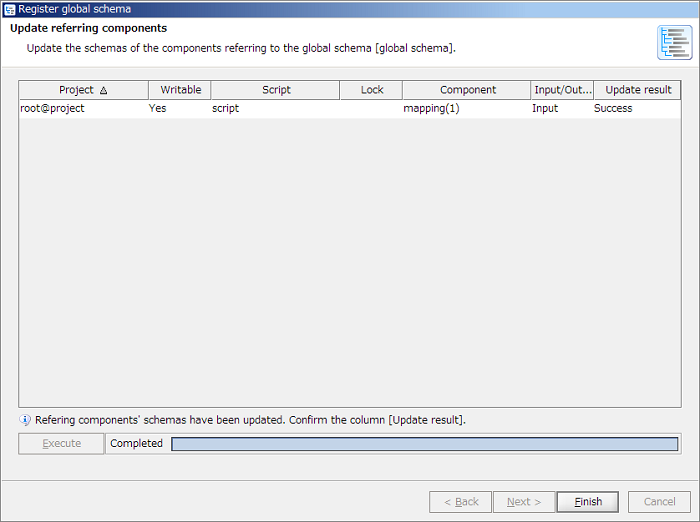
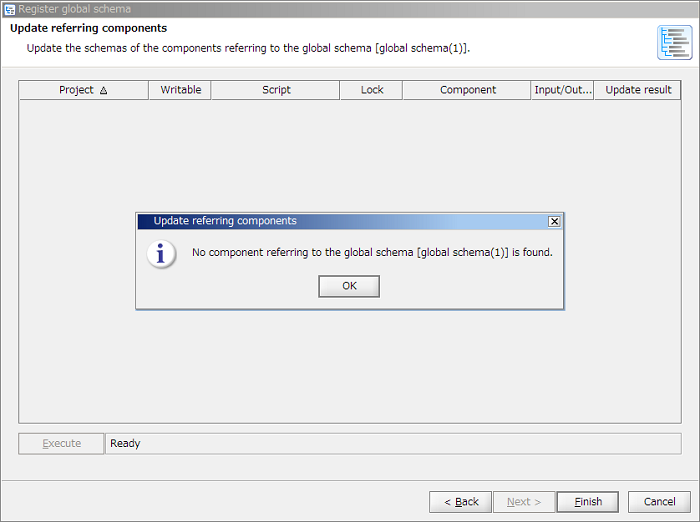
 If some referring components exist, referring components' schemas are updated. The procedure is same as "How to update from script canvas".
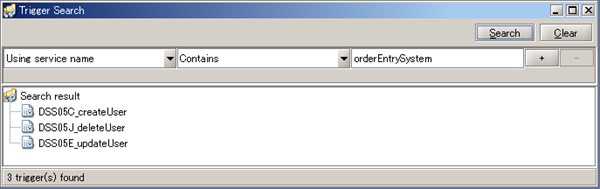
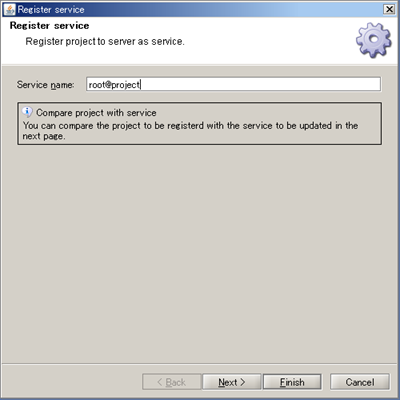
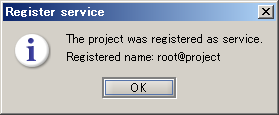
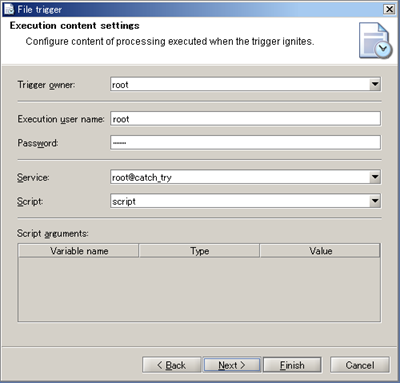
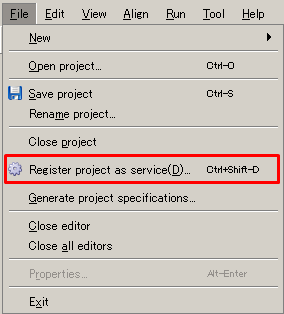 A service name defaults to <user name>@<project name>.
| Trigger name | Description | Remarks |
|---|---|---|
| Schedule Trigger | Schedule trigger is the function to execute the Service in the specified date/time according to the timing of daily/weekly/monthly/yearly/and interval. | |
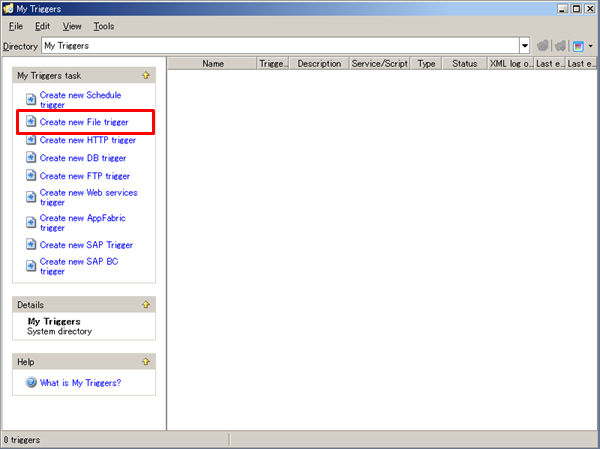
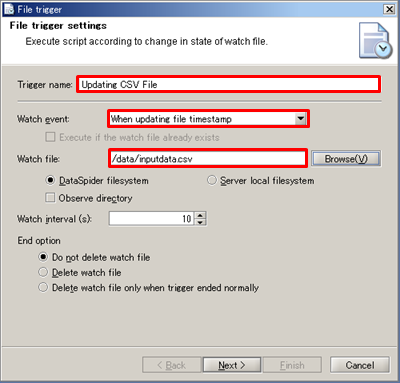
| File Trigger | File trigger is a trigger function to execute scripts when a event of monitored file being created/updated/deleted occurs. | |
| HTTP Trigger | HTTP trigger is a trigger function to run script by sending request from HTTP clients for specified URL. | |
| DB Trigger | DB triggers is the trigger function to monitor the specified database table and execute script according to the status value the status column. | |
| FTP Trigger | FTP trigger is trigger function to execute script detecting file up-loaded to FTP server that works on DataSpiderServer. | |
| Web Service Trigger | Web Service Trigger executes its associated script when the web service requests are accepted on the URL specified. | |
| Amazon Kinesis Trigger | Detect data transmission to the observing Amazon Kinesis stream, and then ignite it. | |
| Azure Service Bus Trigger | Detect a message tramsmitted from a service hosted by Microsoft Azure via Microsoft Azure Service Bus, and then ignite it. | |
| SAP Trigger | SAP trigger is a trigger function to run a script when monitor target messages occur. | |
| SAP BC Trigger | SAP BC trigger is trigger function to execute script by outbound processing of SAP system by sending request to URL specified with SAP Business Connector. | |
| HULFT Script Trigger | HULFT Script trigger is a trigger function to execute scripts, if detects the receiving/sending history of HULFT and meets the conditions. |

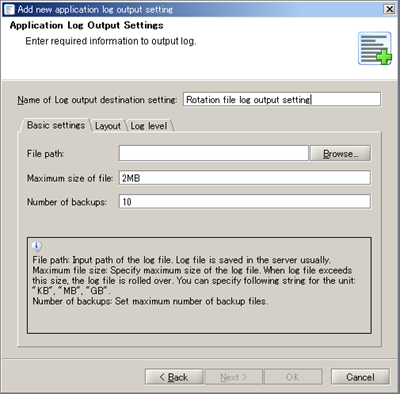
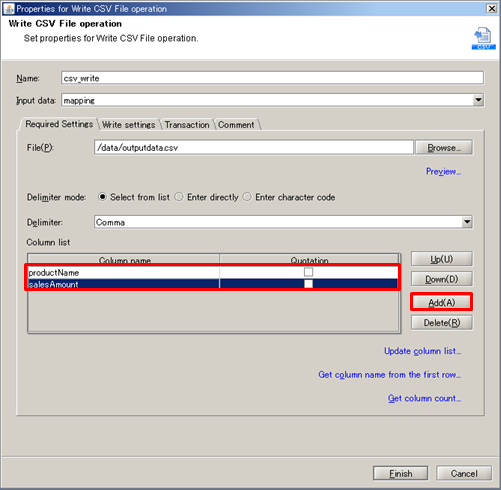
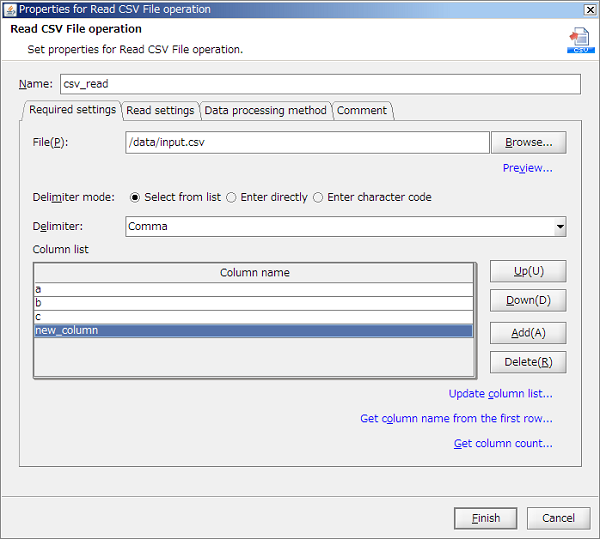
 Alternatively, the file can be selected in the file Selectr that is launched by clicking [Browse] button.
 See Log Level for any details regarding Log level.
 Trigger can be enabled afterwards even if you select [No].


 See Trigger for details regarding trigger settings.
See My Triggers for creating triggers.
See ScriptRunner for details regarding ScriptRunner.
See ScriptRunnerProxy for details regarding ScriptRunnerProxy.
See "Designer" for any details.
See Trigger for details regarding trigger settings.
See My Triggers for creating triggers.
See ScriptRunner for details regarding ScriptRunner.
See ScriptRunnerProxy for details regarding ScriptRunnerProxy.
See "Designer" for any details.