Projects
A project is used to manage one or more related data integration scripts.
On the Projects page, you can view information such as the project name, version (updated date and time), creator of the project, and workspace name.
You can configure projects from  > HULFT INTEGRATE > Projects in the navigation menu.
Users can specify workspaces in projects to share with other users or groups.
For more details about how to use workspaces to share settings, refer to Share settings with team members.
The key points about creating and configuring projects are explained in this section.
To execute scripts created by users in the data integration process, deploy a created project as a job.
Points for settings
To create projects, set project names and script names from Add.
This section explains the screen transitions from the Projects page and the functions such as creating and editing projects.
For the names and functions of basic UI elements and other items of HULFT Square, refer to the following topic:
Projects
In the navigation menu, select > HULFT INTEGRATE > Projects to open this page.
You can manage your projects from here, such as creating, editing, deleting, and associating with a job.
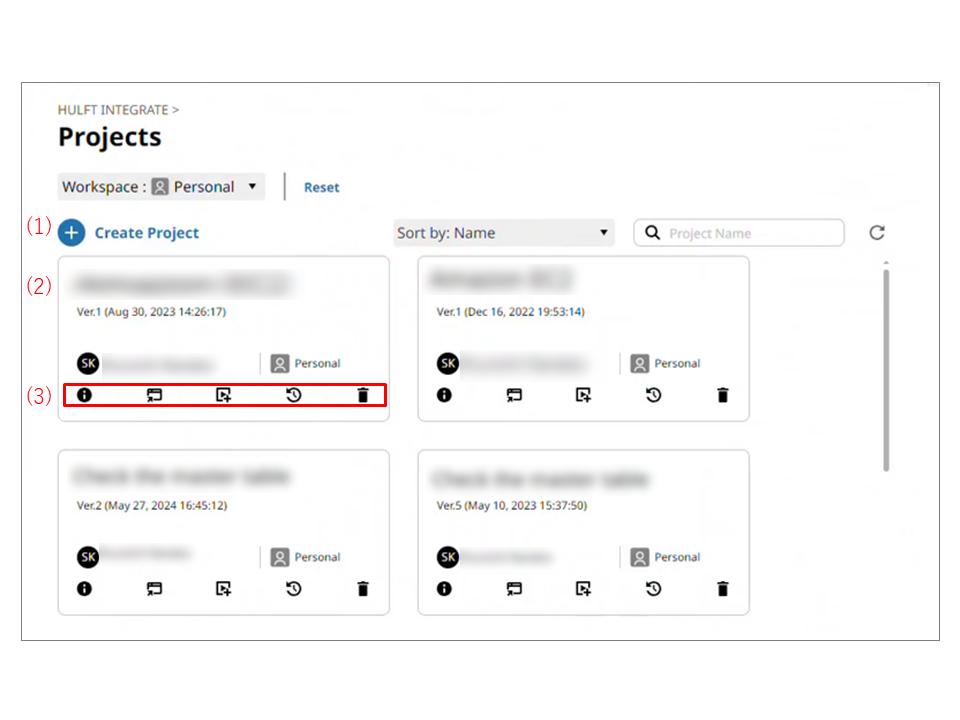
- (1) Add
-
Select this icon to create a new project.
For the project settings, refer to Projects > Add.
- (2) Projects
-
Created projects are displayed.
The following information is shown in the project tiles:
-
Project name
-
Version (updated date and time)
-
Description
-
Author of the project
-
Workspace name
-
- (3) Operation icons
-
Select these icons to perform operations for created projects.
- Information icon
-
Displays detailed information about the selected project. (You can edit and delete the project that is displayed and view its history.)
- Open project icon
-
Opens a project to create and edit scripts.
- Create new job icon
-
Creates a job with the selected project.
- History icon
-
Displays the history of the selected project.
- Change ownership icon
-
Changes the ownership of the selected project to another member. When you change the owner, the value of Author changes.
In order to change the ownership, in addition to permission to view the project, you need the permission ChangeOwnership.
- Delete icon
-
Deletes the selected project.
On the Projects page, select Add to open this page.
Set project information to create a project by following the wizard-style pages step by step.
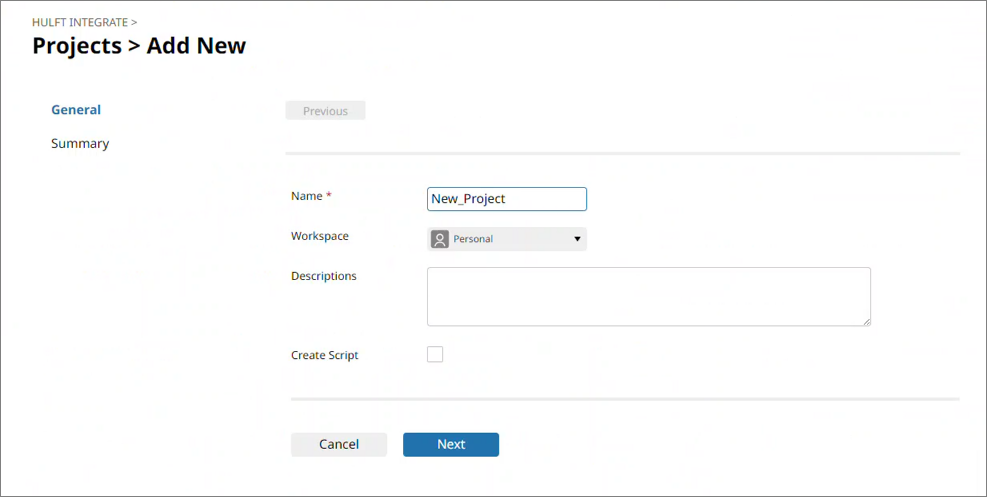
- General to Summary
-
This information tells you which step of the wizard-style setting procedure you are in.
- Name
-
Specify the project name.
- Workspace
-
Specify the workspace that is used to share the project.
= Remarks =If you select Personal for the workspace, it's not shared with users other than yourself.
To share the settings, select the workspace that is used to share.
- Description
-
Specify the description of the project.
- Create script
-
Select this checkbox to start creating a script after this wizard is completed.
- Script name
-
When you select the Create script checkbox, specify a script name.
- Next/Finish
-
Select Next to display the next page.
Select Finish to open the Edit project name dialog to launch Designer. For the settings of the Edit project name dialog, refer to Edit project name dialog.
On the Projects page, select the Information icon on a project to open this page.
You can view detailed information about the selected project.

- (1) Project name
-
The name of the project is displayed in project name.
- (2) Name
-
The project name is displayed.
- (3) Workspace
-
The workspace that is used to share the project is displayed.
- (4) Version
-
The version of the project is displayed.
- (5) Description
-
The description of the project is displayed.
- (6) Script
-
The script name is displayed.
- (7) Author
-
The author of the project is displayed.
- (8) Last modifier
-
The modifier of the project is displayed.
- (9) Created
-
The created date and time of the project is displayed.
- (10) Updated
-
The last updated date is displayed.
- (11) Edit
-
Edits the project name and description.
- (12) Open project
-
Opens a project to create and edit scripts.
For details about the dialog that appears, refer to Edit project name dialog.
- (13) Create new job
-
Creates a job with the selected project.
For the displayed screen, refer to Select a job type.
- (14) History
-
Shows the history of the displayed project. For the history, refer to Projects > Project name > History.
- (15) Change ownership
-
Changes the ownership of the selected project to another member. When you change the owner, the value of Author changes.
In order to change the ownership, in addition to permission to view the project, you need the permission ChangeOwnership.
- (16) Delete
-
Deletes the displayed project.
On the Projects page, select the Open project icon on a project to open this dialog.
Or from the Projects page, go to the Projects > Add New page and select Finish to open this dialog.
From the dropdown lists, select a profile and HULFT Integrate service to be linked with the project. If no options are shown in the dropdown lists, refer to the following topics and set the items:
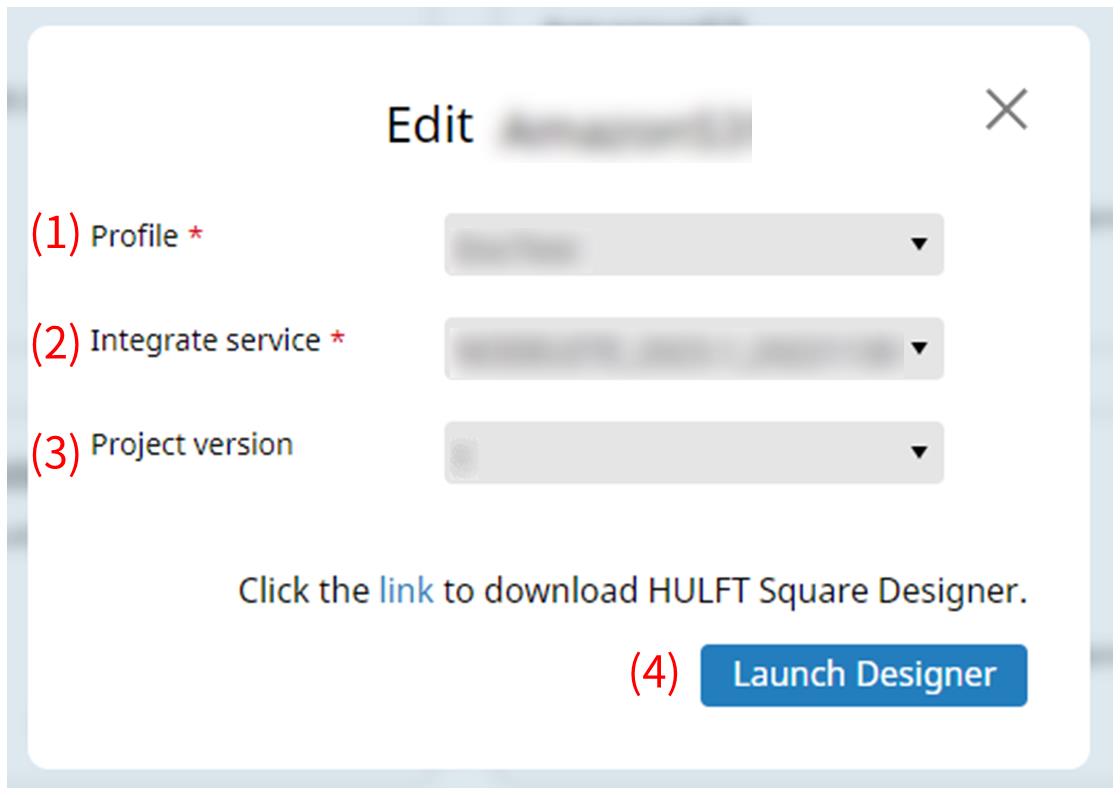
- (1) Profile
-
Select a profile. For settings for profiles, refer to Profiles.
- (2) Integrate service
-
Select a HULFT Integrate service. For settings for HULFT Integrate services, refer to HULFT Integrate.
- (3) Project version
-
Select the version of the project.
- (4) Launch Designer
-
Launch HULFT Square Designer.
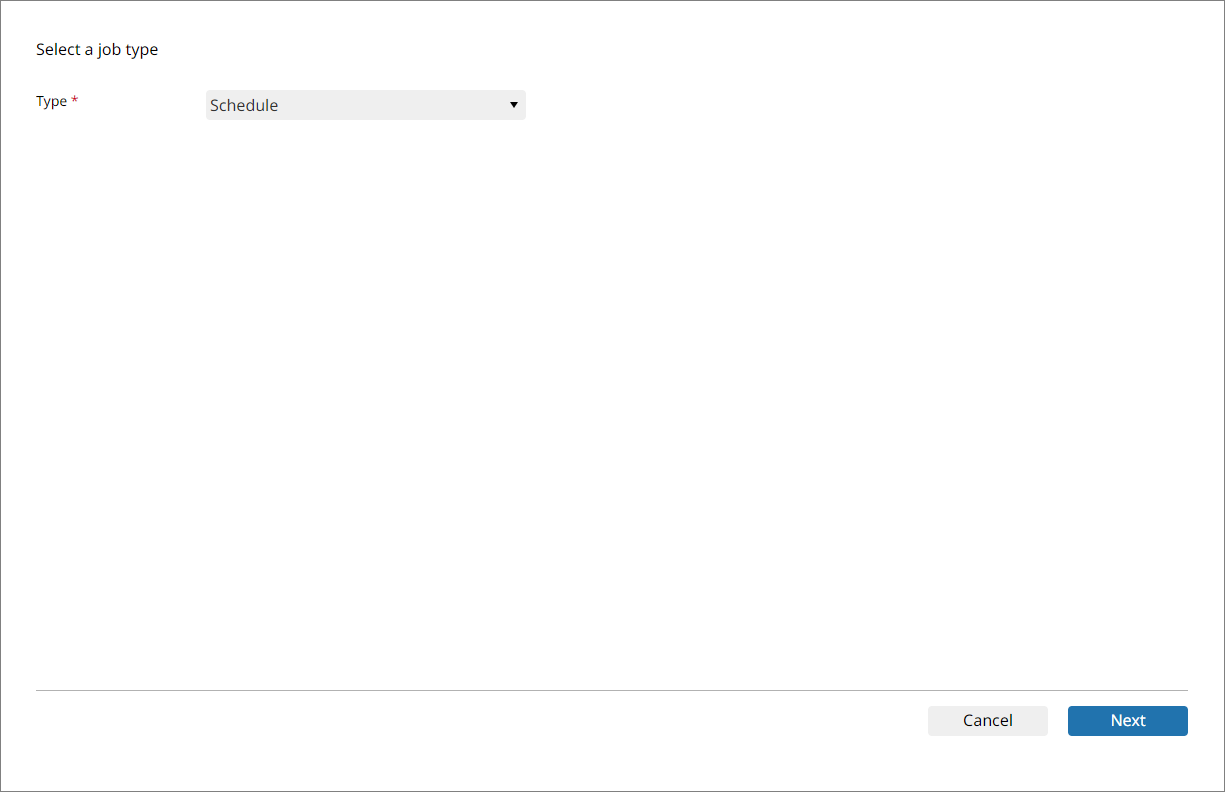
On the Projects page, select the Create new job icon on a project to open this page.
In Type, select the type of job to create, and then select Next.
For details on jobs, refer to JOBS.
For the job creation method, refer to Execute a script using a file event.
Projects > Project name > History
On the Projects page, select the History icon on a project to open this page.
You can view a record of versions and operations for the selected project.
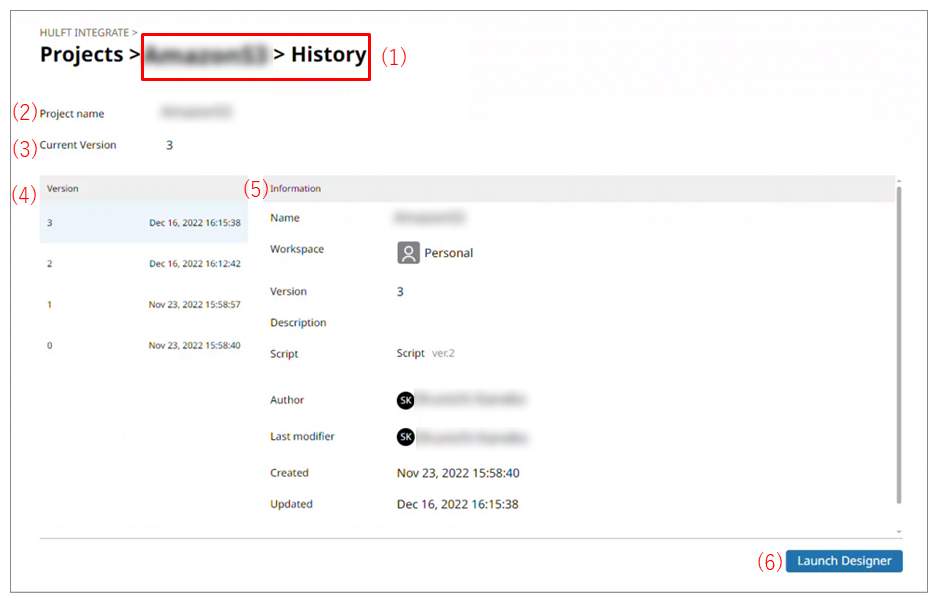
- (1) Project name > History
-
The name of the project is displayed in project name.
- (2) Project Name
-
The project name is displayed.
- (3) Current version
-
The current version of the project is displayed.
- (4) Version
-
The version of the project is displayed. When you select a version, the detailed information is displayed under Information.
- (5) Information
-
Detailed information about the selected version is displayed.
- (6) Launch Designer
-
Opens the project of the selected version with Designer.