Creating applications
This section explains the screen to create a new application.
To create an application from a project, display the following page:
To create an application from a job, display the following page:
-
File Event Jobs > File event job name > Create a new Application
-
REST API Jobs > REST API job name > Create a new Application
-
Schedule Jobs > Scheduled job name > Create a new Application
Set information to create an application by following the wizard-style pages step by step.
Step General
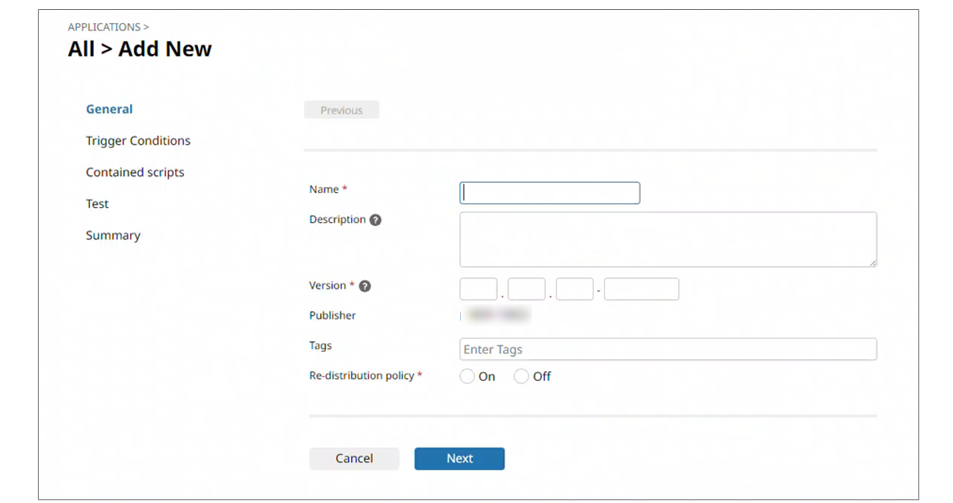
- Name
-
Specify the name of the application.
- Description
-
Specify the description of the application.
You can add a link by using an HTML tag.
= Remarks =The link you set can be viewed from the details page of the application.
- Version
-
Specify the version of the application.
When you update the application, also update the version as necessary.
- Publisher
-
The name of the organization is displayed as the publisher.
- Tags
-
Specify tags for the application.
NoteAfter you enter each tag, press the Enter key.
- Re-distribution policy
-
Specify whether the application can be redistributed.
- On
-
Select this to permit redistribution of the application.
- Off
-
Select this to forbid redistribution of the application.
- Next
-
Displays the next page.
If you are creating an application from a job, this completes configuration.
Step Trigger Conditions
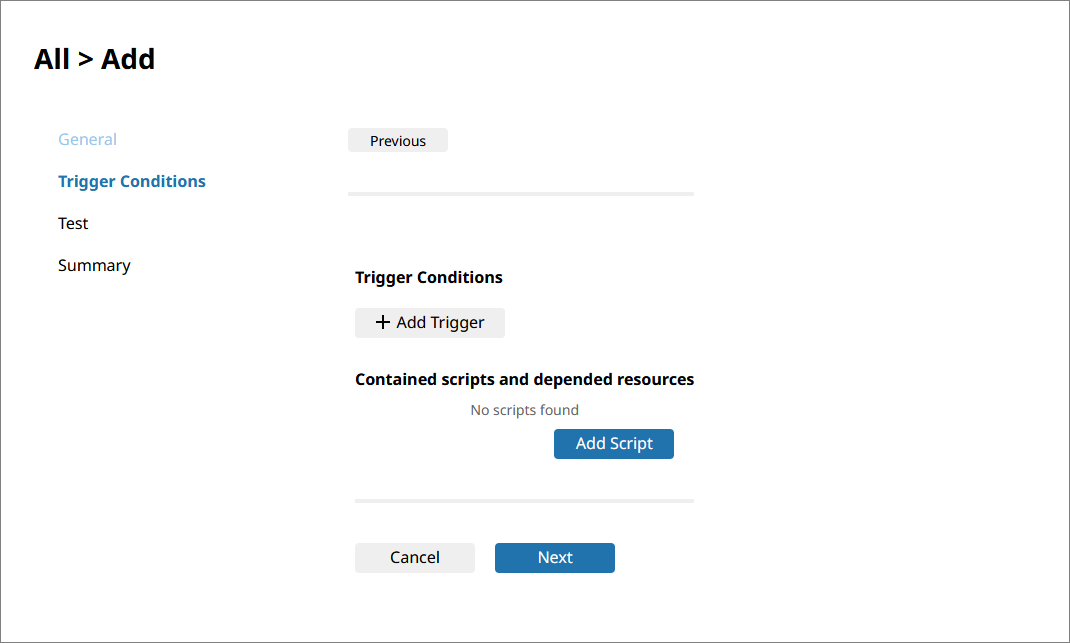
- Trigger Conditions
-
Specify trigger conditions.
Select Add Trigger and then select a trigger condition and a script.
You can create a new script from Create New.
This way you can create a script directly, without doing so through a project.
To edit the newly-created script, select Edit Script from
 in Contained scripts and depended resources.
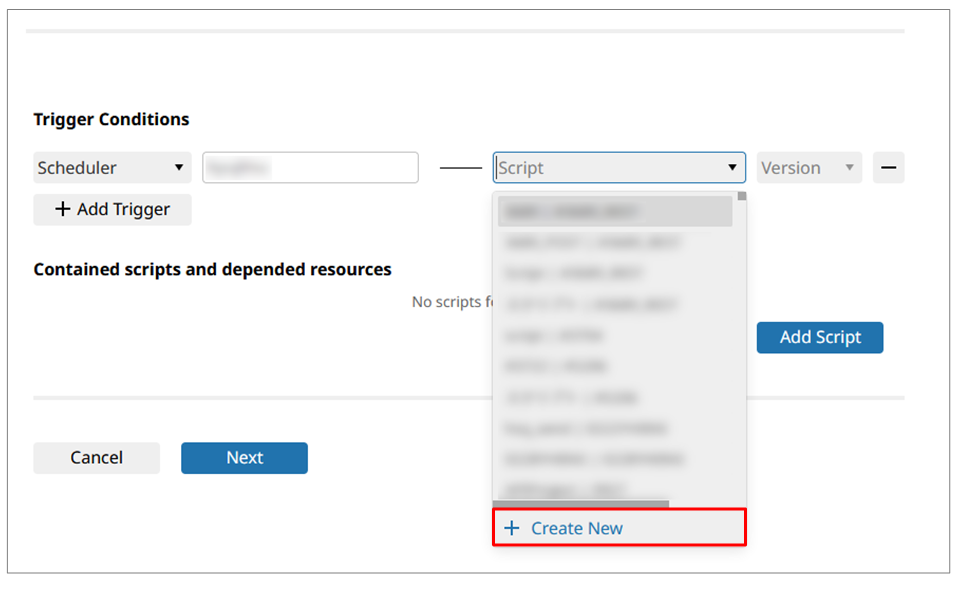
- Scheduler
-
Select scripts whose execution is triggered by scheduled events.
- File Event
-
Select scripts whose execution is triggered by file events.
- Contained scripts and depended resources
-
Specify a script.
NoteIf the name of the call destination script is specified as a variable in a script contained in an application, an error occurs.
- Add Script
-
Select the script to make into an application.
Multiple scripts can be selected.
- Next
-
Displays the next page.
Step Test
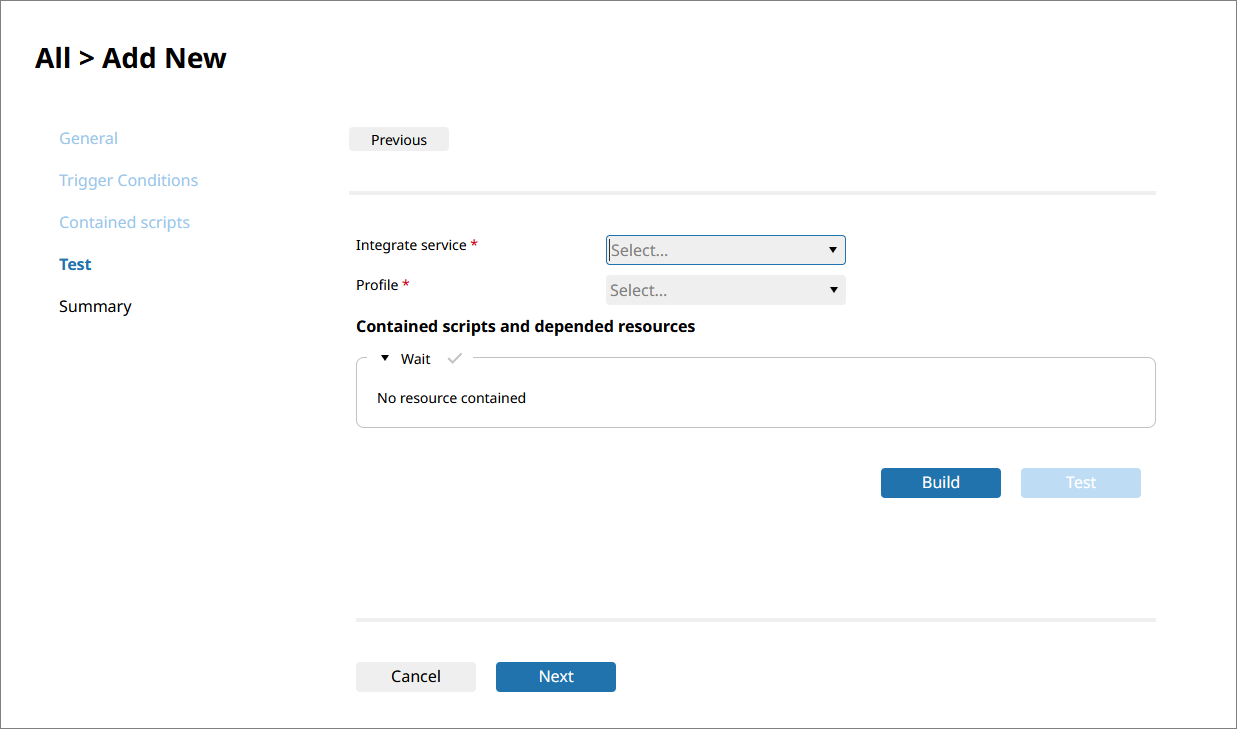
- Integrate service
-
Select the HULFT Integrate service to run the specified script.
- Profile
-
Select the profile to load the resources from.
- Build
-
Build an application. The application must be built before it can be tested.
- Test
-
Select this button to perform test execution for the scripts.
To cancel the application test after the test starts, select Cancel.
Note-
If test execution of the script fails, the application can't be created.
-
After the test starts, it might not stop immediately when you select Cancel.
-
If you try to move to another screen during testing, a confirmation message for the screen transition is displayed. Transitioning to another screen will stop the test execution.
-
- Next
-
Displays the next page.