All
On the All page, you can manage all applications, including applications you installed from App Square, applications you created, and shared applications.
Use the All page to create and share applications.
Making a project or scheduled job into an application has multiple benefits, such as the below.
-
Cloning and reuse of projects within your organization is simplified
-
Combinations of specific versions of scripts can be saved like a project
You can make a project into an application on the All page in the navigation menu.
To make a scheduled job into an application, refer to Schedule Jobs.
You can edit or share applications you have created from the All page.
The key points about creating applications are explained in this section.
Points for settings
To create a new application, select Add on the All page and enter application information.
To clone and customize an application that can be redistributed, select Clone & Edit from the All > Application name page.
This section explains the screen transitions from the All page and the operations for applications.
For the names and functions of basic UI elements and other items of HULFT Square, refer to the following topic:
In the navigation menu, select  > APPLICATIONS > All to open this page.
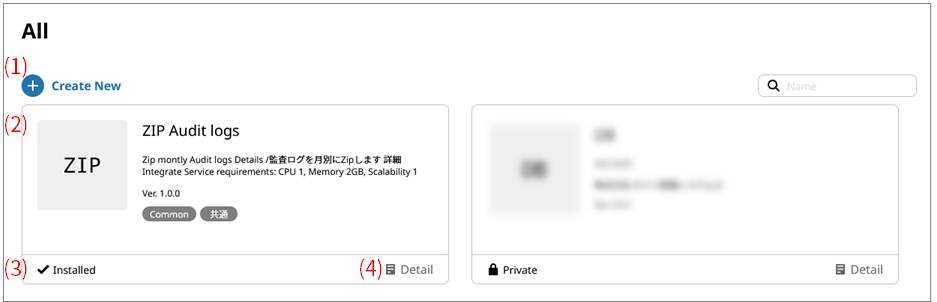
- (1) Add
-
Select this icon to create a new application.
For details about configuring application settings, refer to All > Add.
- (2) Applications
-
Installed applications and created applications are displayed.
The following information is shown in the application tiles:
-
Application name
-
Details
-
Publisher
-
Version
-
Tags
-
- (3) Installation status
-
The installation status of the application is displayed.
- Installed
-
This is displayed for applications that you installed from App Square.
- Private
-
This is displayed for applications that have not been shared with any users but yourself.
- Shared
-
This is displayed for applications that have been shared with users within the organization you belong to.
- (4) Detail
-
Select this icon to edit or clone an application.
For the screen displayed after selecting this icon, refer to All > Application name.
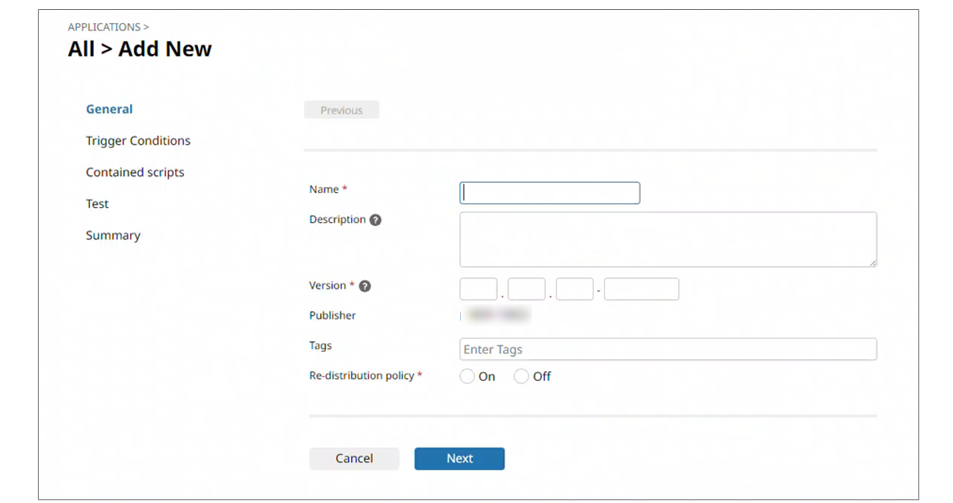
On the All page, select Add to open this page.
Set information to create an application by following the wizard-style pages step by step.
For details about creating applications, refer to Creating applications.
On the All page, select Detail from an application tile to open this page.

- (1) Application name
-
In Application name, the name of the application is displayed.
- (2) Description
-
The details about the application are displayed.
- (3) Redistribution policy
-
Whether the application is redistributable or not is displayed.
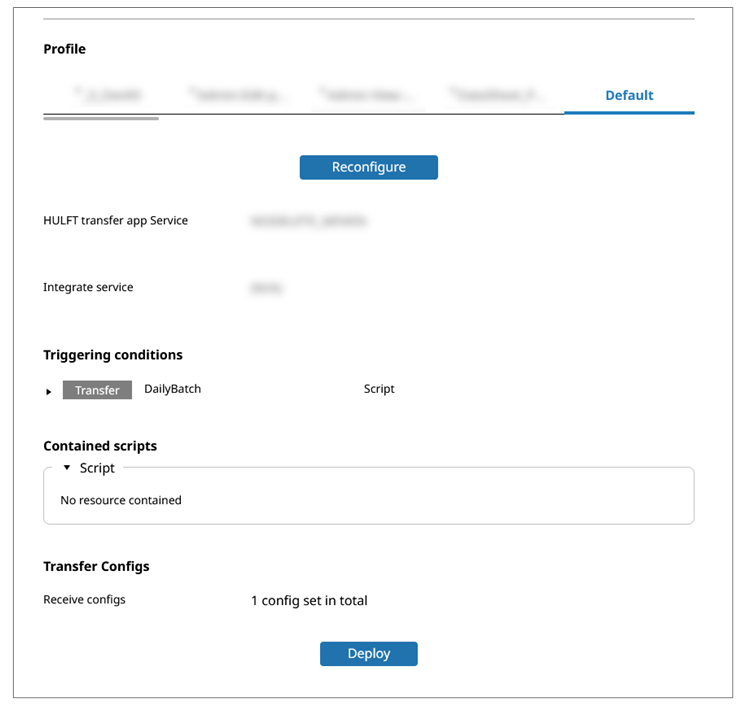
- (4) Profile
-
Profiles for which you have the access permission are displayed in a list. If you have the edit permission, the Configure button or the Reconfigure button is enabled.
- (5) Configure/Reconfigure
-
-
When settings for the application haven't been configured
Configure is displayed. When you select Configure, you can configure settings required in order to execute the application.
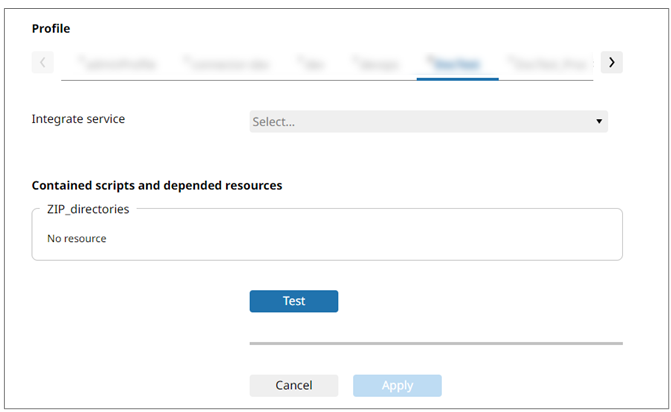
- Integrate service (mandatory)
-
Specify the Integrate service that executes the application.
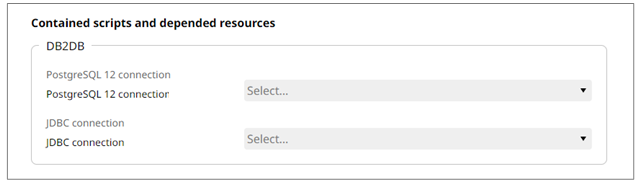
- Contained scripts and depended resources (Optional)
-
If the scripts contained in the application require resource settings, set the resources.
- Triggering condition (mandatory)
-
This is displayed only when triggering conditions can be set for the application.
= Remarks =Even when execution schedules are set, the log records are output in
 > Application > All.
The log records aren't output in
> JOB EVENTS > Schedule Jobs.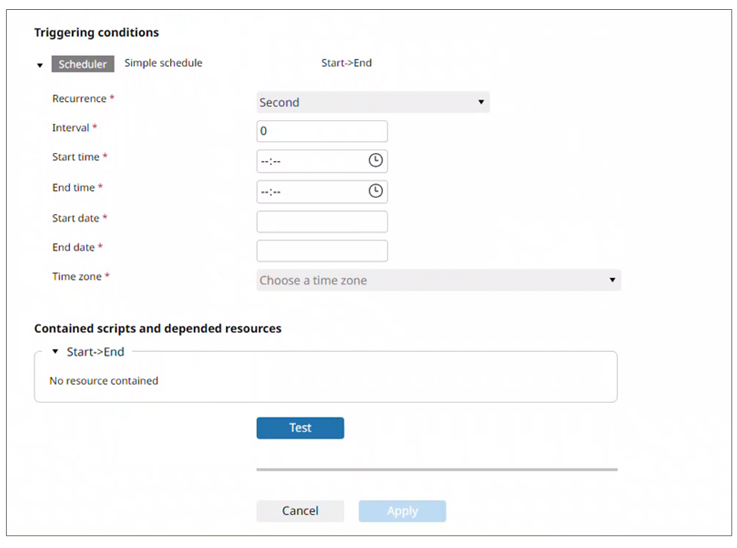
- Test
-
Select this button to perform test execution for the scripts. Test execution is performed according to the set triggering condition. You can leave the screen because the test is executed in the background.
- Apply
-
If you select Test and the test execution succeeds, the settings for the application can be applied.
After applying the settings for the application, you can start up the application by selecting Deploy.
You can start up the application per profile.
To stop the application, select Undeploy.
= Remarks =You can add Send configurations and Receive configurations to a running HULFT Transfer Application without stopping it with Undeploy or other means.
The Host group information and Host configurations required for the added sending and receiving are added automatically.
This function is called "Redeploy". The difference between before and after the additional Send configurations and Receive configurations were added is displayed on the screen.
To reflect changes made in the configurations to the application, you need to re-configure the application after undeploying it, like with delete.
-
When settings for the application have already been configured
Reconfigure is displayed. To modify the application settings, select Reconfigure.
- (6) View contained scripts
-
Displays information about the scripts and resources contained in the selected application.
For the screen displayed after selecting this menu item, refer to All > Application name >Scripts and resources.
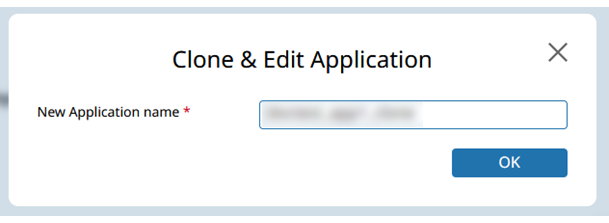
- (7) Clone & Edit
-
You can clone and edit an application that can be redistributed.
NoteFor an application that isn't allowed to be redistributed, this menu item isn't displayed.
Enter the name of the cloned application in the Clone & Edit Application dialog.
- (8) Edit
-
You can edit the application.
For the screen displayed after selecting this menu item, refer to All > Application name (edit) .
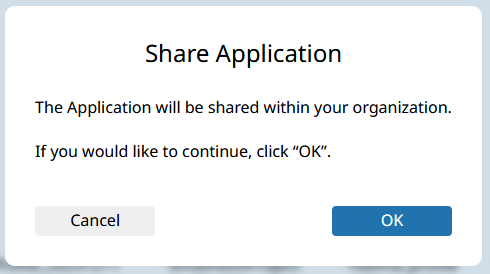
- (9) Share
-
Shares the application with users within your organization.
A confirmation message is displayed on the Share Application dialog. Select OK to share the application.
- (10) Delete/Uninstall
-
Deletes or uninstalls the selected application.
All > Application name >Scripts and resources
On the All > Application name page, select View contained scripts from the action menu to open this page.
You can view detailed information about the scripts and resources for the selected application. If the scripts contained in the application are available to copy, you can copy them from this page.
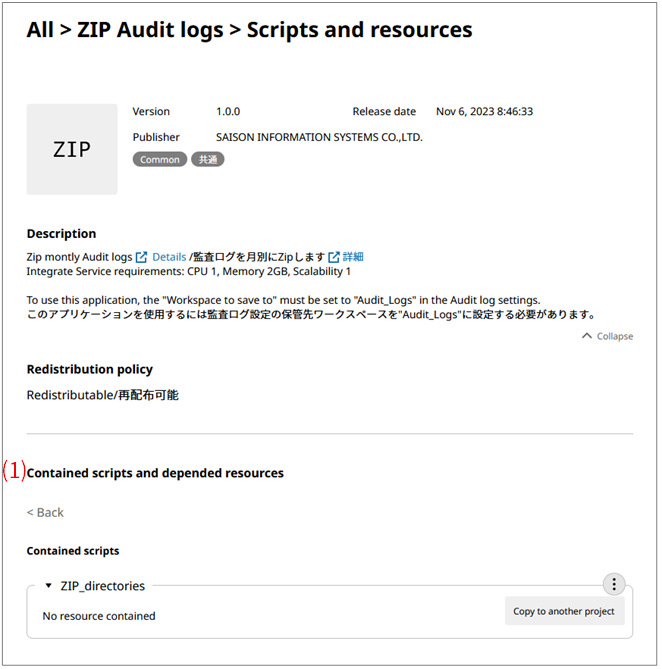
- (1) Contained scripts
-
Information about the scripts contained in the application is displayed.
From
 , you can select Copy to another project. Copy the scripts by specifying the script names and the project to copy to.
On the All > Application name page, select Edit to open this page.
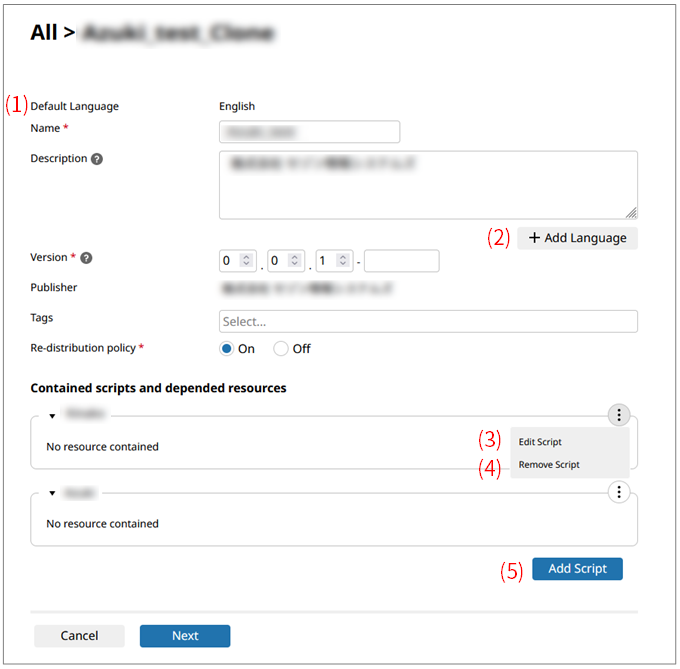
- (1) Default Language
-
The default language for the application is displayed.
The setting in Language in PERSONAL SETTINGS of the user who created the application is used for Default Language.
- (2) Add Language
-
Adds information to Name and Description in the application using a language other than the language in Default Language.
Example: When the default language is English
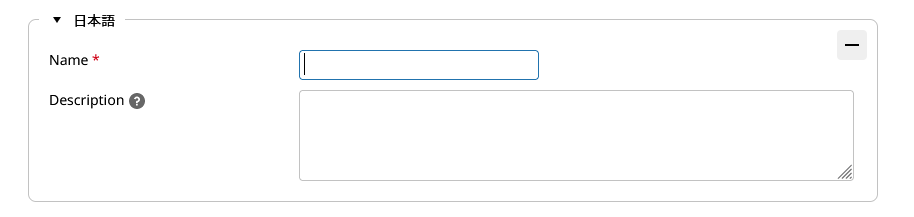
For applications to which the additional language has been added, the information in Name and Description is displayed using the language setting of the user.
- (3) Edit Script
-
You can launch Designer and edit the script.
- (4) Remove Script
-
Deletes the script.
- (5) Add Script
-
You can select a script from the Contained Scripts dialog to add.
