Write data from Amazon S3 to a database (MySQL)
This section explains how to write data from Amazon S3 to a database (Amazon Aurora for MySQL 5.7).
This tutorial uses sample data. For details on how to use the sample data, refer to How to use sample data.
Prepare an AWS account and an empty database for Amazon Aurora for MySQL 5.7 first, and then do this tutorial.
To write data from Amazon S3 to a database (Amazon Aurora for MySQL 5.7), read the data with the Read File/Folder and Read from Sheet operations, and write it to the database with the Write Table operation.
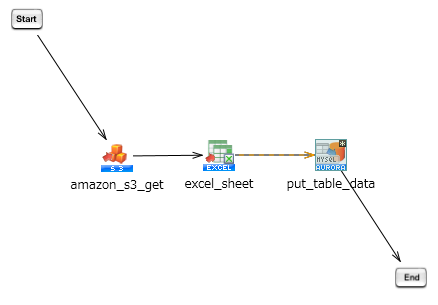
- Processing flow
-
Take the following steps to write data from Amazon S3 to Amazon Aurora for MySQL 5.7:
- Create a connection to Amazon Aurora for MySQL 5.7
- Create a project and script, and launch Designer
- Create a script that retrieves data from Amazon S3 and inserts it to Amazon Aurora for MySQL 5.7
- Execute the script
- Confirm that the data is inserted to Amazon Aurora for MySQL 5.7
- Confirm the service event log
- Key functions
-
-
Read File/Folder operation
Reads files and folders from Amazon S3.
You can set it from Cloud > Amazon S3 > Read File/Folder in the tool palette in Designer.
-
Read from Sheet operation
Reads the input data.
You can set it from File > Excel > Read from Sheet.
-
Write Table operation
Writes input data to a table.
You can set it from Cloud > Amazon Aurora for MySQL > Write Table.
-
- Tips for this operation
-
After configuring the resource settings to connect to each service, write data using the connectors.
The sample data to execute the above processing is provided.
Download the sample data from Scenario list. The procedure for using the sample data is as follows:
File name of the sample data: tutorial_S3_to_DB.zip
-
Extract the sample data
Extract the sample data file tutorial_S3_to_DB.zip.
-
Prepare the sample data
The data extracted from tutorial_S3_to_DB.zip is the sample data.
Upload the sample data to Amazon S3 to use it.
Procedures
(1) Create a connection to Amazon S3
For details about how to create a connection to Amazon S3, refer to Create a connection to Amazon S3.
(2) Create a connection to Amazon Aurora for MySQL 5.7
-
Select
 > HULFT INTEGRATE > Connections.
 -
On the Connections page, select Add.
-
In step Type on the Connections > Add page, search for the resource type.
Enter Amazon in the search box.
-
Select Amazon Web Services in Connector, and Amazon Aurora for MySQL 5.7 connection in Type.
-
Select Next.
-
In step General, set the fields related to connection resources as shown below.
Field name
Setting (example)
Name
Amazon Aurora for MySQL 5.7 connection
Workspace
Personal
Description
(Optional)
= Remarks =This tutorial uses the default value for Name. Change it as needed.
-
Select Next.
-
In step Settings, enter the following information to configure the connection settings for the database.
-
Cluster endpoint
-
Port number
-
Database name
-
User name
-
Password
-
SSL connection (checkbox)
= Remarks =To use SSL, select the checkbox for SSL connection.
-
-
Select Next.
-
In step Profiles, select a profile.
= Remarks =-
If you select a profile, the connection is registered to the profile. The profile can be used to switch the resource settings.
-
If nothing is displayed in the dropdown list, refer to Profiles to create a profile.
-
-
In step Summary, confirm the entered contents and select Finish.
(3) Create a project and script, and launch Designer
For details on the operation procedure, refer to Create a project to Launch Designer.
(4) Create a script that retrieves data from Amazon S3 and inserts it to Amazon Aurora for MySQL 5.7
-
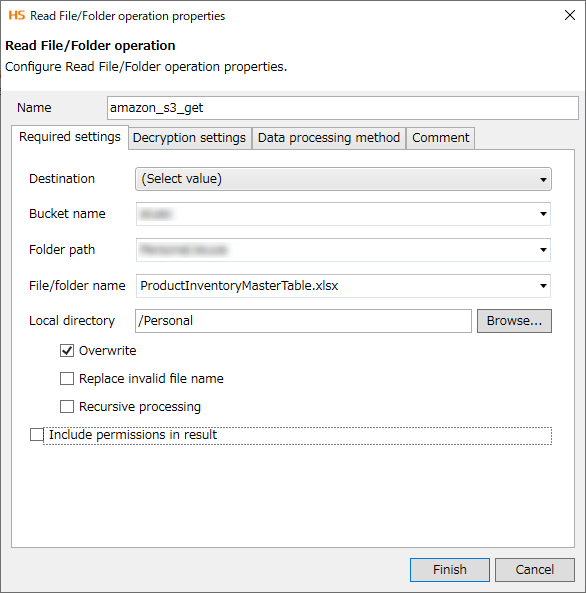
From the tool palette in Designer, drag Cloud > Amazon S3 > Read File/Folder onto the script canvas.
Configure the Read File/Folder operation as shown below.
Required settings tab
-
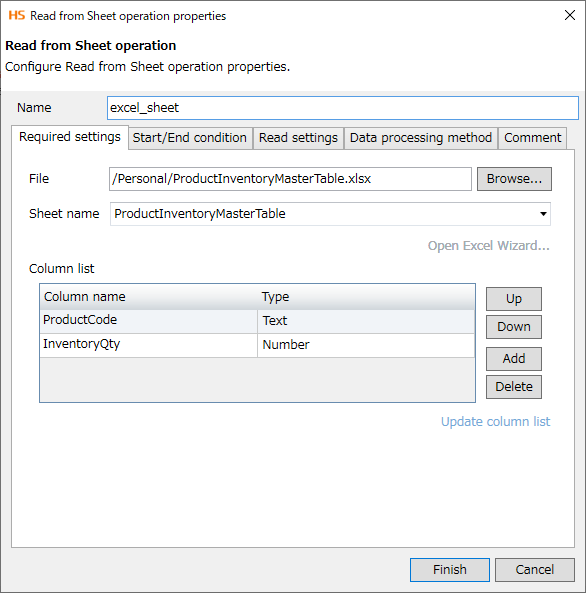
From the tool palette in Designer, drag File > Excel > Read from Sheet onto the script canvas.
Configure the Read from Sheet operation as shown below.
Required settings tab
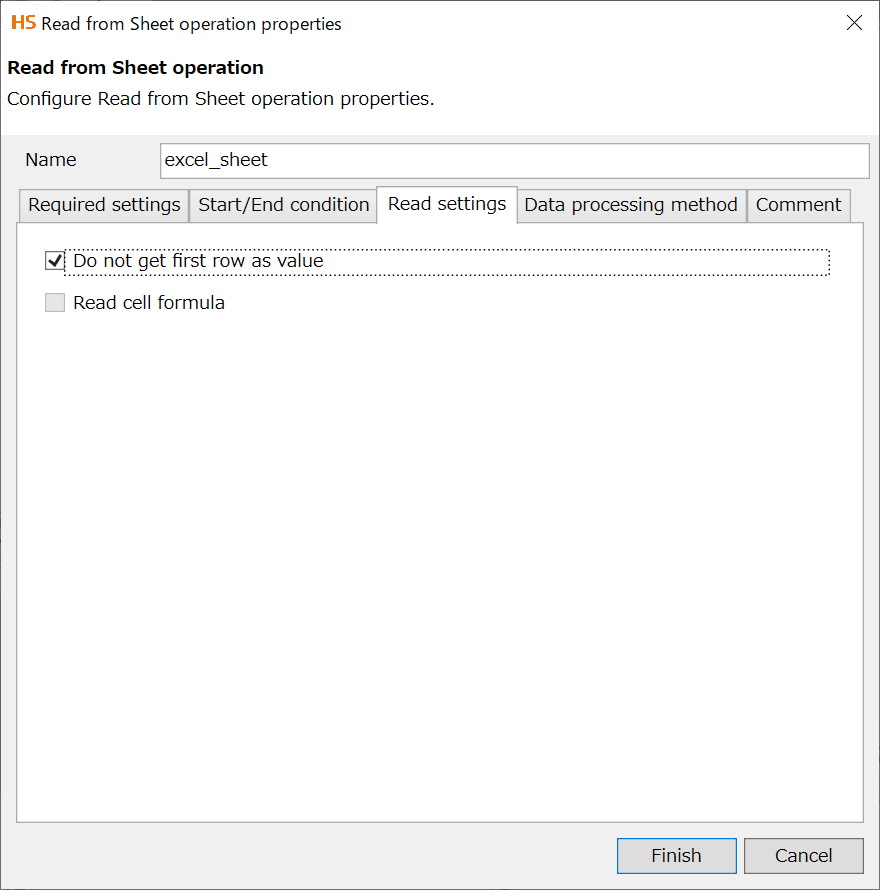
Read settings tab
-
From the tool palette in Designer, drag Cloud > Amazon Aurora for MySQL > Write Table onto the script canvas.
Configure the Write Table operation as shown below.
Required settings tab

-
Execute the script. If it's completed normally, the operation is successful.
For details on how to execute scripts, refer to Execute the script.
(6) Confirm that the data is inserted to Amazon Aurora for MySQL 5.7
-
Confirm that the data retrieved from Amazon S3 is inserted to Amazon Aurora for MySQL 5.7.
(7) Confirm the service event log
-
Confirm the service event log.
For details on how to confirm the service event log, refer to Confirm the service event log.