Executing the installation
The following shows the commands to execute the installation.
When the installation processing is complete, the module required for the operation has been set up and made ready for operation.
Command to execute the installation:
# pwd
/usr/local/MAGIC/insttmp
# ./installer
Running the installation program runs processes such as those for backing up existing files, creating an installation directory, and copying modules to the directory. In an update installation, existing environment settings are inherited during the installation.
In an update installation, existing environment settings are inherited during the installation.
(2) Enter the product key and the serial number
(3) Select the installation method
(4) Enter the installation directory
(5) Enter the directory for each operation
(7) Confirm the installation conditions
Press the up and down arrow keys or the Tab key to move the cursor to the language you want to use during installation, and then press the Enter key.

Screen 2.1 Select the language screen
-
The language selected in this screen will be used to display subsequent screens during the installation and DataMagic Server screens (such as the Trace Log screen).
-
After the installation finishes, you can change the language setting specified in this screen. If you change the language after installation, you must change the Language setting in the System Environment Settings screen or the Language field (huledlang) in the system environment settings file (huledenv.conf) accordingly.
-
In an update installation, the language that you select in this screen overrides the language used prior to installation.
-
Select a language appropriate to your operating environment. For example, if Japanese is selected in an environment that does not support display of Japanese characters, characters might be garbled and on-screen information might be corrupted.
(2) Enter the product key and the serial number
When you press the Tab key, the character cursor moves to the input items and selection items. Move the cursor to select the Serial number and Product key fields, and then enter the values for each item. Next, press the Tab key to move the cursor to select Next >, and then press the Enter key.
To go back to the Select Language screen, select Back.
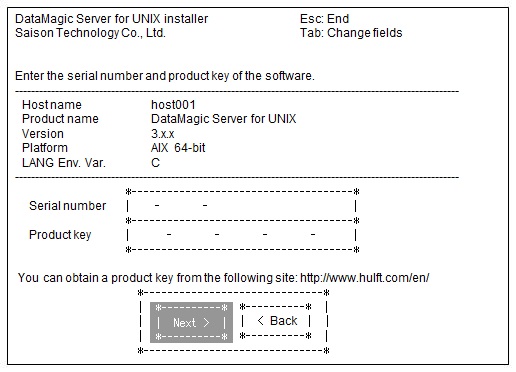
Screen 2.2 Enter the serial number and product key of the software screen
The character '-' cannot be typed or pasted in the Product Key field. Note that you can copy and paste entire product keys that are in the following format: XXXXX-XXXXX-XXXXX-XXXXX-XXXXX.
If you change the host name, you should obtain the product key again.
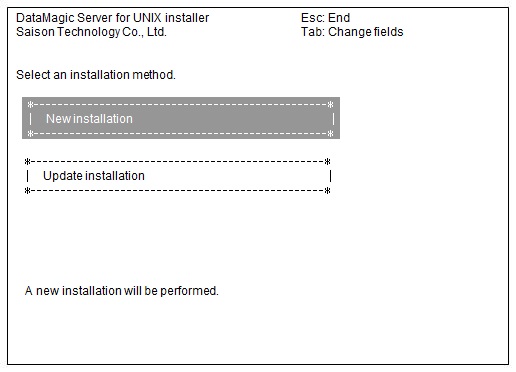
(3) Select the installation method
To install DataMagic Server, press the up and down arrow keys or the Tab key to select the installation method, and then press the Enter key.
This screen does not appear in the trial version.
- New installation
-
Use this method when you want to perform a new installation of DataMagic Server.
- Update installation
-
Use this method when you want to perform an installation that allows you to transfer the existing environment from an older product, older version, or the trial version.
If you purchased options together with the product, the options will be installed in addition to the product.
Screen 2.3 Select an installation method screen
(4) Enter the installation directory
Enter the installation directory for the selected product (the directory specified in Selecting the installation directory). The name of the directory must contain an alphanumeric string that is no longer than 50 bytes. Next, press the Tab key to move the cursor to select Next >, and then press the Enter key.
Note that DMEXEP and DMPATH at the end of the respective directory names in the screen are environment variables. These variables are used while the installed products are running. For details about how to configure the environment variables, see Specifying environment variables.
-
If the environment variables were previously set during an update installation, the existing paths for these variables are displayed by default. If the variables have not been set, the current directory from where you started the installation is displayed.
-
If you install DataMagic Server in the same environment as HULFT, specify a destination directory that is different from that of HULFT.
For an update installation, you must specify the directory in which the existing product resides. If you specify the wrong directory, the existing environment will not be transferred.
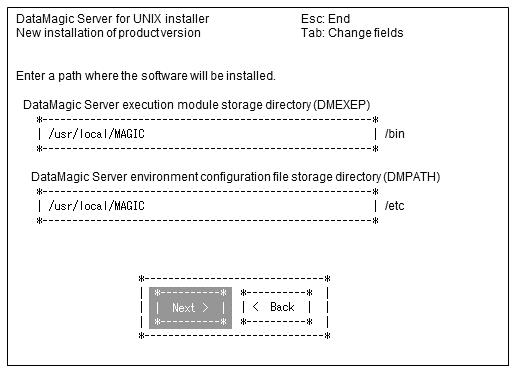
Screen 2.4 Enter the installation directory screen
(5) Enter the directory for each operation
Specify the directory name for each operation. If you want to modify the work file storage directory or trace log storage directory, enter a new name which contains an alphanumeric string of no more than 50 bytes. Next, press the Tab key to move the cursor to select Next >, and then press the Enter key.
-
The Enter the directory for each operation screen appears only during a new installation or upgrade installation from HULFT-DataMagic Ver.1.
-
The name of a work file storage directory is "work" and the name of a trace log storage directory is "log". Initially, the directory fields are set to the paths for the subdirectories under the destination directory specified in (4) Enter the installation directory. The name of a work file storage directory is "work" and the name of a trace log storage directory is "log". Initially, the directory fields are set to the paths for the subdirectories under the destination directory specified in (4) Enter the installation directory.
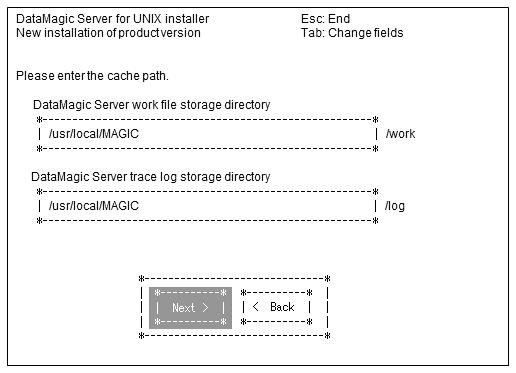
Screen 2.5 Enter the directories for the operations screen
Press the up and down arrow keys to select the date format you want to use in DataMagic Server.
-
YYYY/MM/DD Example: 1970/01/30
-
MM/DD/YYYY Example: 01/30/1970
-
DD/MM/YYYY Example: 30/01/1970
Next, press the Tab key to move the cursor to select Next >, and then press the Enter key.
-
The Date Format screen appears only during a new installation.
-
The date format can also be changed in the Date Format field of the System Environment Settings screen or in Date Format (datefmt) in the system environment settings file (huledenv.conf).
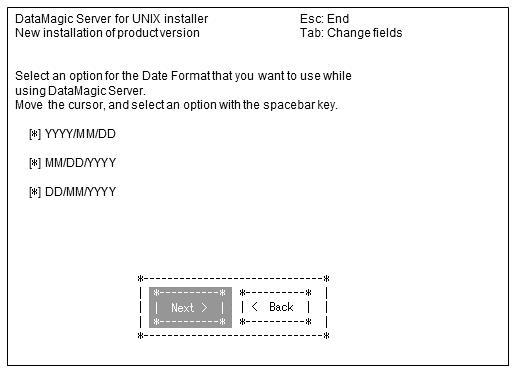
Screen 2.6 Select the date format screen
(7) Confirm the installation conditions
Press the up and down arrow keys to read the following conditions, and then install the product. When performing a new installation or update installation, all the products are displayed, including DataMagic Server.
-
Installation method
-
Product name and version
-
Installation directory
-
Module to be installed
-
Date format
If the installation conditions are met, press the Tab key to move the cursor to select Start, and then press the Enter key. Start the installation.
If the conditions are not met, move the cursor to select < Back, press the Enter key, and then modify the conditions in the previous screen.
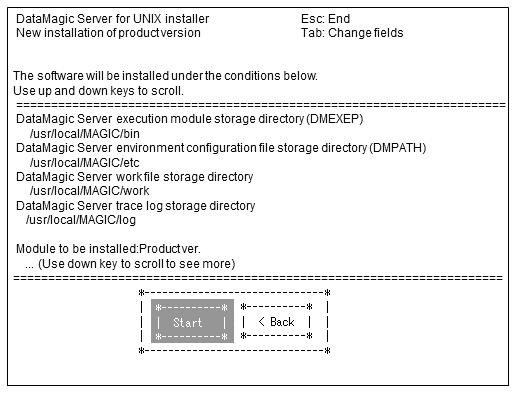
Screen 2.7 Confirm the installation conditions screen (for a new installation and update installation)
Install the product according to the specified conditions. Create the installation directory and then copy the module. For an update installation, transfer the existing environment in addition to performing the other necessary tasks.
If you press the ESC key in screens 1 to 7, all of which appear before installation is started, the End Confirmation screen appears.
If you select Back in the End Confirmation screen, the previous screen appears, and the installation continues from that screen.
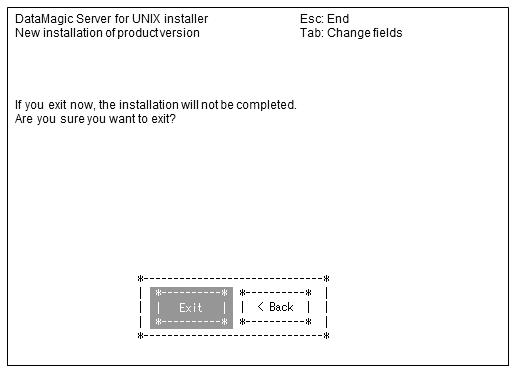
Screen 2.8 Interrupt installation screen
When the following screen is displayed, press the Tab key to move the cursor to select Exit, and then press the Enter key. The installer closes.
For more details about the installation process, see the install.log file in the current directory where you started the installer.

Screen 2.9 Installation complete screen
Installation might fail if there is not enough free disk space, or if a permission error occurs while attempting to create the directory. If an error occurs, follow the instructions given to check the environment, and then try to install DataMagic Server again.