Create a workspace to work together
After setting users and groups, create workspaces for each of the different roles for users or groups.
For workspaces, refer to Explore HULFT Square (Share).
Description
In this scenario, perform the following operations to create and edit a workspace.
Procedures
1. In the navigation menu, select  > SYSTEM > Workspaces.
2. On the Workspaces page, select Add.

3. In step General on the Workspaces > Add page, enter the name and the description of the workspace as shown below.
|
Field name |
Setting (example) |
|---|---|
|
Name |
Team A |
|
Description |
The workspace for team A to work together |
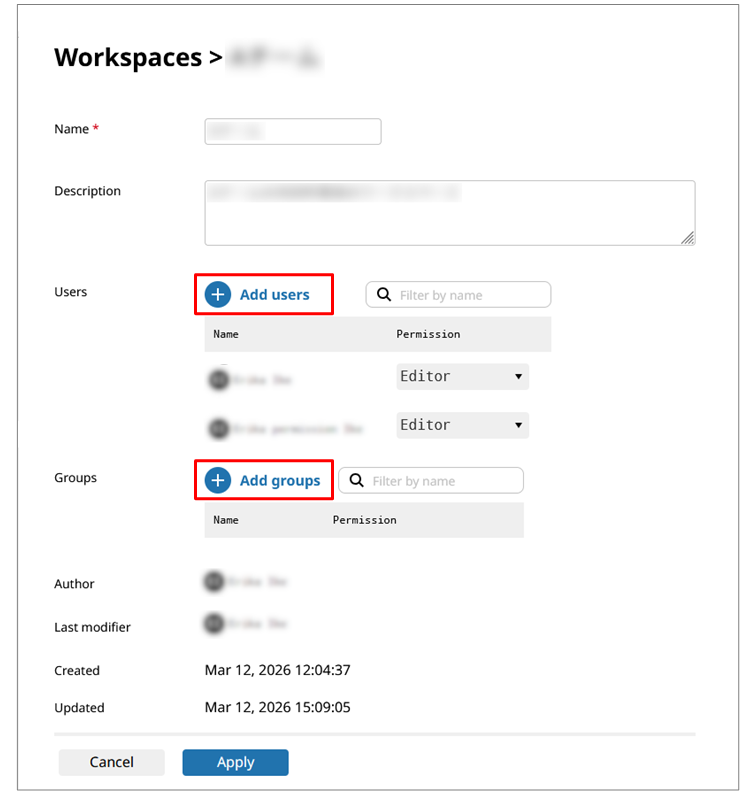
4. In this scenario, select Add users to register users to the workspace.
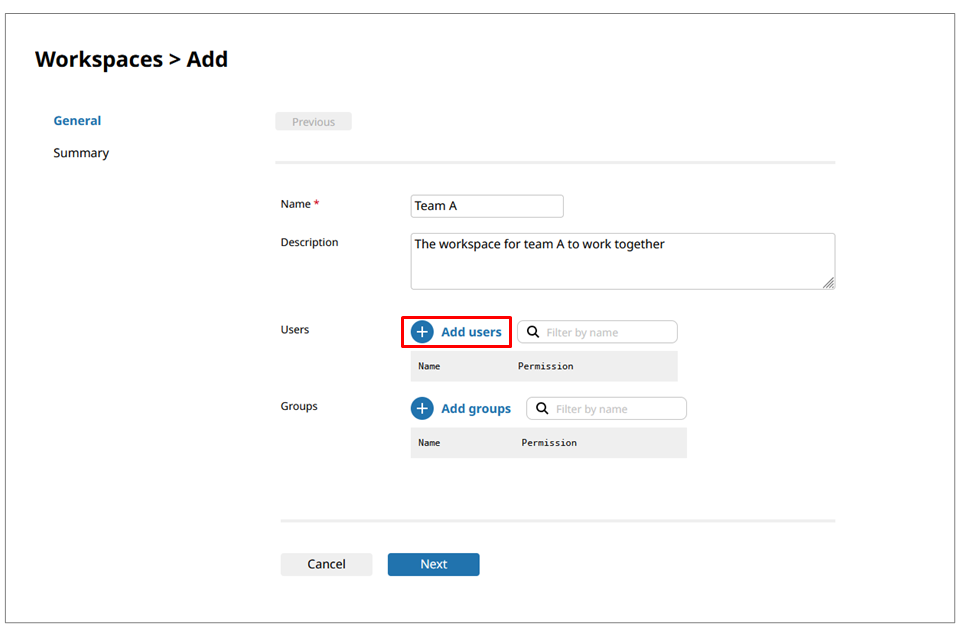
When you want to register groups to the workspace, select Add groups.
5. In the Add users dialog, select users and a permission.
In this scenario, select Editor to grant users the permission to edit workspaces and then select OK.
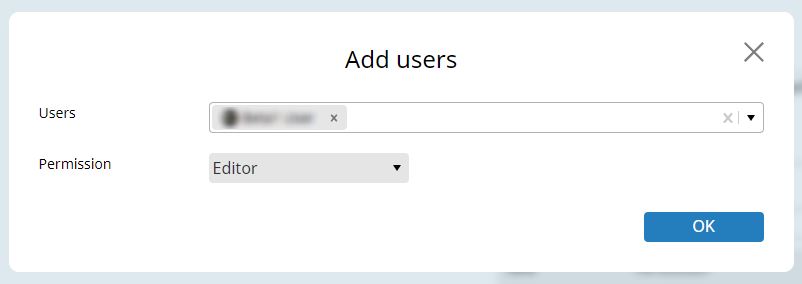
To grant users only the permission to view workspaces, select Viewer.
6. Repeat the operations of step 4 to 5 to add multiple users.
7. Select Next.
8. In step Summary, confirm the entered contents and select Finish.
Now, the workspace is created.
Edit the members of a workspace
1. On the Workspaces page, select the action menu for the created workspace.
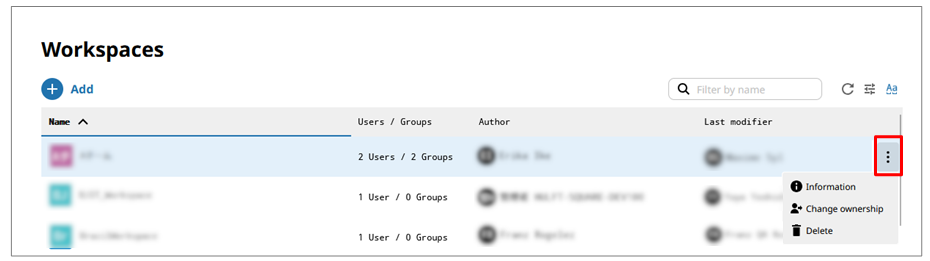
2. Select Information.
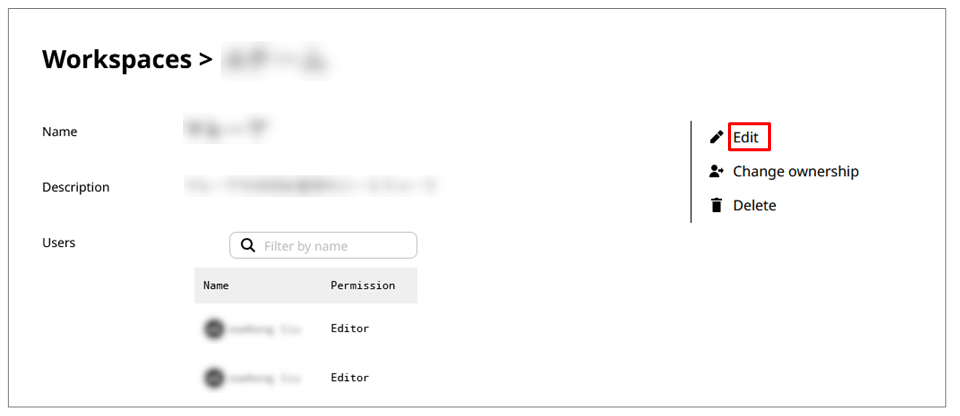
3. On the Workspaces > Workspace name page, select Edit.
To add users or groups
1. Select Add users or Add groups.
2. Referring to step 5. in "Create a workspace," add users or groups.
You can add groups in the same way.
3. Select Apply.
To change the permissions for or delete users or groups
1. In the list of users or the list of groups, select a permission from the dropdown list.
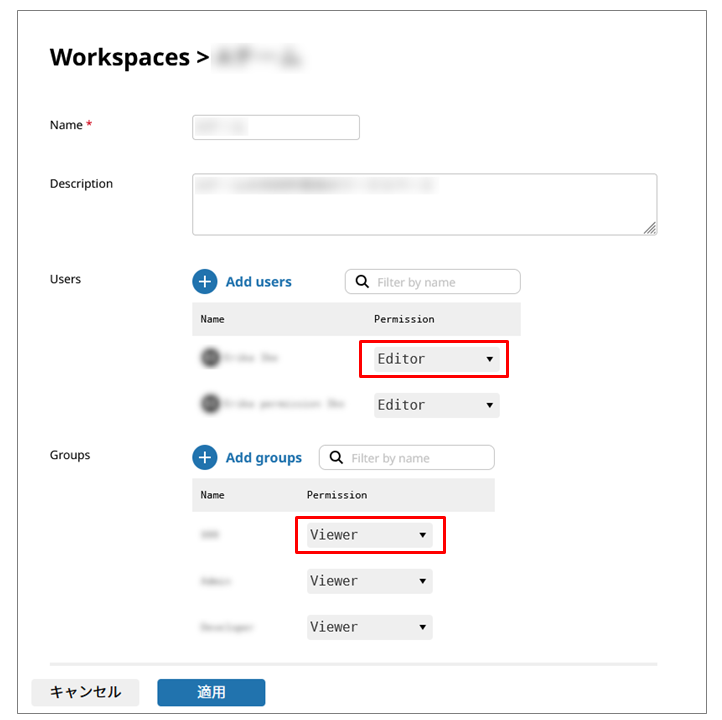
- Viewer
-
Grants the permission to view the workspace. Editing isn't allowed.
- Editor
-
Grants the permission to view and edit the workspace.
- Remove
-
Remove the user or the group from the workspace.
2. Select Apply.