Set up Microsoft Entra ID (formerly Azure Active Directory) to log in with SSO
HULFT Square supports single sign-on (SSO) that uses Microsoft Entra ID (formerly Azure AD).
In order to be able to log in with SSO, first configure Microsoft Entra ID, and then configure SSO in HULFT Square.
This scenario describes configuration of Microsoft Entra ID.
Description
Points for using SSO
Because HULFT Square manages users by groups, all users must belong to a group. If a user who doesn't have a HULFT Square account logs in to HULFT Square for the first time with SSO, a user account is created when that user logs in. That user must be assigned to a group.
In this tutorial, you will create a security group to which SSO users belong on the Microsoft Entra ID side and map them to the group on the HULFT Square side so the users are mapped to the specified group.
The group name in HULFT Square and the group name in Microsoft Entra ID must match. It's recommended to create the group name in HULFT Square first and then create a group with the same name in Microsoft Entra ID.
Steps and what to do
Configure Microsoft Entra ID with the following procedures:
-
Preparation
-
Configuration of SSO
(1) Start the Microsoft Azure Portal application
(2) Create HULFTSquare applications
(3) Set single sign-on with SAML for the application created in (2)
-
Automatic assignment of groups
(1) Create a group in Microsoft Entra ID to assign to a group in HULFT Square
Procedures
Preparation
(1)Create a group in HULFT Square
In  > USER MANAGEMENT > Groups of HULFT Square, create a group called "HULFT_Square_Users".
This group is assigned with the minimum of policies that all users must have.
For the group creation method, refer to Create groups.
Configuration of SSO
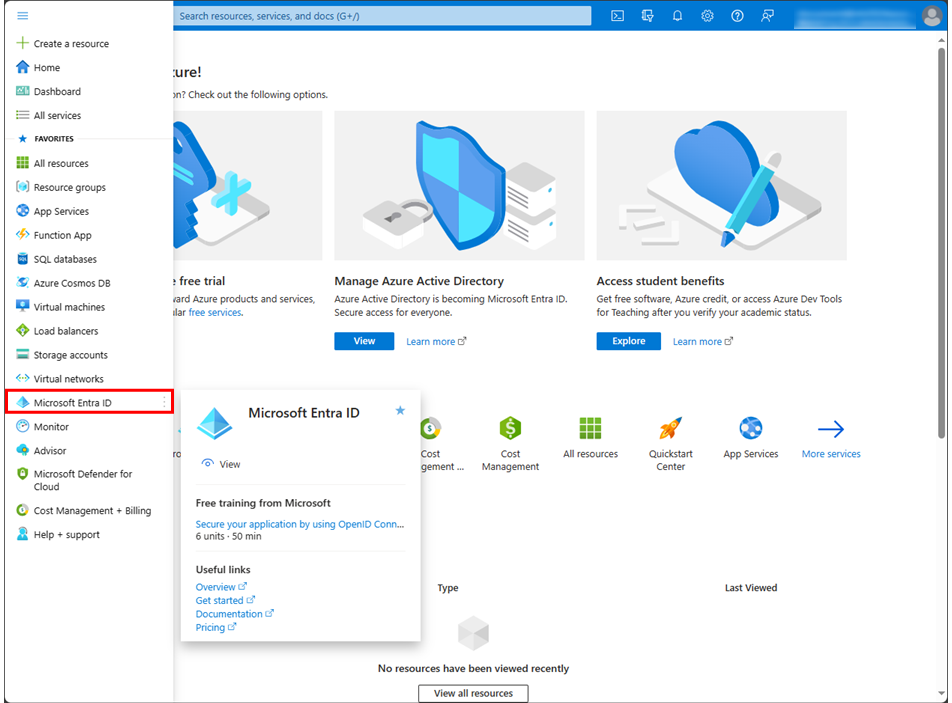
(1)Start the Microsoft Azure Portal application
Start Microsoft Azure Portal from a web browser. Sign-in with an account that is assigned with the administrator role of Microsoft Entra ID.
-
Select Microsoft Entra ID in the Azure Portal menu.
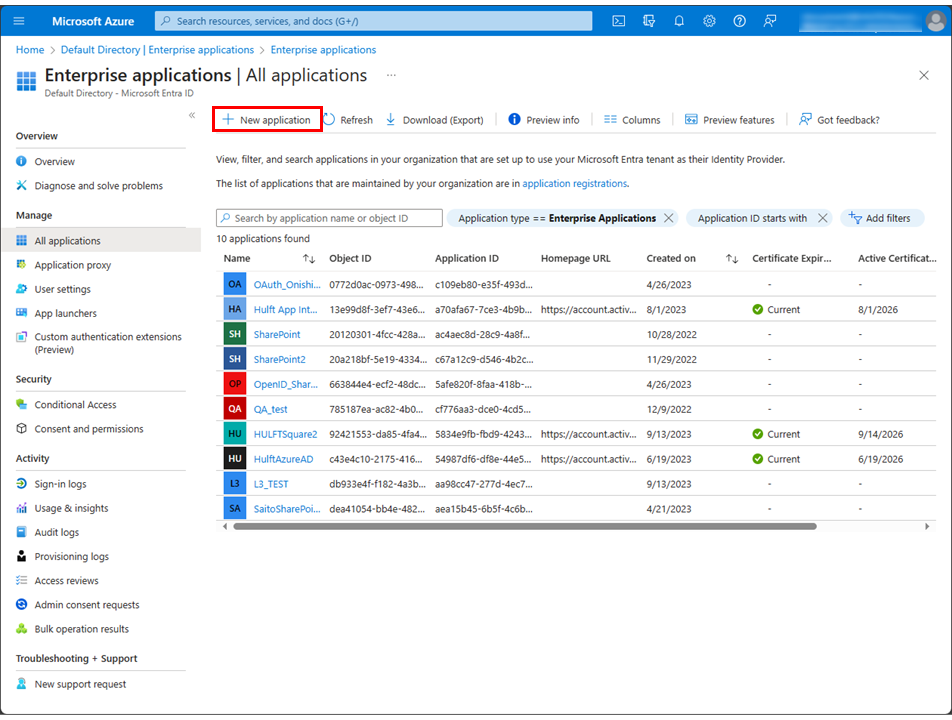
(2)Create HULFTSquare applications
-
Select Enterprise applications.

-
Select New application.
-
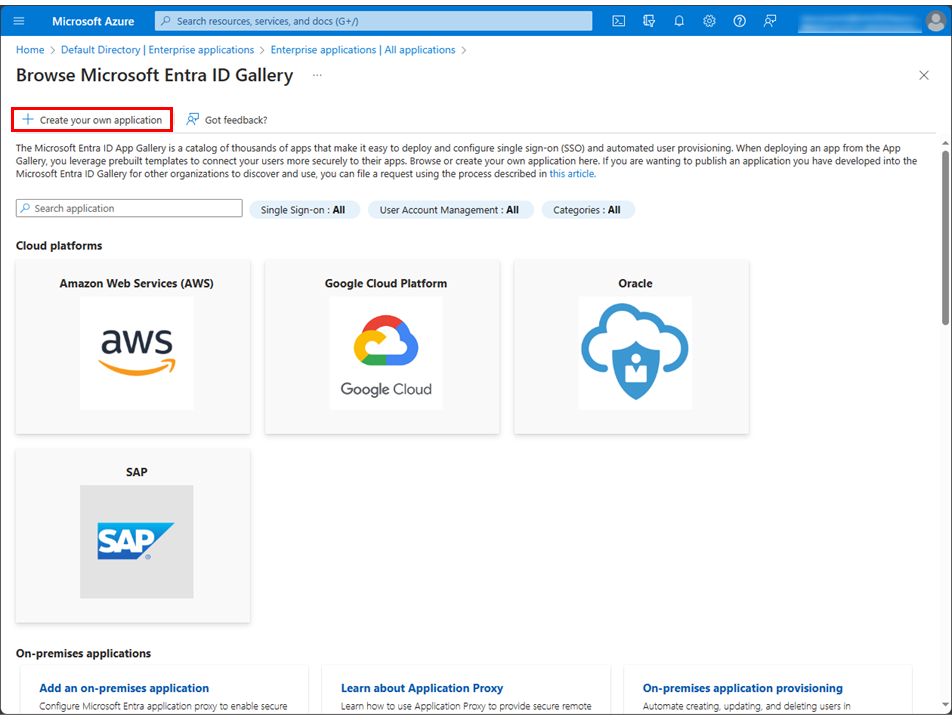
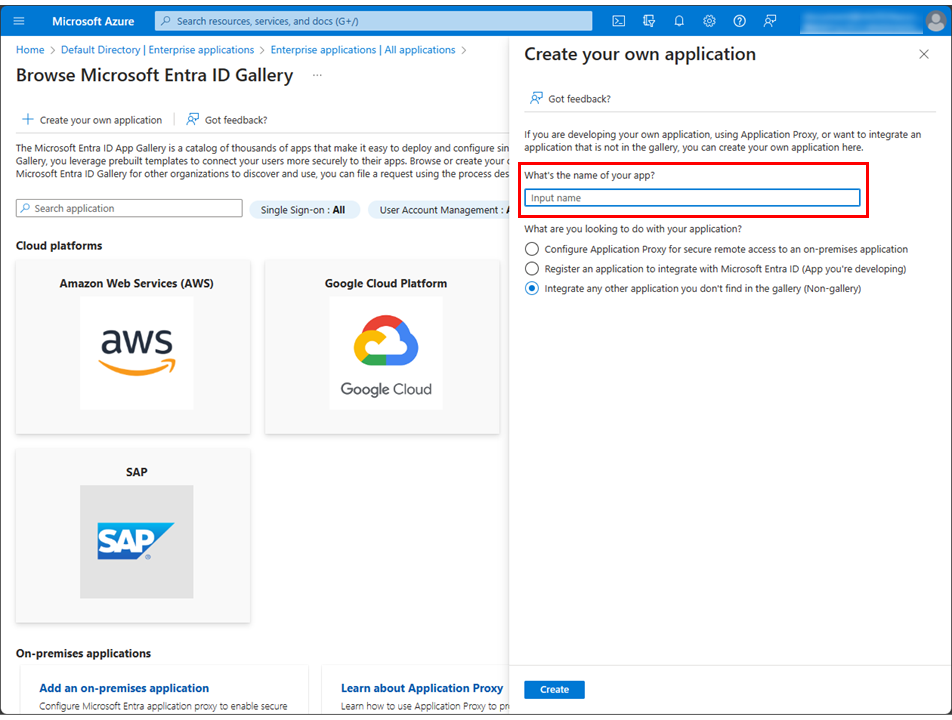
Select the Create your own application at the top of the Browse Microsoft Entra ID Gallery menu.
-
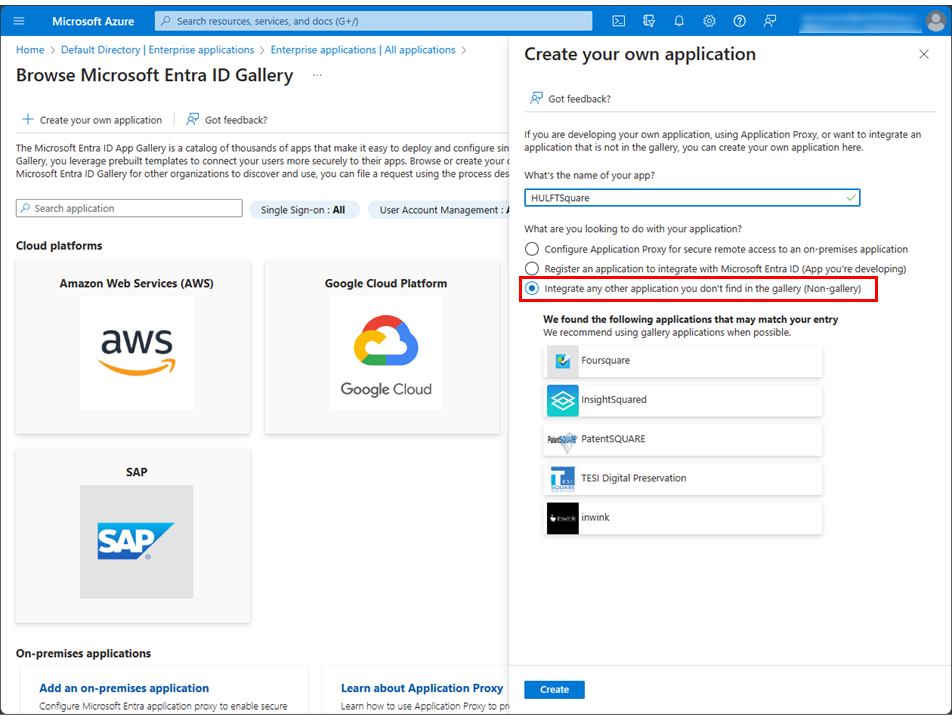
On the Create your own application page, enter HULFTSquare for What's the name of your app?.
-
Select Integrate any other application you don't find in the gallery (Non-gallery) in What are you looking to do with your application?.
-
Select Create.
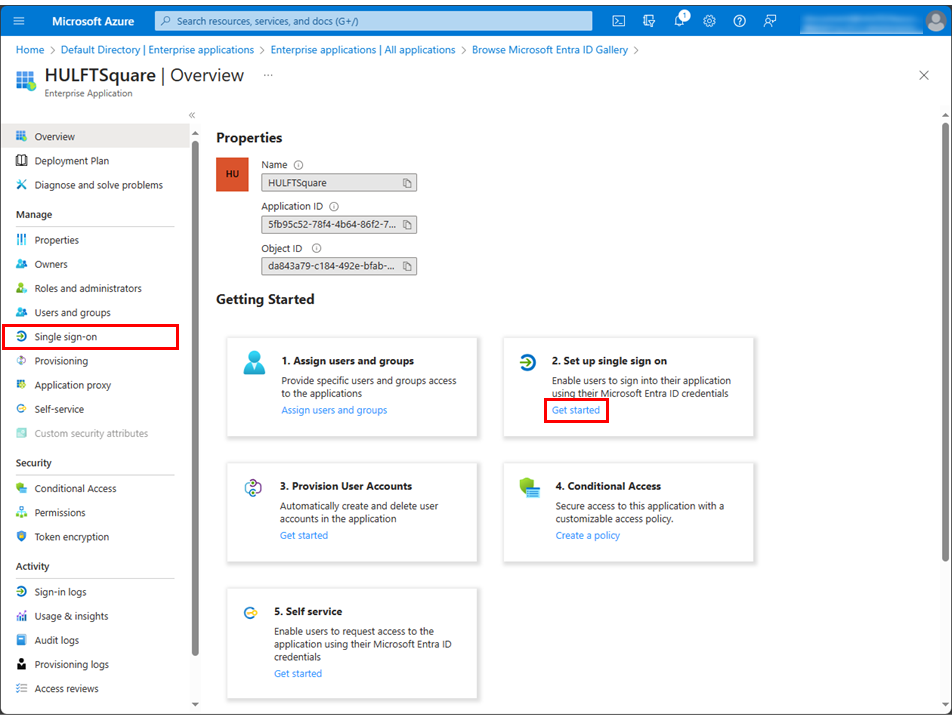
(3)Set single sign-on with SAML for the application created in (2)
-
Select Single sign-on in the Azure Portal menu.
= Remarks =You can also navigate to the page by selecting Get started in 2. Set up single sign on from Overview > Getting Started.
-
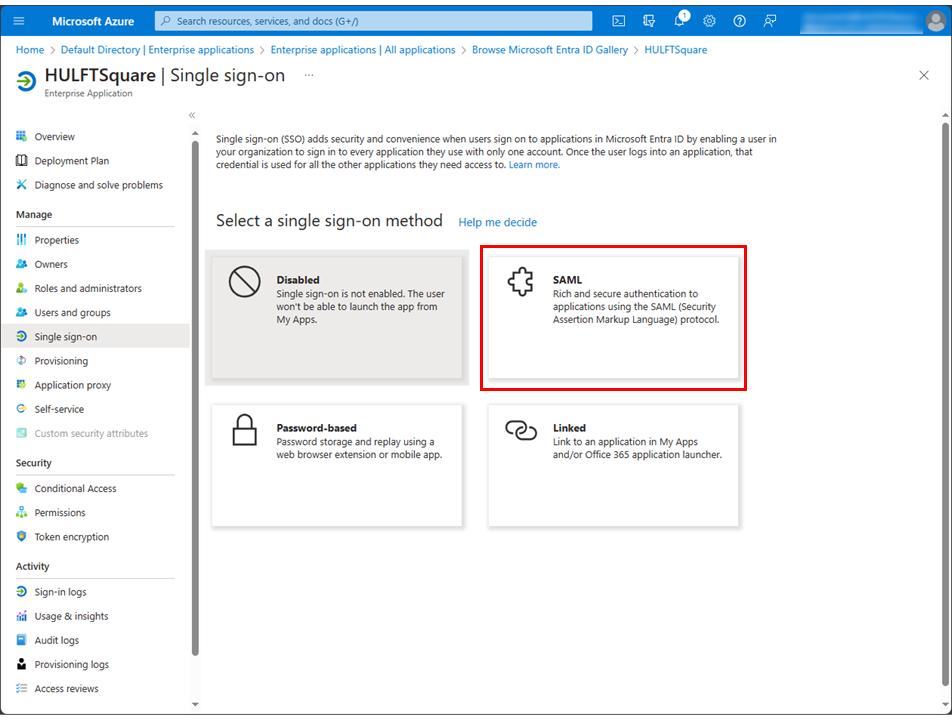
Select SAML.
-
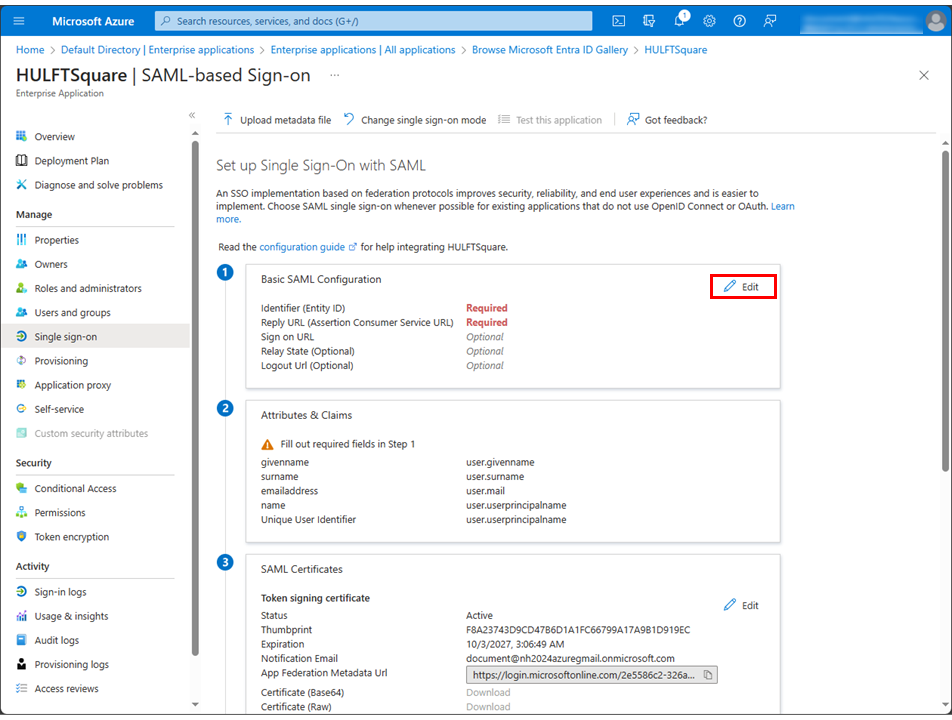
Select Edit in the Basic SAML Configuration section on the Set up Single Sign-On with SAML page.
-
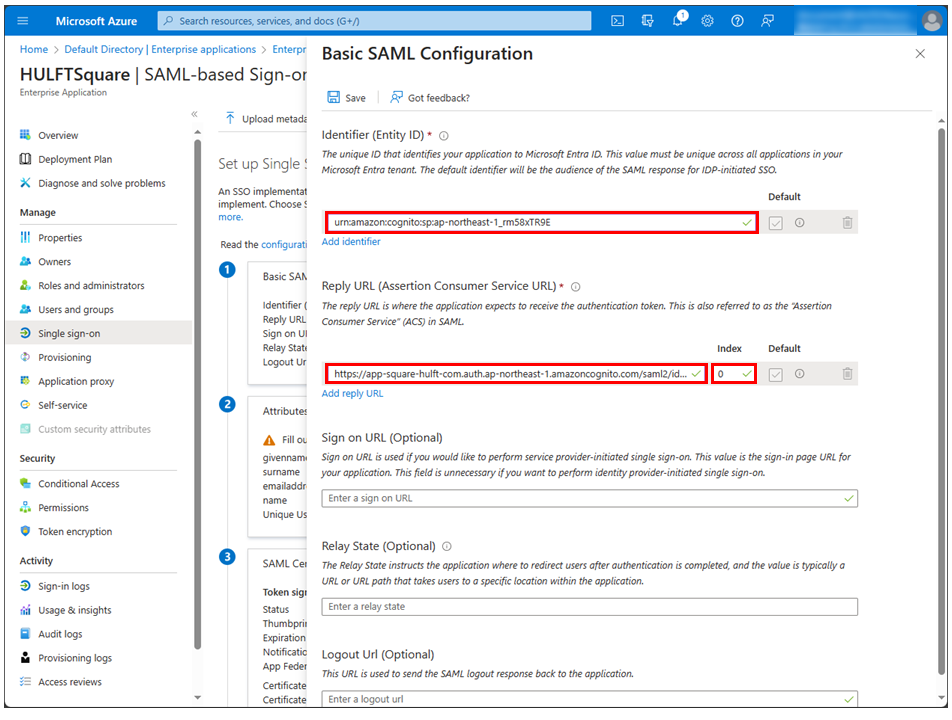
In the Basic SAML Configuration section, set the fields as shown below.
For customers whose HULFT Square contract began on or after December 14, 2025, or customers whose HULFT Square contract began prior to December 14, 2025, but have changed user email addresses
Field name
Setting content
Add identifier
urn:amazon:cognito:sp:ap-northeast-1_i6SZQC7wv
Add reply URL
https://app2-square-hulft-com.auth.ap-northeast-1.amazoncognito.com/saml2/idpresponse
Index
0
For customers whose HULFT Square contract began prior to December 14, 2025, and have not changed user email addresses
Field name
Setting content
Add identifier
urn:amazon:cognito:sp:ap-northeast-1_rm58xTR9E
Add reply URL
https://app-square-hulft-com.auth.ap-northeast-1.amazoncognito.com/saml2/idpresponse
Index
0
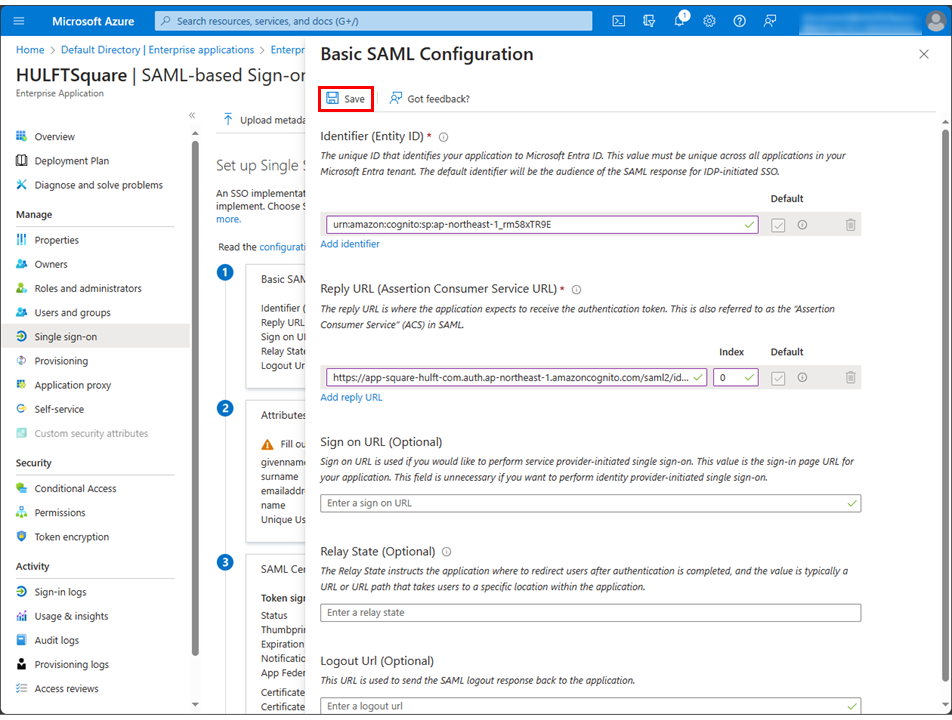
-
Select Save.
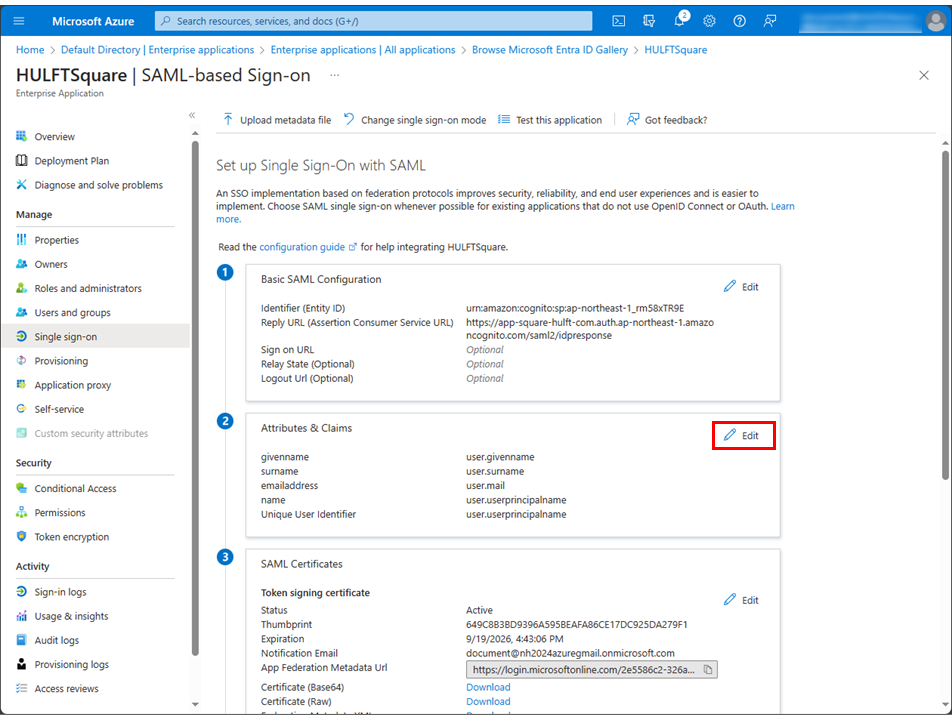
-
Select the
 at the upper right corner to close the Basic SAML Configuration page.
If you don't intend to map the group in Microsoft Entra ID to the group in HULFT Square, this completes the configuration of Microsoft Entra ID.
= Remarks =If you don't make group assignments to the enterprise application, users added via SSO won't belong to any group in HULFT Square. Therefore, they should be manually assigned to the appropriate group by the administrator.
To assign enterprise applications to a group, Enterprise Mobility + Security E5 must be enabled on Microsoft Entra ID.
If you want to map the group, continue with the following procedure.
-
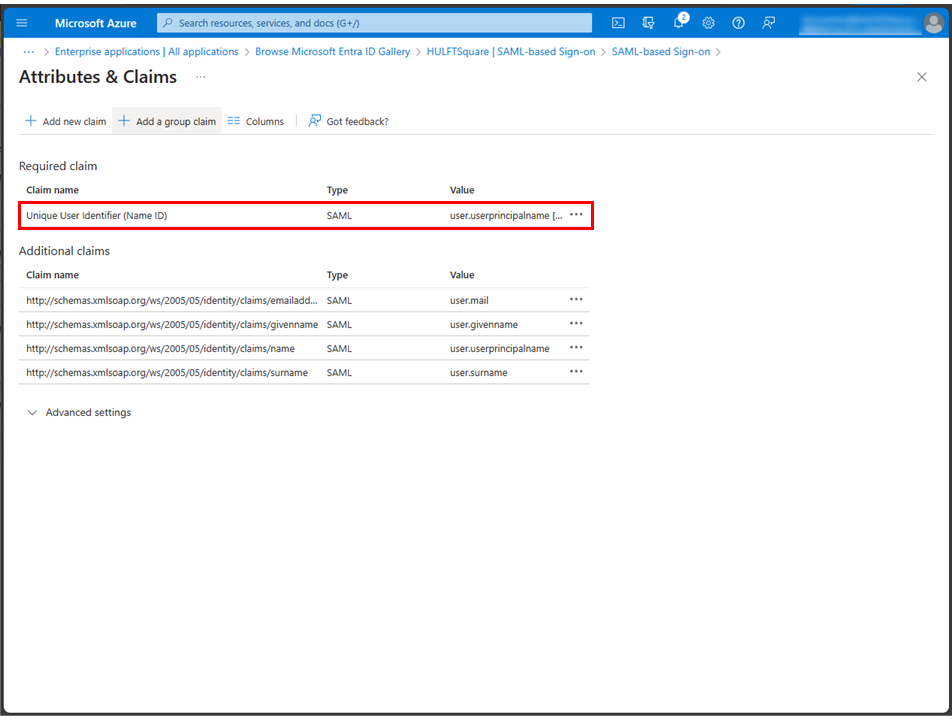
Select Edit in the Attributes & Claims section on the Set up Single Sign-On with SAML page.
-
Select Unique User Identifier (Name ID) for Claim name in Required claim.
-
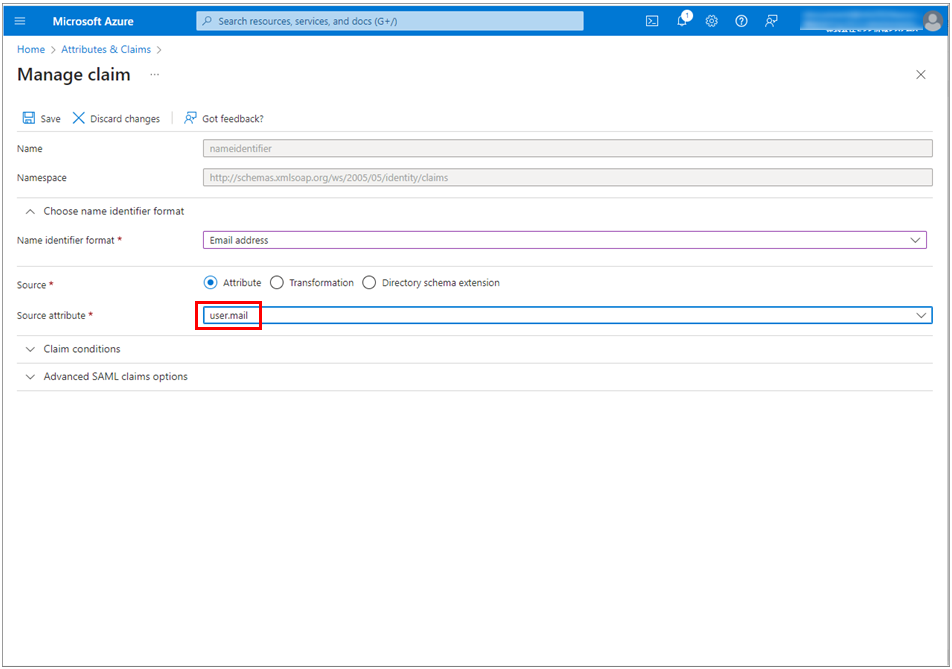
If the setting value of Source attribute isn't "user.mail", change it to "user.mail" and select Save.
-
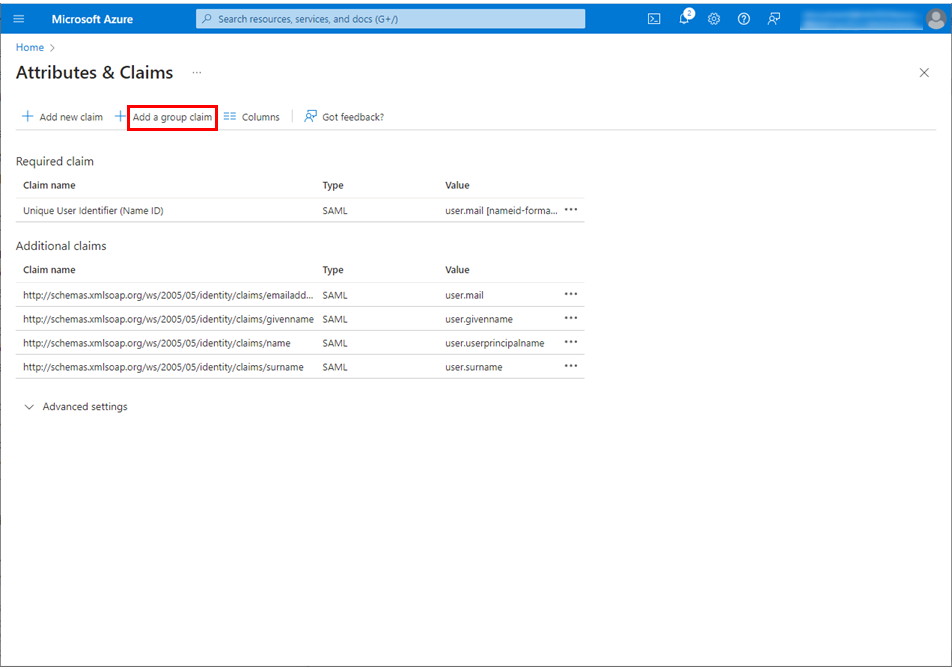
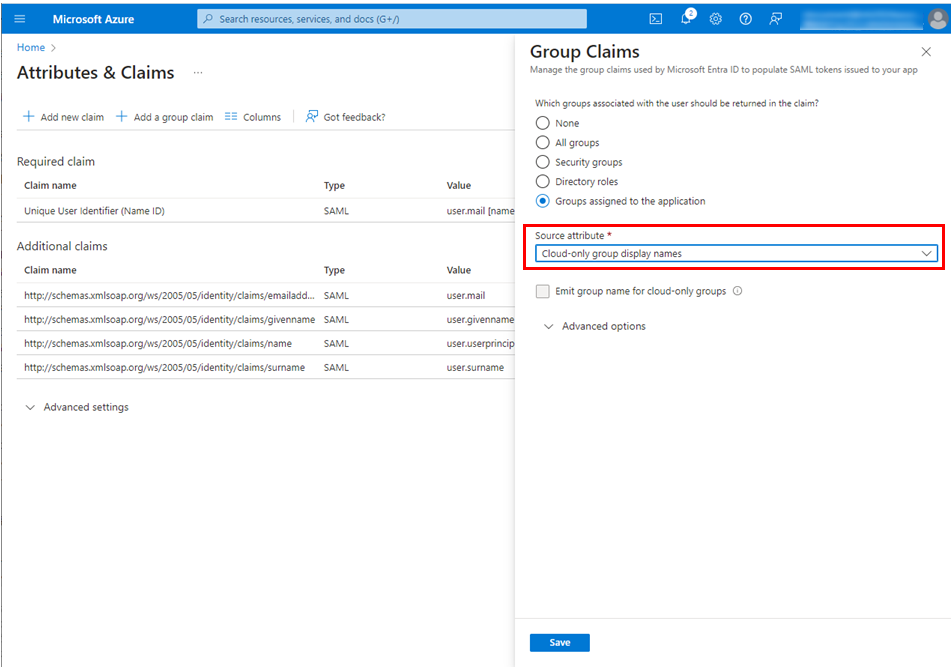
Select Adding a group claim.
-
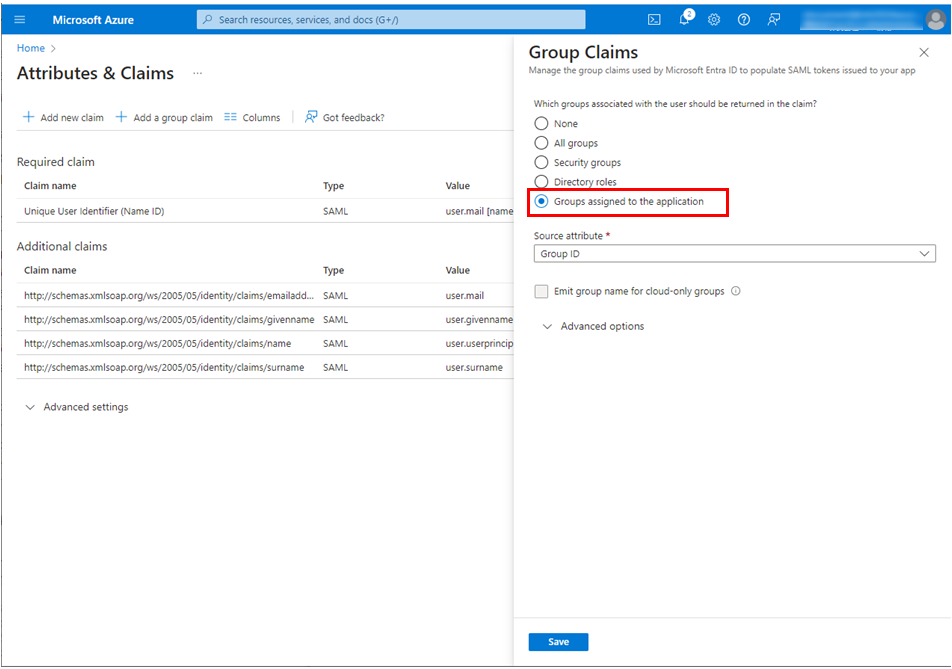
Select Groups assigned to the application for Which groups associated with the user should be returned in the claim? in the Group Claims section.
-
Select Cloud-only group display names for Source attribute.
-
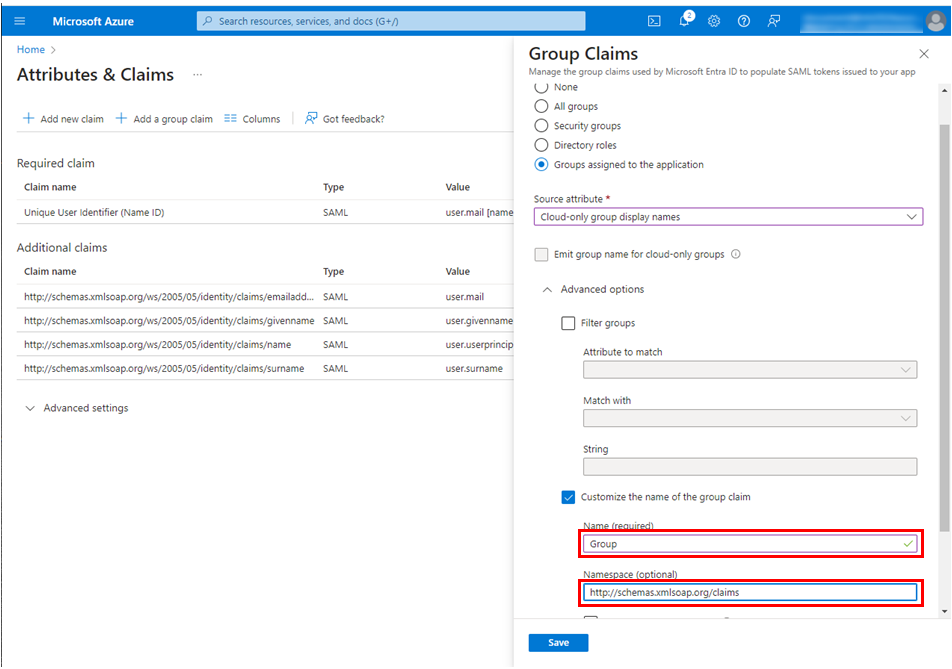
Open Advanced options, select Customize the name of the group claim, and enter the following.
Field name
Setting content
Name
Group
Namespace
http://schemas.xmlsoap.org/claims
-
Select Save.
-
Select the
at the upper right corner to close the Attributes & Claims section. -
Confirm that the following content has been added to the Attributes & Claims section.
Attribute
Claim
Group
user.groups
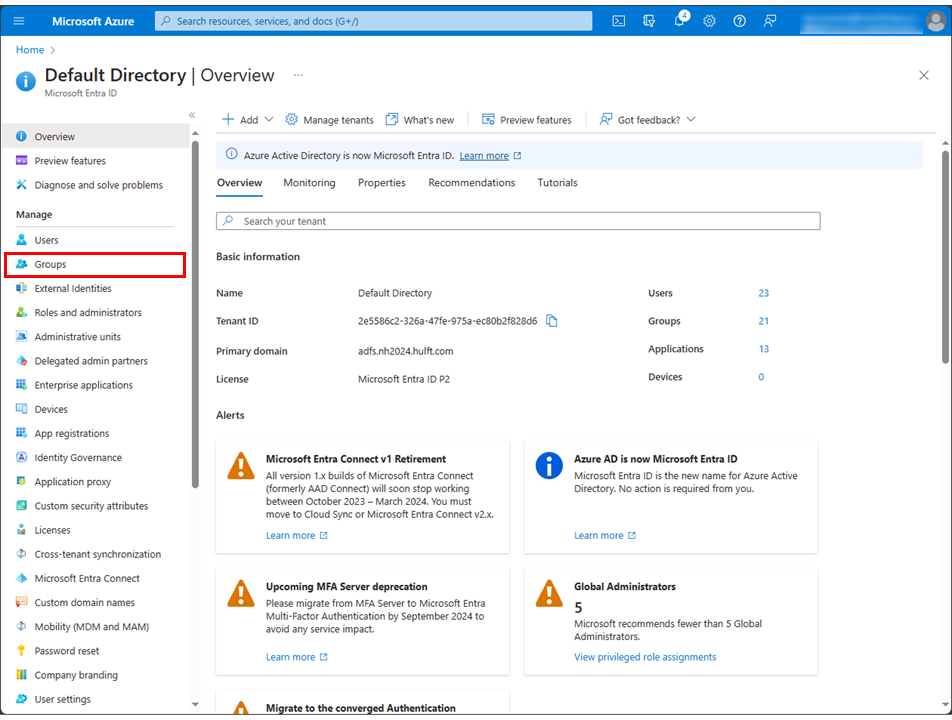
Automatic assignment of groups
(1)Create a group in Microsoft Entra ID to assign to a group in HULFT Square
-
Select Microsoft Entra ID in the Azure Portal menu.
-
Select Group in the Microsoft Entra ID menu.
-
Select New group.
-
Specify HULFT_Square_Users for the group name.
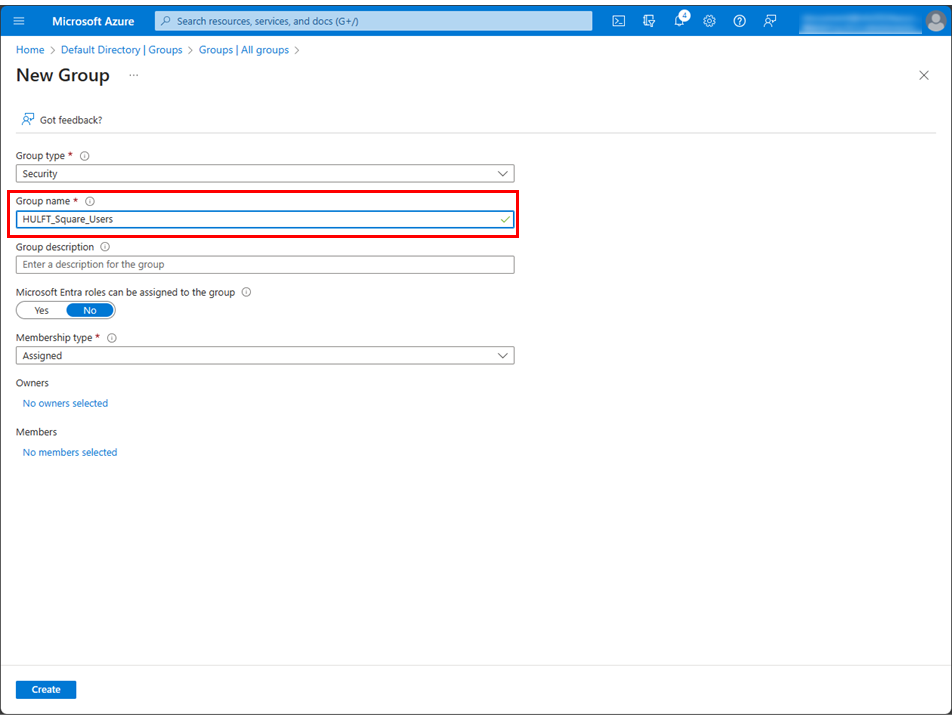
-
Confirm the following configuration and select Create.

-
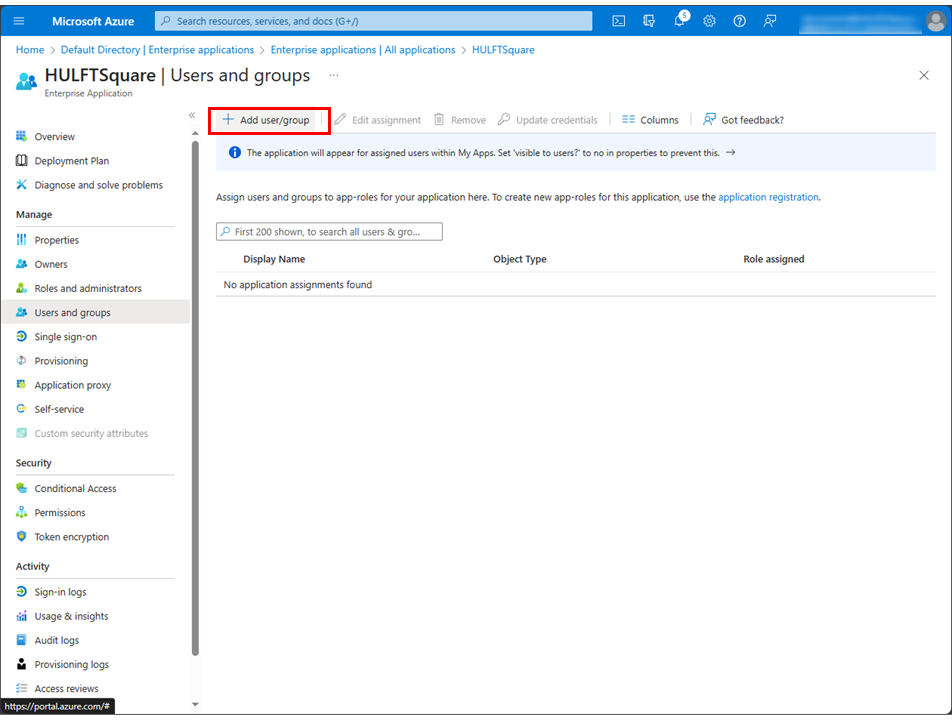
Open the HULFTSquare application from Enterprise applications, select Users and groups.
-
Select Add user/group.
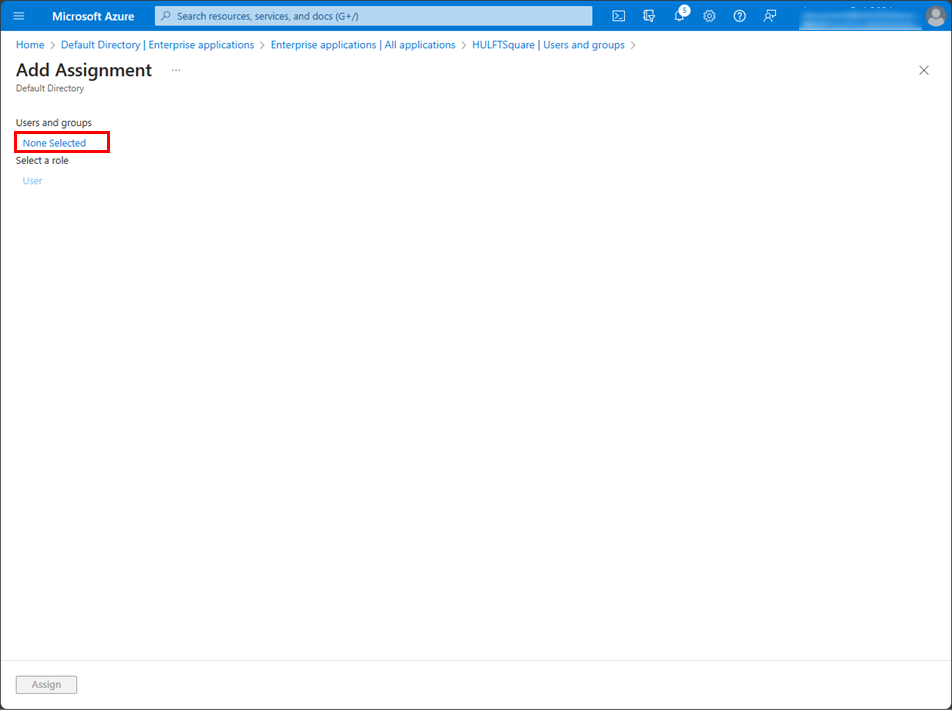
-
Select None Selected in Users and groups on the Add Assignment page.
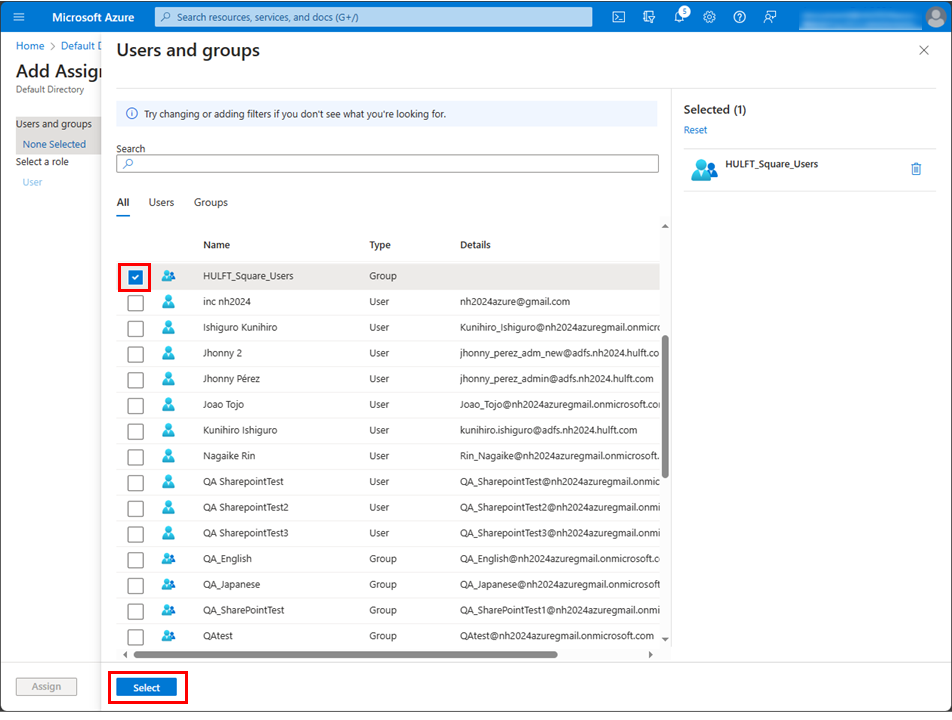
-
Select the checkbox for HULFT_Square_Users and select Select.
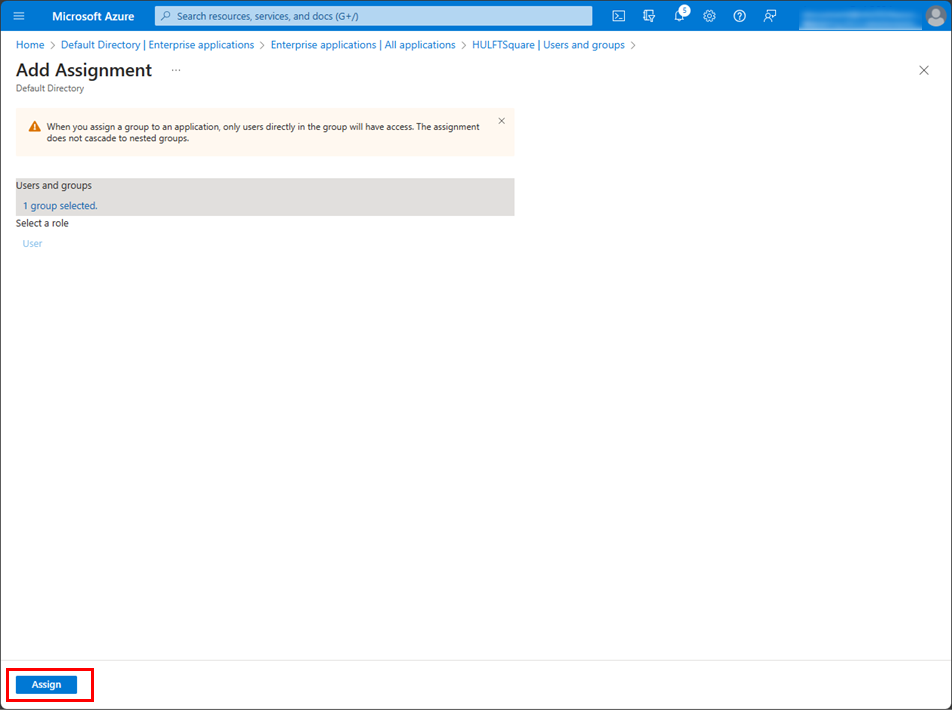
-
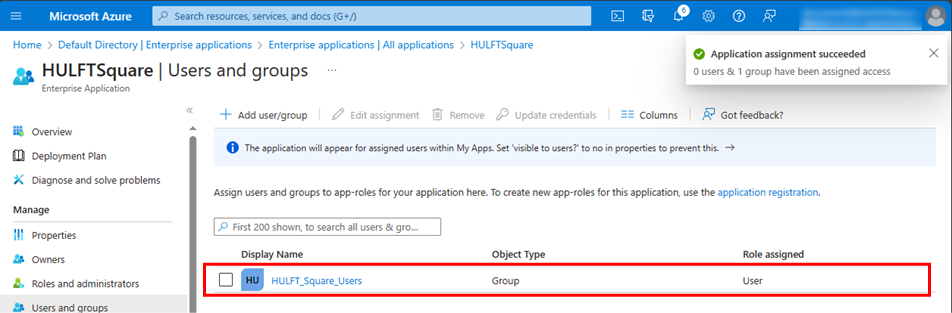
Select Assign.
The number of groups that you can assign is one. A group with the same name must also be created in HULFT Square.
-
Confirm that the group is assigned to the application role.
When registering new users to HULFT Square via SSO, add the users as HULFT_Square_Users group members before using SSO.
This completes the configuration of Microsoft Entra ID in your environment.