Steps to take before a revision upgrade and an installation
Set the nodes in the clustering environment to the STANDBY status (the state in which the node is not mounted on the shared disk) one node at a time, and carry out the installation on each node. This section explains the procedure for carrying out a revision upgrade installation of HULFT in the clustering environment in use.

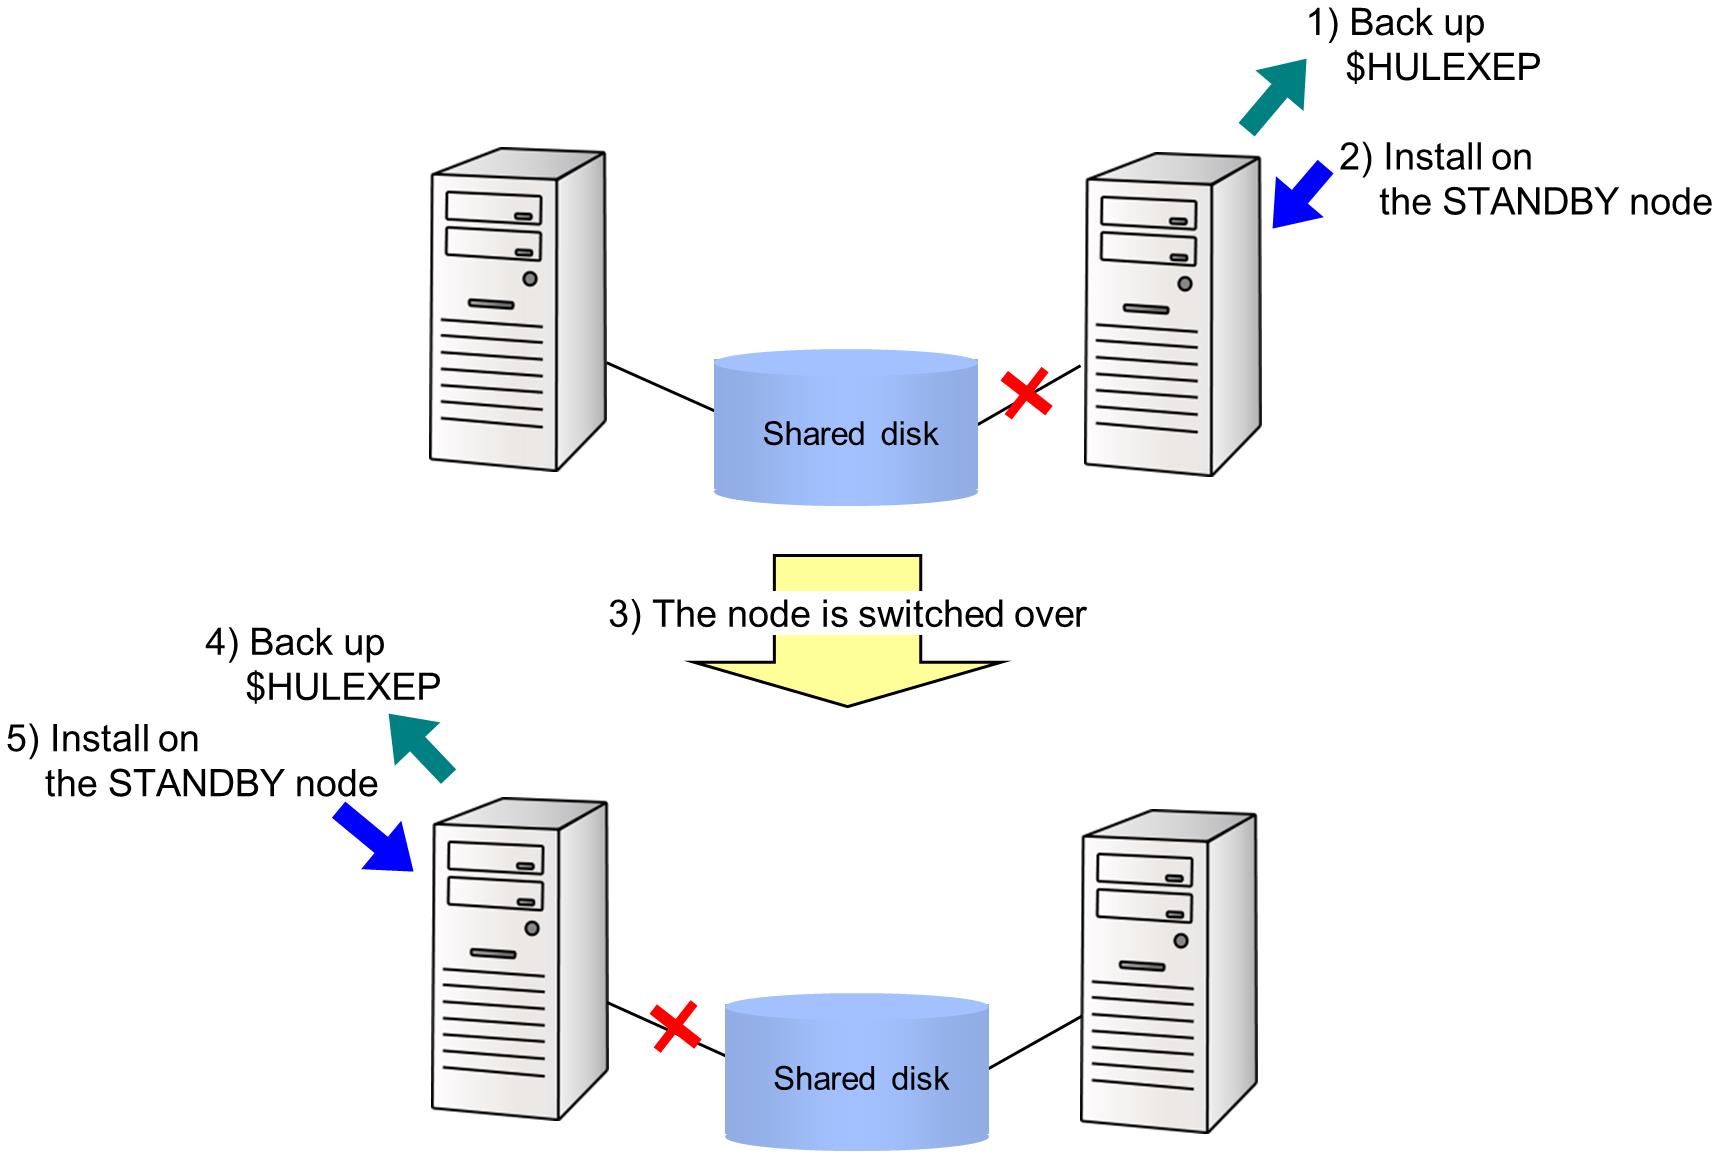
Figure 12.2 Installation Procedure for Revision Upgrade from Clustering Environment
1) Create a backup of the content under the execution module storage directory ($HULEXEP) of the STANDBY node.
2) Carry out Update Installation on the STANDBY node (node that is not mounted on the shared disk).
3) Switch over the node.
4) Create a backup of the content under the execution module storage directory ($HULEXEP) of the STANDBY node to which you have switched.
5) Carry out Update Installation on the STANDBY node to which you have switched.
6) Switch over the node again (to the original state).
Create a backup of only the content under the execution module storage directory ($HULEXEP).
For the backup method, refer to Creation of backup for installation directory.
Install the program by following the steps described in Custom installation.
In the steps, select the following options when asked:
-
Selecting the Installation Type
'Update Installation'
-
Confirming the installation environment
-
Select 'Clustering Environment (STANDBY node)' to install HULFT on the STANDBY node
-
-
For details on the product and grade necessary for using HULFT in a clustering environment, refer to Clustering Manual.
-
This operation requires extra free disk space that is equivalent to the disk space that was used by the existing HULFT.
Check how the partition is set up beforehand with the 'df' command.
-
When you have selected 'STANDBY node' in Confirming the installation environment, the backup command does not access the HULFT environment settings file storage directory (HULPATH).
Therefore, the command does not create a backup of $HULPATH.