Send Log Inquiry
The Send Log Inquiry displays the log list of the sent files.
How to Display Send Log List
-
Select the [Status Inquiry] > [Send Log Inquiry] menu option.
The Send Log List screen is displayed. For the details on the screen and the fields of each host type, refer to Send Log Inquiry topic of each host type below Operation of the destination hosts (when connecting to a version lower than HULFT8) part.
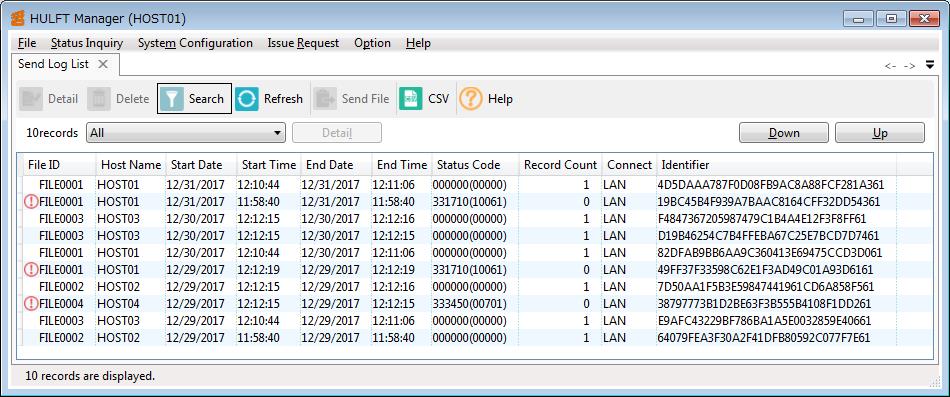
Screen 5.4 Send Log List Screen
-
 (Unsuccessful Sign)
 -
This sign is displayed on the left side of each log record whose sending process has been unsuccessfully terminated.
- Log Display Count
-
The number of log records currently displayed is displayed on the upper left of the list.
-
How to Close Send Log List
-
Click the [X] (Close) in the Send Log List screen.
The Send Log List screen is closed.
How to Delete Record of Send Log List
-
Select the log record to be deleted from the Send Log List (multiple selection is possible).
-
Click the [Delete] on the toolbar.
A delete confirmation message is displayed.
-
Click the [Yes].
The selected log record is deleted.
How to Search Records on Send Log List
-
Click the [Search] on the toolbar.
The Search section is displayed.
-
Specify the Search Conditions.
For details about search methods, refer to Search on the list screens.
-
Set the Search Condition, and click the [Search]. The retrieved records are displayed on the Send Log List screen.
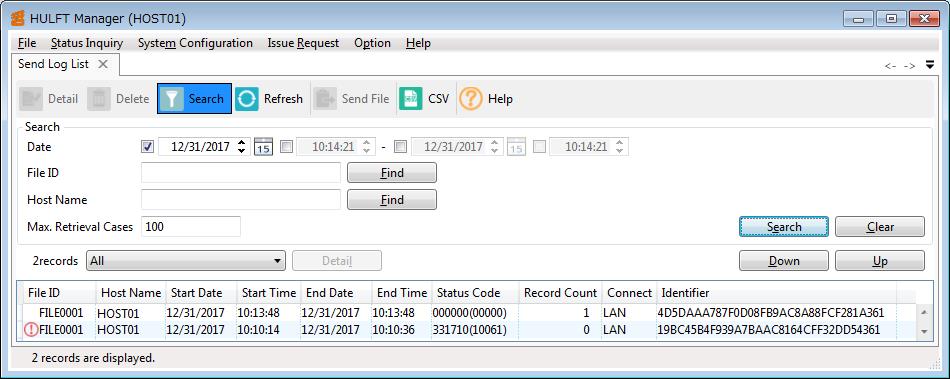
Screen 5.5 Send Log List Screen (Search Section)
How to Update Send Log List
-
Click the [Refresh] on the toolbar.
The Send Log List is refreshed and the sent records that have been newly processed are displayed.
Clicking the [Refresh] displays the search results according to the search conditions you specified. Therefore, there may be some information that is not displayed unless you clear the search conditions, when you directly specify the search conditions, or when you click the [Up] or the [Down].
To display all of the latest logs, clear the search conditions.
CSV
-
Click the [CSV] on the toolbar.
The CSV Output Condition Settings dialog box is displayed. For the details on the CSV output, refer to CSV output functionality.
Pulldown Lists
To display all logs
-
Select [All] in the pulldown list on the Send Log List screen.

Screen 5.6 Send Log List Screen (Pulldown List)
Logs with both successful and unsuccessful send results are displayed on the Send Log List.
To display only logs with 'Unsuccessful Termination' send results
-
Select [Only Unsuccessful Termination] in the pulldown list on the Send Log List screen.
Only logs with unsuccessful send results are displayed on the Send Log List.
[Up] and [Down]
-
Only the log records up to the value of the Max. Retrieval Cases are displayed in the Send Log List. Click the [Up] or the [Down] when all the log records are not displayed on the screen.
-
Click the [Down] to executes downward search, using the End Date and the End Time of the downmost log record that is currently displayed as a key. Meanwhile, click the [Up] to executes upward search, using the End Date and the End Time of the uppermost log record that is currently displayed as a key.
-
When the [Up] or the [Down] does not work, there are no more record downwards or upwards.
Clicking the [Up] or the [Down] does not change the search conditions other than time and date. Therefore, when you have applied search conditions other than time and date such as the File ID or the Host Name, clicking the [Up] or the [Down] moves the rows in the log list screen up or down, based on the conditions you have set.
How to Sort Send Log List by Field
-
Click any title of the Send Log List to sort the data by the selected field in alphabetical order (descending order, ascending order).
How to Issue Send File from Send Log List (with Dialog Box)
-
On the Send Log List screen, right-click the log for the ID which you intend to send, and then select the [Send File] in the pop-up menu.
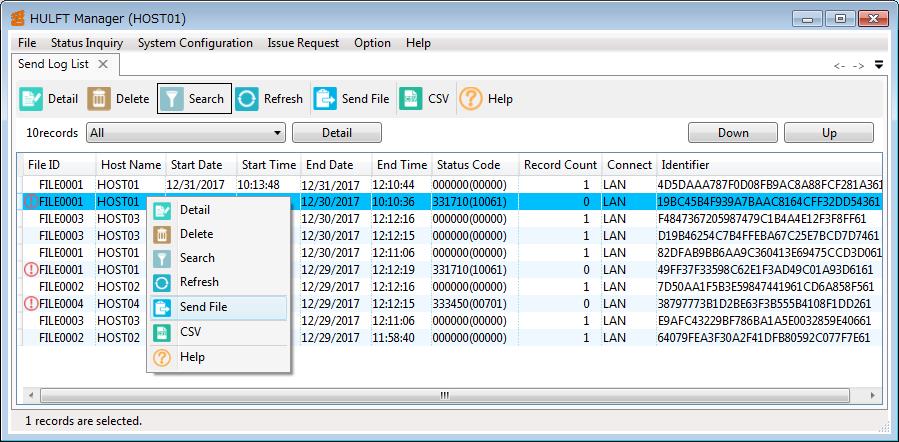
Screen 5.7 Send Log List Screen (Pop-Up Menu)
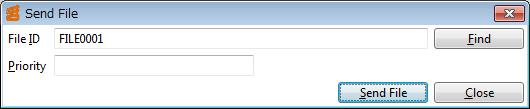
The Send File dialog box is displayed with the selected File ID already filled in.
Screen 5.8 Send File Dialog Box
-
Click the [Send File] to issue the Send File. For the details on the Send File, refer to Send File.
How to Issue Send File from Send Log List (without Dialog Box)
-
On the Send Log List screen, click on the File ID to which you intend to issue the Send File.
-
Press the 'Ctrl+U' to issue the Send File.
How to Display Send Detail Information (below List)
-
On the Send Log List screen, select the intended log record. Next, click the [Detail] on the Send Log List screen.
Otherwise, double-click the log record on the Send Log List screen.
The detail information of the selected File ID is displayed below the list. The [Detail] on the Send Log List screen changes into the [List].
Refer to Status Inquiry topic of each host type below Operation of the destination hosts (when connecting to a version lower than HULFT8) part for the details on each item of the Send Detail Information Inquiry.
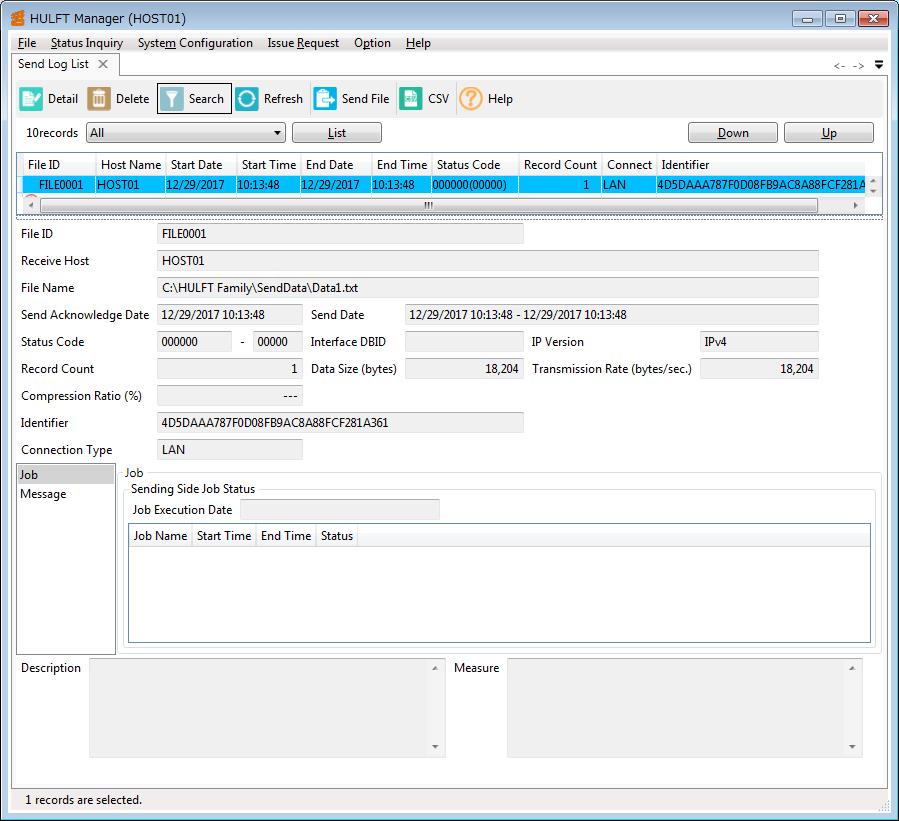
Screen 5.9 Send Detail Info Screen (below List)
-
Clicking the [List] hides the detail information. The [List] changes back to the [Detail].
When the detail information is shown below the list, changing the selected File ID on the list to another one switches the detail information displayed on the screen, accordingly.
How to Display Send Detail Information (on Separate Screen)
-
On the Send Log List screen, select the intended log record. Next, click the [Detail] on the toolbar.
Otherwise, right-click the log record on the Send Log List screen and select the Detail of the pop-up menu.
The detail information of the selected File ID is displayed on a separate screen. Refer to Status Inquiry topic of each host type below Operation of the destination hosts (when connecting to a version lower than HULFT8) part for the details on each item of the Send Detail Information Inquiry.
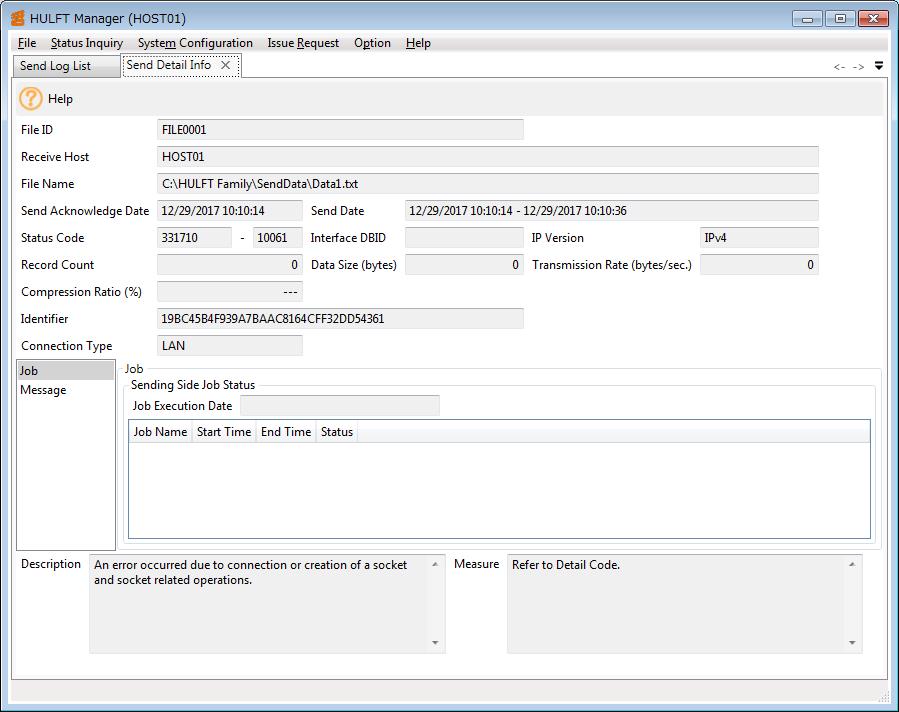
Screen 5.10 Send Detail Info Screen (on Separate Screen)
Use the settings in How to select the Display Preference to display the separate screen either as a tab or as a floating screen.