Technical
Tips
I Want to Extract Data from an Excel File
- The following software is used in this tip: DataMagic for Windows Version 3
Please download the sample script and try it out.↗
Introduction
Many of you frequently use Excel to perform everyday data
summation tasks.
Excel is used for many purposes, including the handling of
large amounts of data such as purchase orders or customer lists, as well as
invoices and estimates.
- With DataMagic, you can input and output data in Excel spreadsheet format.
- In this series of tips, I'm going to show you how to extract Excel data that is in a table format and output the data to a database.

Advance Preparation
Prepare the Excel data that is to be converted.
Sample data↗
Store the above sample data in the folder C:\work\SAMPLE4\. (Save it with the file name in.xlsx.)
Specify Shift-JIS as the kanji character encoding for this database.
- ORDER_NO
- DATE
- CODE
- NAME
- QUANTITY
- UNIT_PRICE
- SUB_TOTAL
Procedure
Create the definition information that is necessary for data
conversion.
The flow of tasks for data conversion can be
broadly categorized into the following tasks.
- 1. Specify input file information:
- Connection information
- Adapter information
- 2. Specify output file information:
- Connection information
- Adapter information
- 3. Specify data processing information.
Step 1
First, let's perform task 1: Specify the input file
information.
Define the information that DataMagic will use to read data
from the input Excel file.
DataMagic handles the Excel format as one type of database
format.
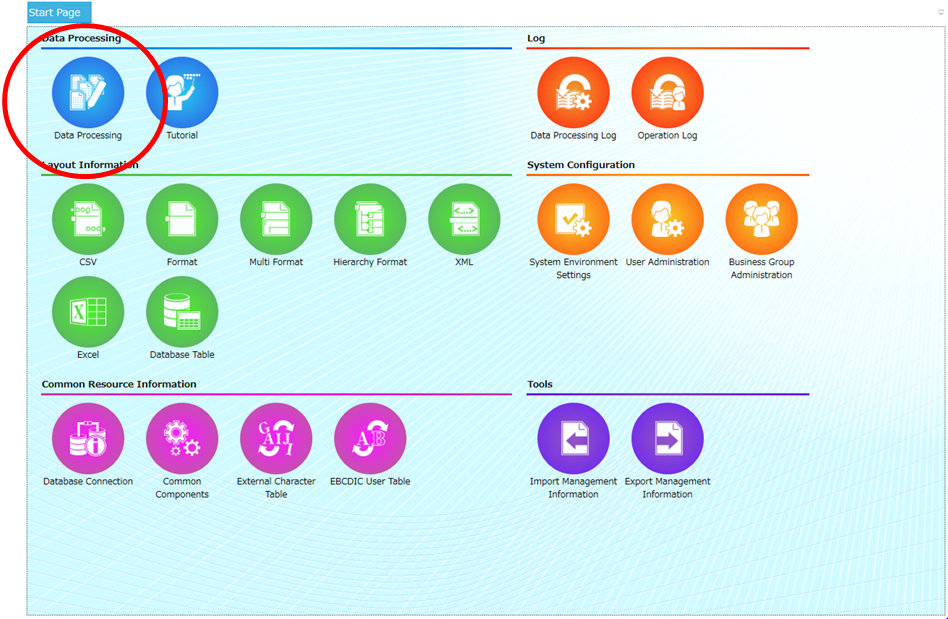
Click Adapters to
go to the Adapters tab.
Then, on the Database tab, specify Database connection, and then click New.
When the Database Connection - Detailed Information screen appears, specify the settings as shown in the following screenshot, and then click the Apply button to save the settings.

Step 2
Define adapter information (database table information) for
the input data.
On the Database tab, specify Database table, and then click New.
When the Database Table - Detailed Information screen appears, specify the settings as shown in the following screenshot, and then click the Apply button to save the settings.

The input file information settings are now complete. This completes task 1.
Step 3
Next, let's perform task 2: Specify the output information settings.
Follow the same procedure as steps 1 and 2 to specify database connection information and adapter information (database table information) as shown in the following screenshot.
Database Connection Information
Adapter Information (Database Table Information)

The output file information settings are now complete. This completes task 2.
Step 4
When you have finished specifying the input and output file information,
perform task 3: Specify data processing information.
Now, we will specify settings that indicate the type of file
that is to be input, the type of file that is to be output, and the conditions
to be used to output and convert the data.
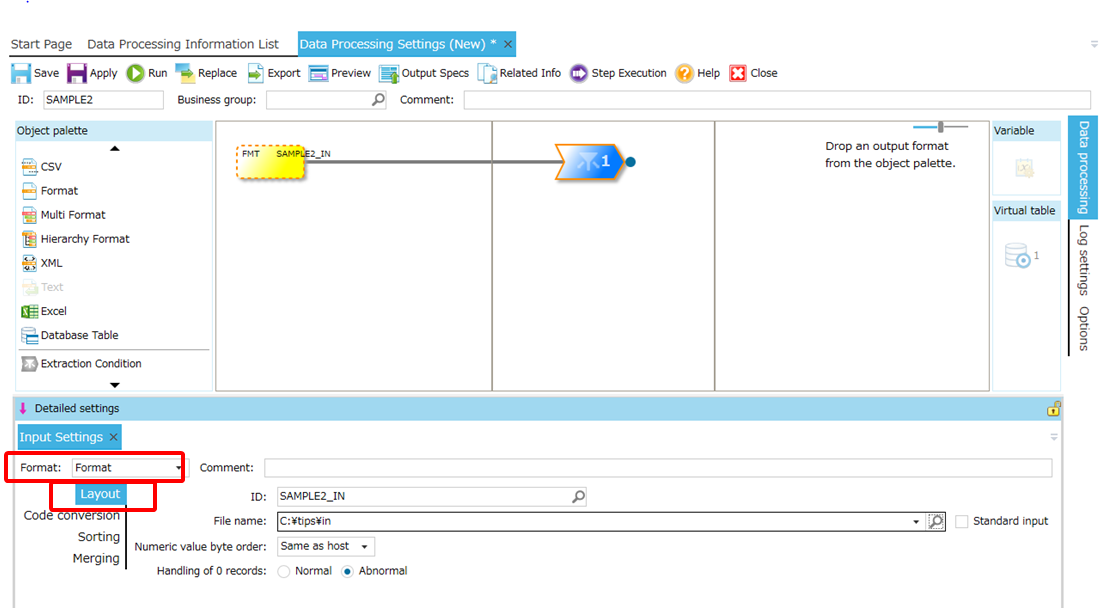
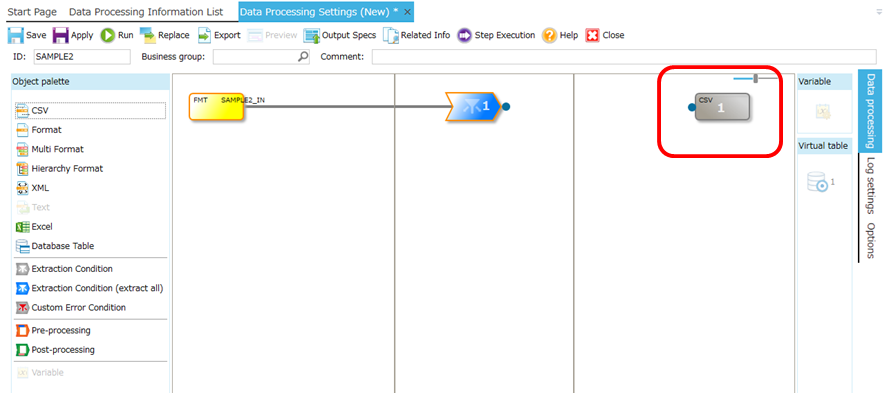
Click Data Processing to go to the Data Processing tab. Then, in the Operations menu, click New.

Step 5
First, specify the settings for the input file.
- The Data Processing Settings screen appears.
- Enter the data processing settings ID that you want to use, and then double-click the input file icon.

Step 6
Specify the input file information as shown in the following
screenshot.
Adapters Tab
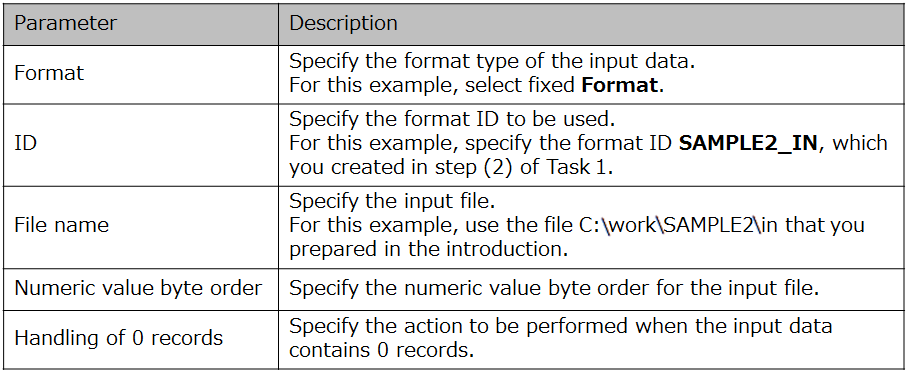
Encoding Conversion Tab
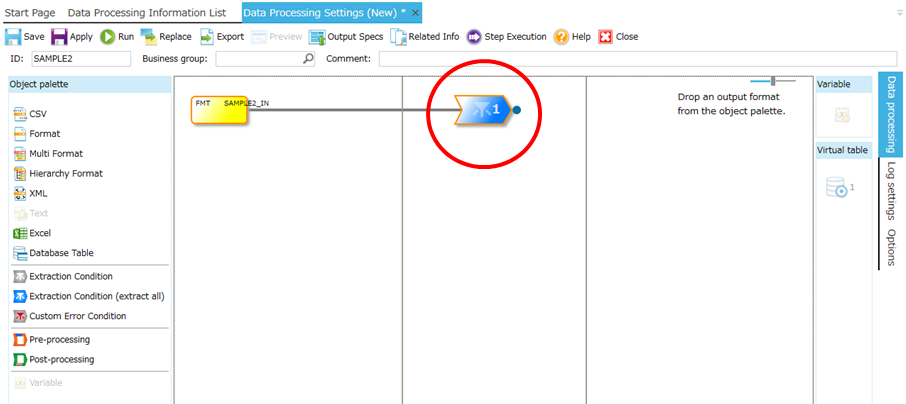
Step 7
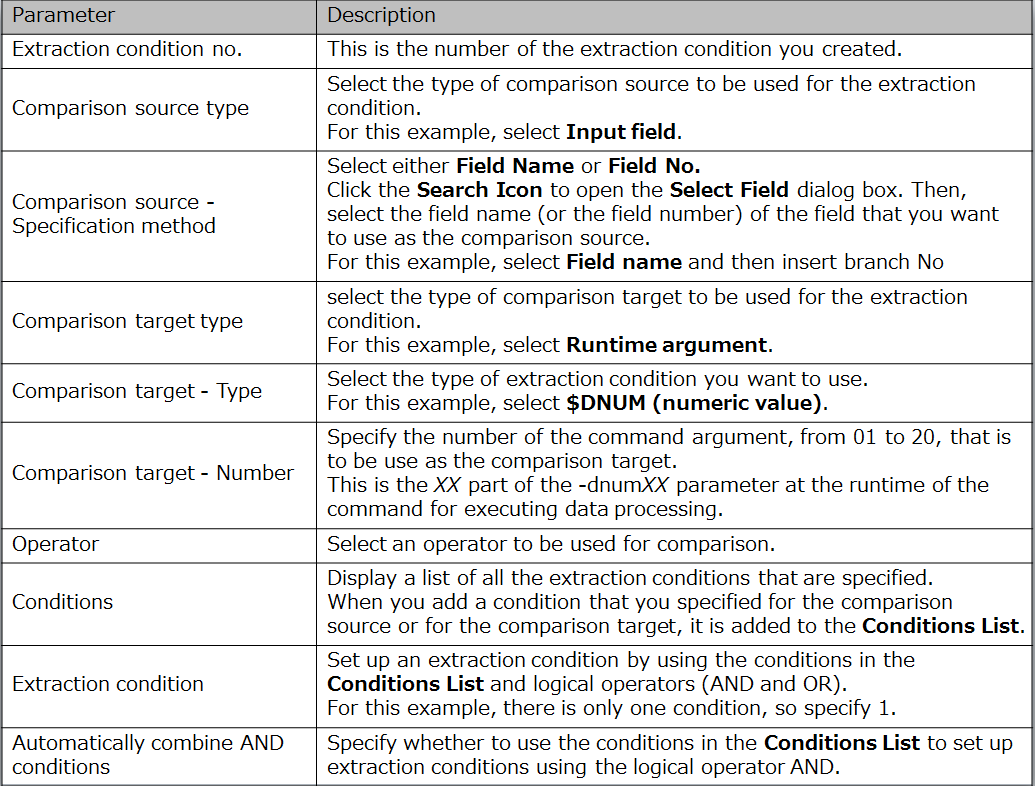
Next, specify the extraction condition settings to be used
to extract the data.
When you finish specifying the settings in the Input Settings screen, new extraction
condition information is created.
Double-click the extraction conditions icon.
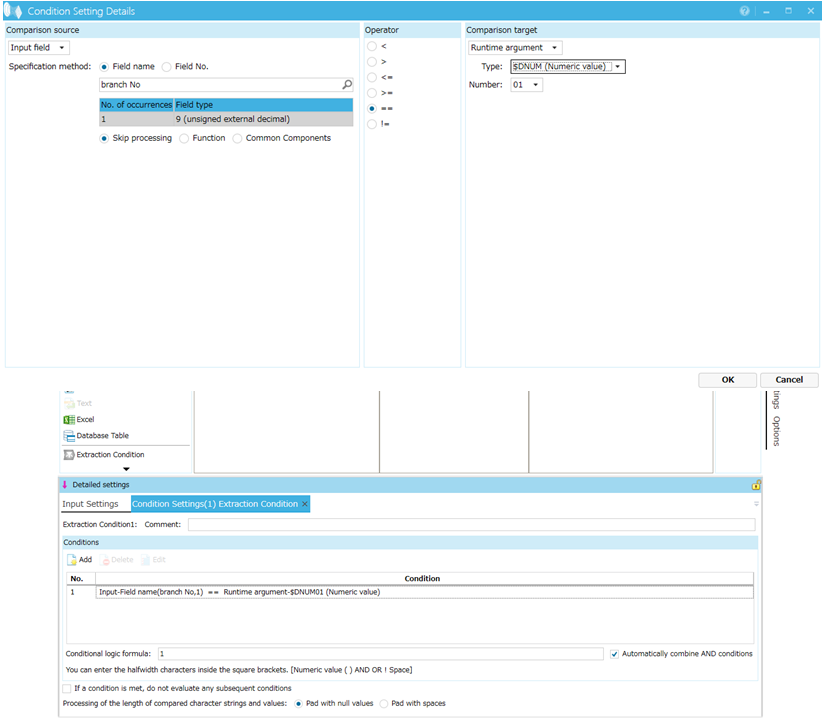
Step 8
The Extraction
Condition Settings screen appears.
Specify the settings as shown in the following screenshot,
and click the OK button to save the
settings.
Note: For this example, specify the extraction condition to
extract all records.
The extraction condition settings are now complete.
Step 9
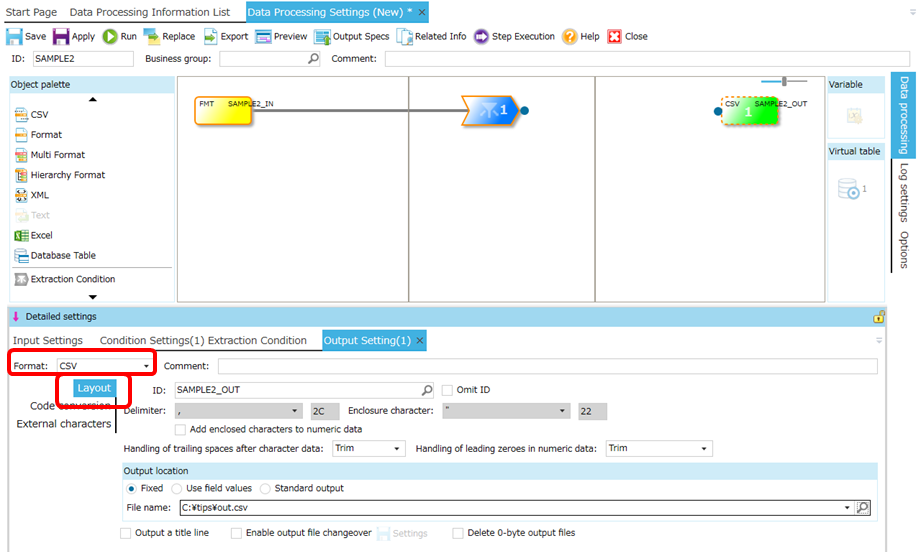
Next, specify the settings for the output file.
Double-click the output file icon.
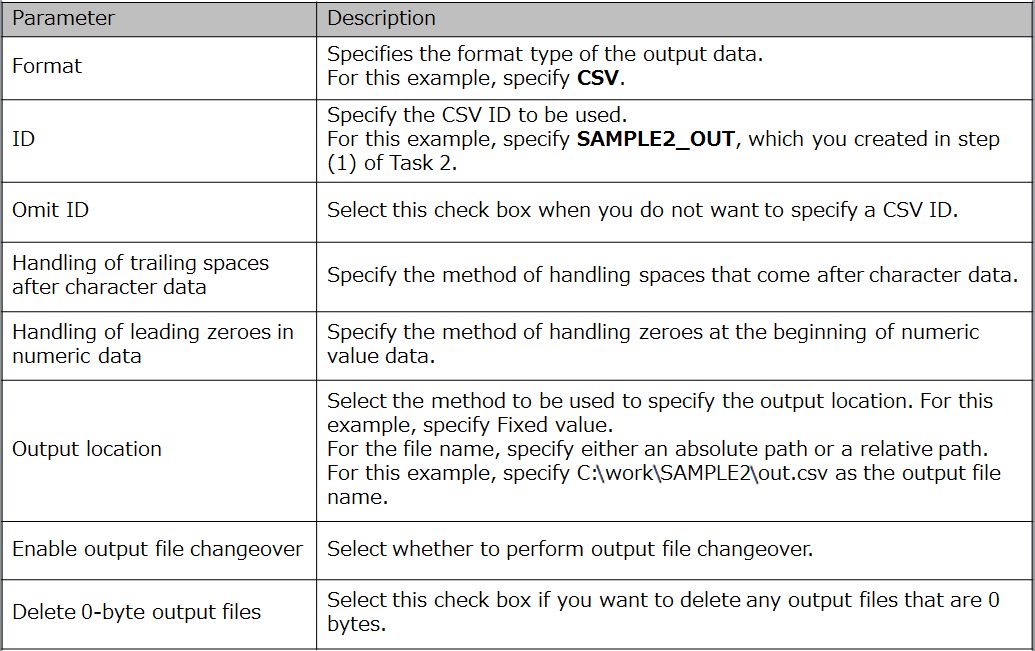
Step 10
In the Output
Settings screen, specify the settings on the Adapters tab, and click the OK
button to save the settings.
Adapters Tab
The settings for the output file are now complete.
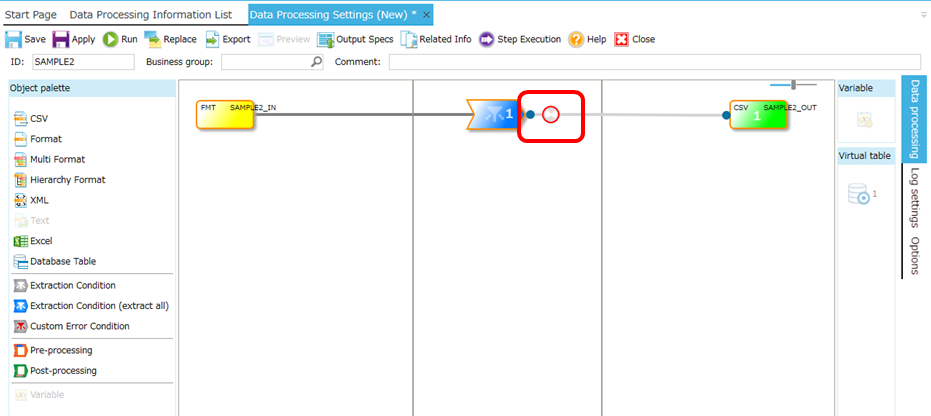
Step 11
Next, define the mapping processing to be used between
fields in the input file and fields in the output file.
Connect the extraction condition and the output condition, and double-click the mapping icon.
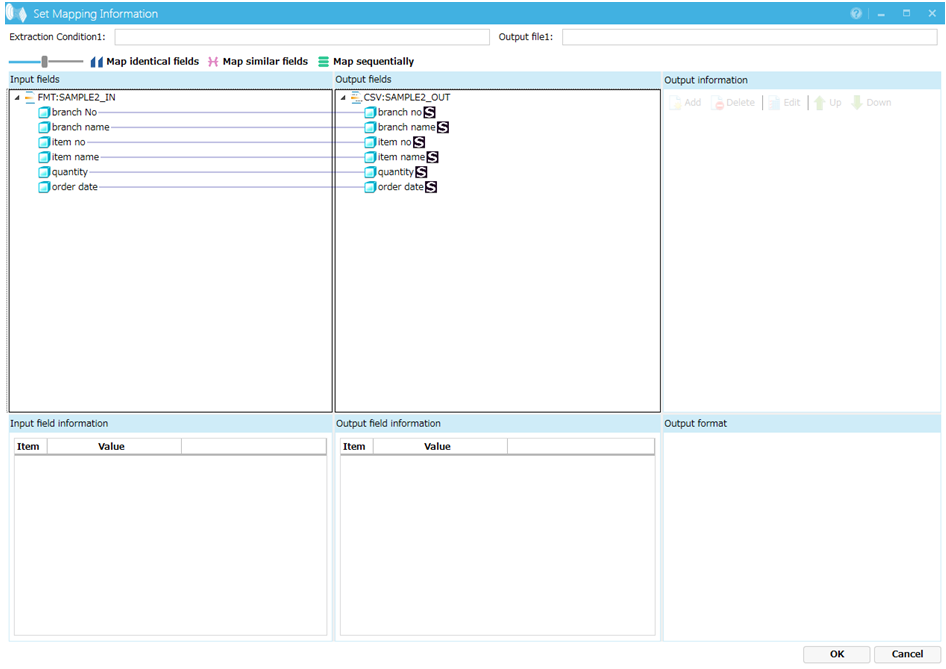
Step 12
Connect the input fields and the output fields with mapping
lines as shown in the following screenshot.
When you have finished mapping the fields, click the OK button to register the mapping information.

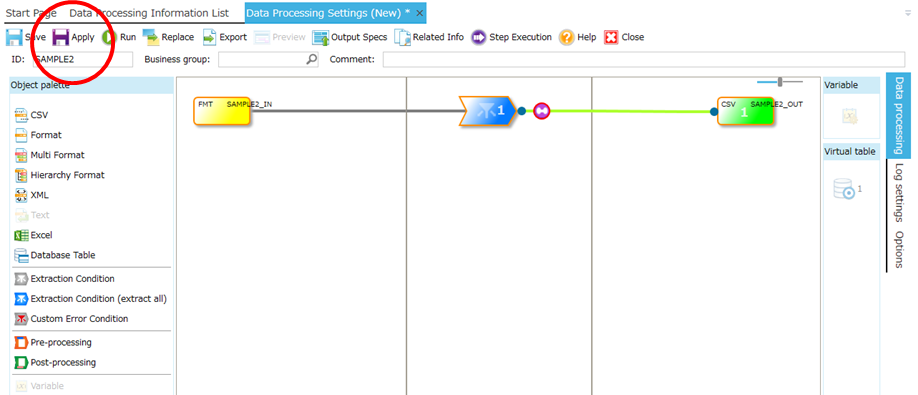
Step 13
Finally, in the Data Processing Settings screen, click the Apply button.
The data processing information settings are now complete. This completes task 3.
Step 14
Now, let's execute the processing. In the Data Processing Settings screen, click the Run button at the top of the screen.

The Execute Data
Processing screen appears. Confirm the output file generation mode, and
click the Run button.
After processing successfully ends, check the output file.
About the output file generation mode:
Step 15
Data is output to the table SAMPLE_TBL, which you created in
Step 3.
Check the data that was output.
The following table displays the same results that are shown the above screenshot, in an easy-to-understand format.
In Conclusion
So, what do you think?
In this example, we used Excel data in a table format.
However, DataMagic can also handle Excel data in a ledger format.
In the Database Table - Detailed Information screen, in which you specified settings in Step 2, select Single cell for the unit, and specify the cells that you want to read.
For detailed information about how to specify settings, refer to the Operations Manual.