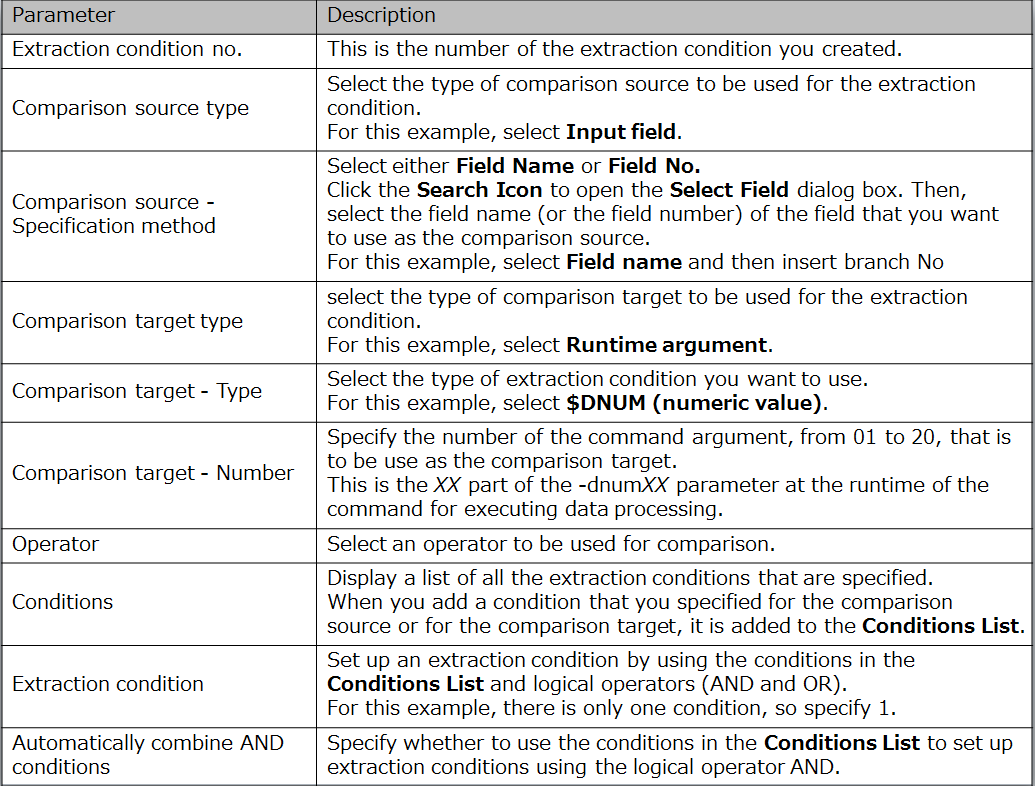
Technical
Tips
I Want to Extract Data by Dynamically Specifying Conditions
- The following software is used in this tip: DataMagic for Windows Version 3
Please download the sample script and try it out.↗
Introduction
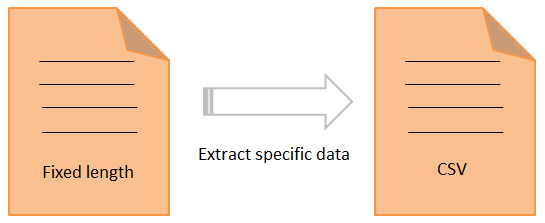
One of the most common types of data
processing used for business operations is the separation of data.
You
can separate data based on a variety of conditions. For example, you might want
to separate the data for each store, or for each client.
When you separate data, you typically
extract data that meets specific conditions and output the data to a new file.
However, when the extraction conditions are
specified by using fixed values, it's difficult to efficiently handle changes
to the extraction conditions.
With DataMagic, you can use the values that are assigned to command arguments at the runtime of the data processing command as the extraction conditions. This is called the dynamic value specification function.
By using this function, you can dynamically change the comparison values for the extraction conditions in order to control the data that is extracted. You can also insert a different character string into an output field each time you execute the command.
- Dynamic Value Specification Function

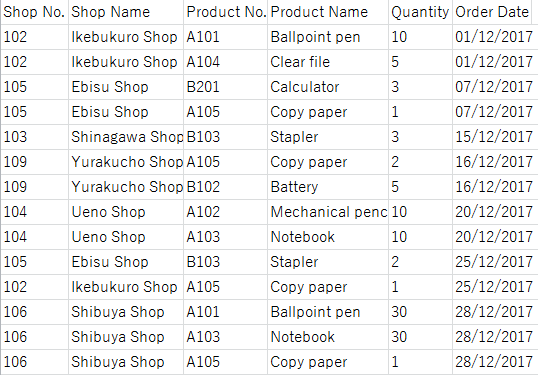
In this example, let's assume that you want to process the data for the Ebisu store separately. In order to do that, you need to extract only the data for the Ebisu store from the order data. I will show you how to extract the data for which the store number is 105 (the Ebisu store) from the order data (which is in a fixed-length file) and to output that data to a separate CSV file.
• Processing diagram
• Functions used
- Extraction conditions
• Sample data file
Note: You can download a sample data file for this tip by clicking on the link at the bottom of this page.
Store the sample file in the folder C:\work\SAMPLE2\ with the file name in.
(This sample data is fixed-length data for
which the character encoding is Shift-JIS.)
Flow of Tasks for Data Conversion
Create the definition information that is
necessary for data conversion.
The flow of tasks for data conversion can
be broadly categorized into the following three tasks:
1. Specify input file information.
2. Specify output file information.
3. Specify data processing information.
Task 1: Specify Input File Information
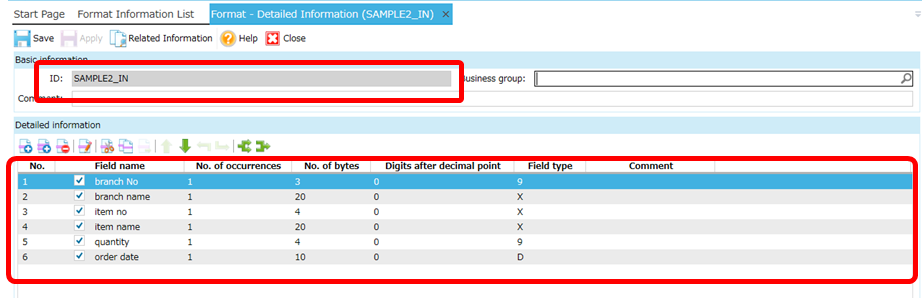
(1) Create new format information.
- The sample file for this tip is a fixed-format file, so we need to register format information for the input file.
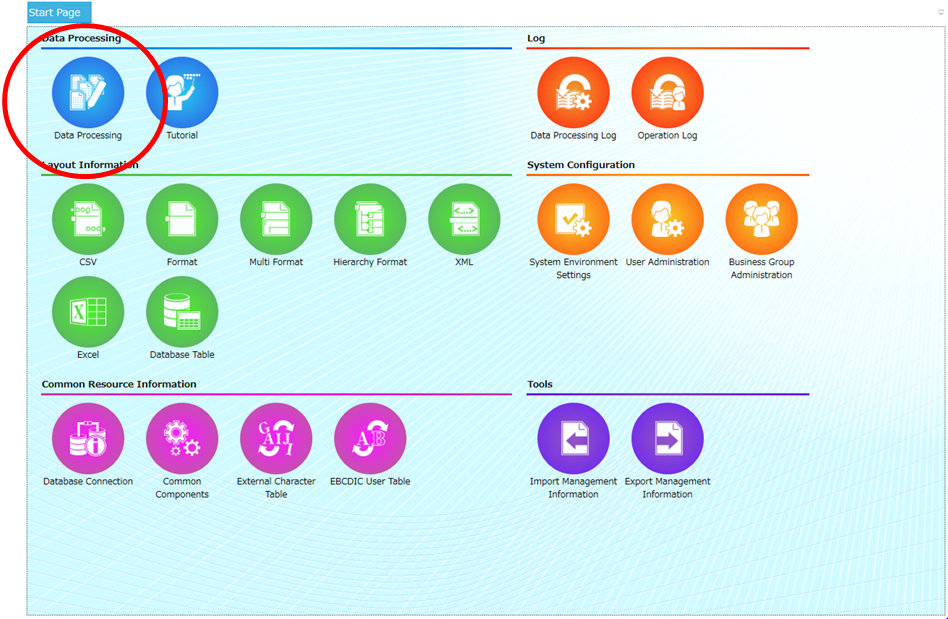
- Click Format from Layout Information.
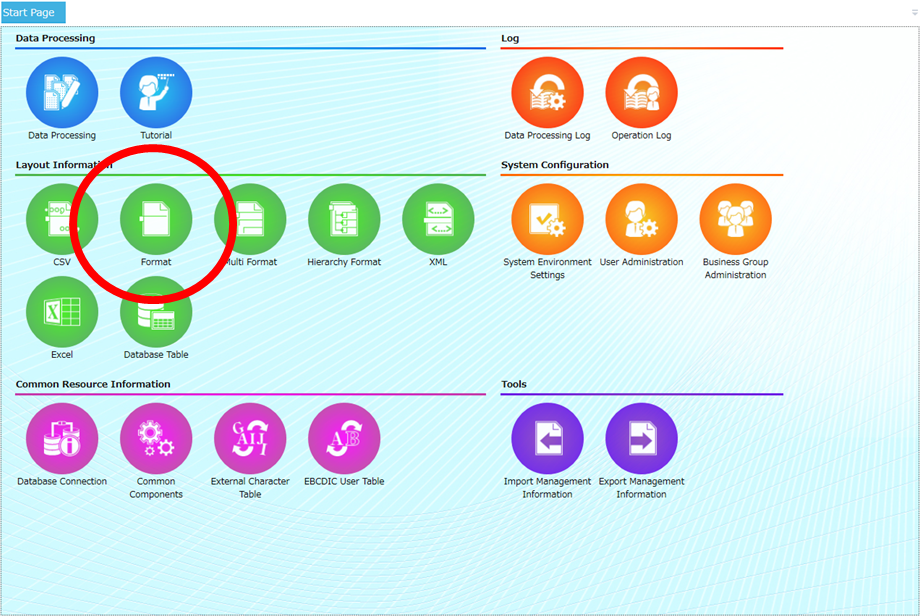
Click New.

(2) Specify Fixed-Format Information.
- In the Fixed Format - Detailed Information screen, specify the settings shown in the following screenshot, and then click the Apply button to save the settings.
To specify field information, double-click an empty row to open the Fixed-Format Information Field Settings screen.
Fixed Format - Detailed Information Screen
Fixed-Format Information Field Settings Screen
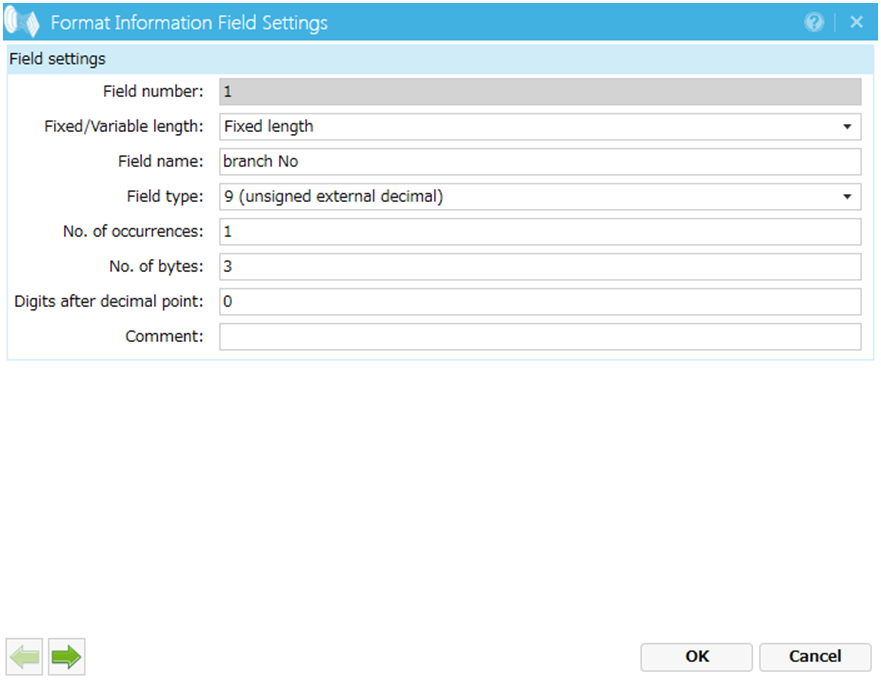

Note: Specify the settings for Field name, Field type, No. of occurrences, No. of bytes, and Digits after decimal point that are shown in the above Fixed Format - Detailed Information screen screenshot.
The input file information settings are now complete.
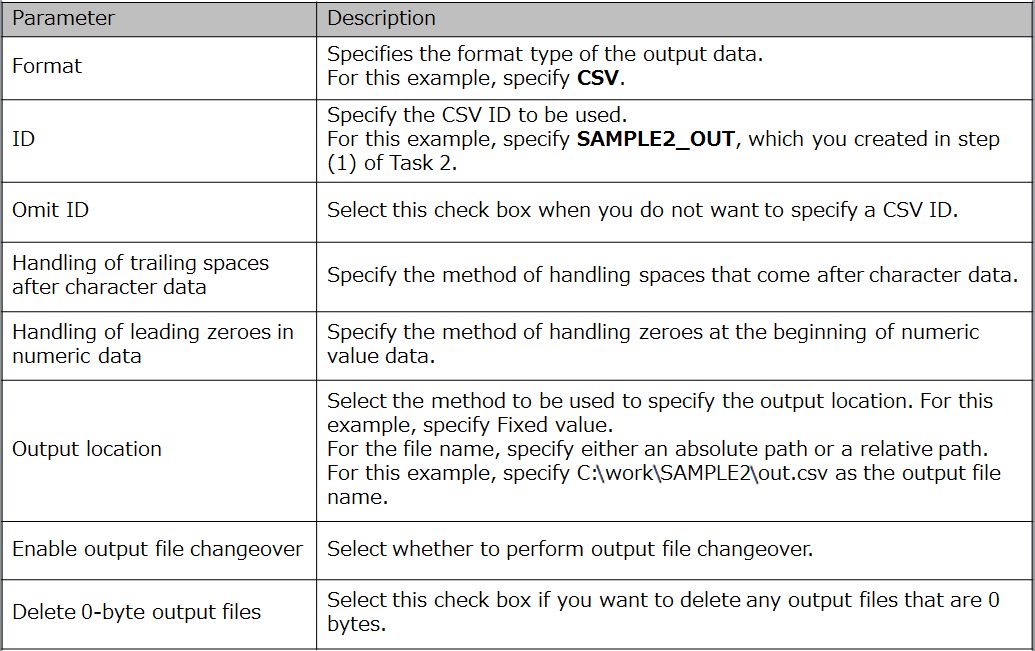
Task 2: Specify Output File Information
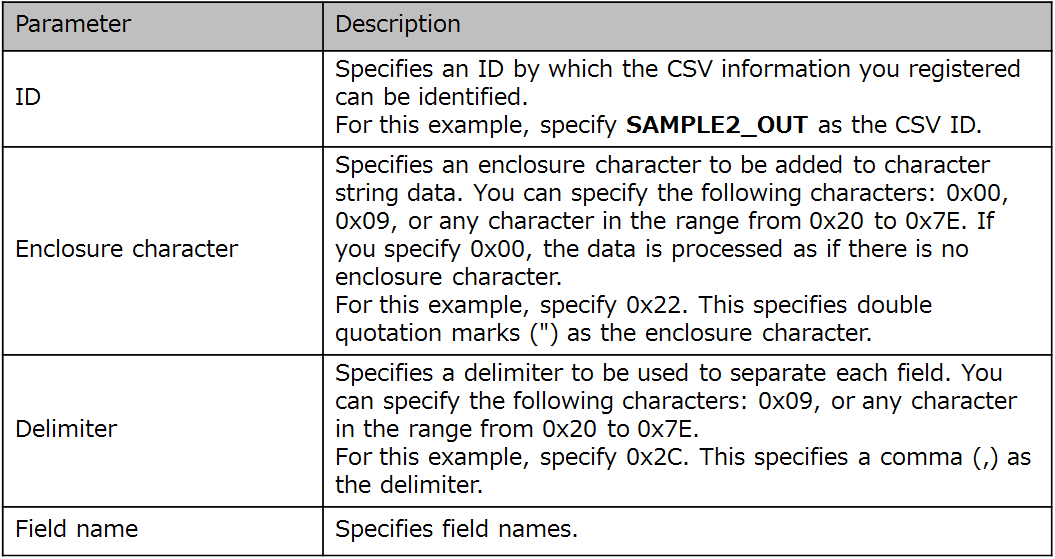
(1) Specify CSV information.
In the CSV
- Detailed Information screen, specify the settings as shown in the
following screenshot, and then click the Apply
button to save the settings.
To specify field information, double-click
an empty row to open the CSV Information
Field Settings screen.
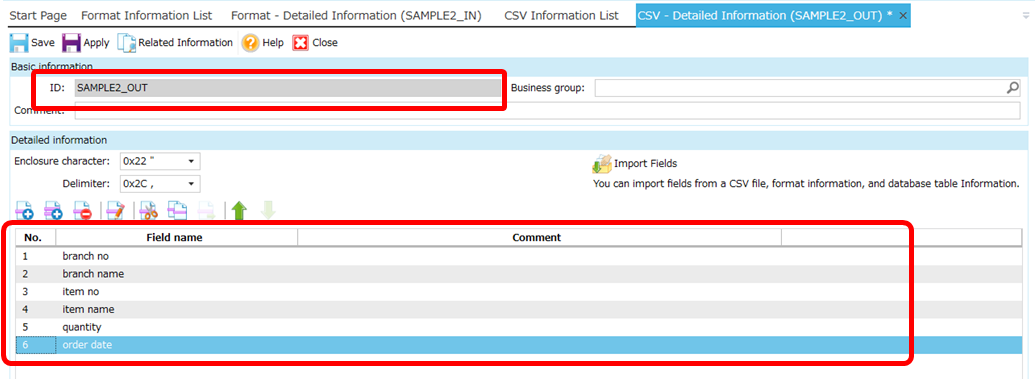
The output file information settings are now complete.
Task 3: Specify Data Processing Information.
(1) Create new data processing information.
- Specify settings that indicate the type of file that is to be input, the type of file that is to be output, and the conditions to be used to output and convert the data.
Click Data Processing to go to the Data Processing Information List tab. Then, in the operations menu, click New.

(2) Specify the data processing information ID.
- First, specify the settings for the input file.
In the Data Processing Settings screen, enter an ID, and double-click the input file icon.


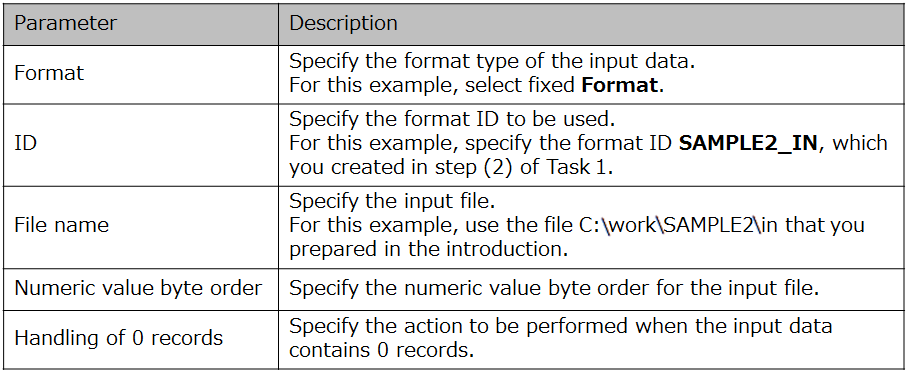
(3) Specify adapter information.
In the Input Settings screen, click the Layout tab and specify the settings as shown in the following screenshot. Then click the Apply button to save the settings.
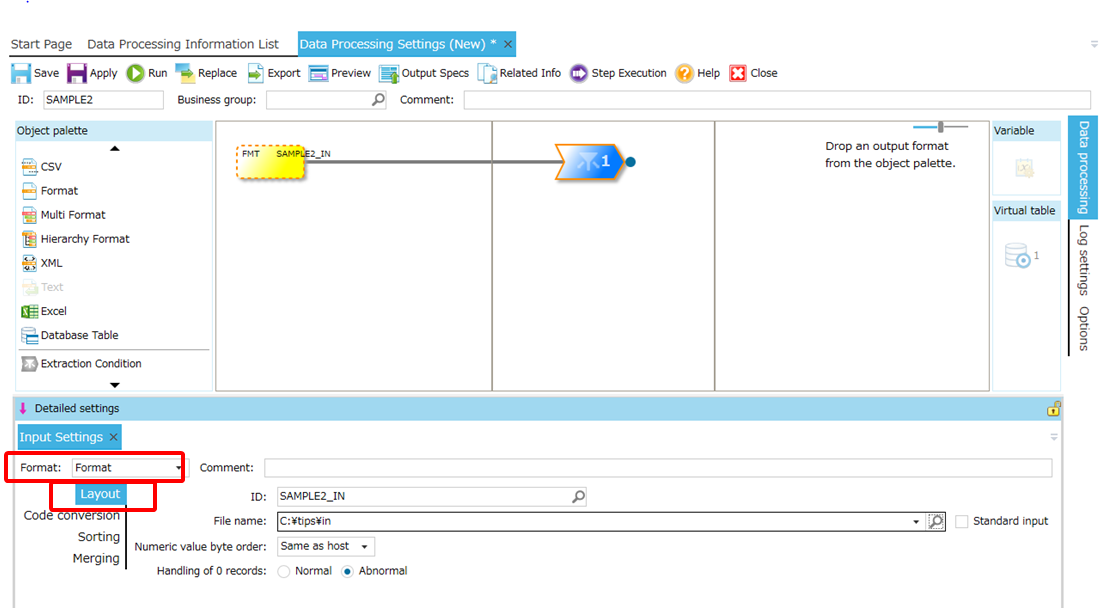
The settings for the input file are now complete.
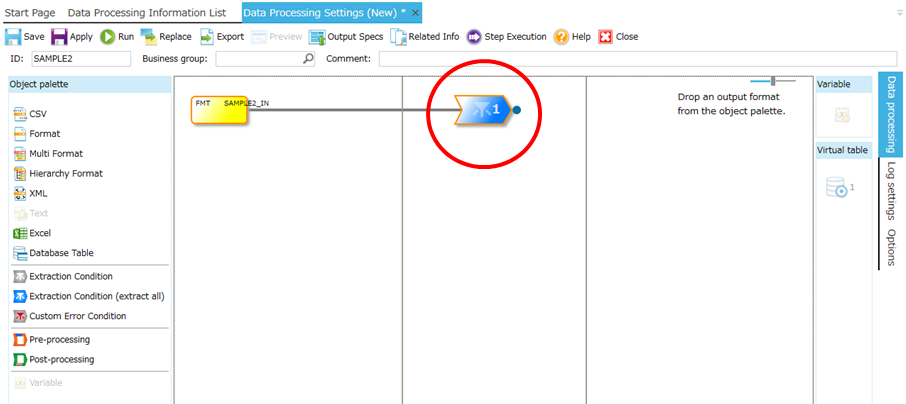
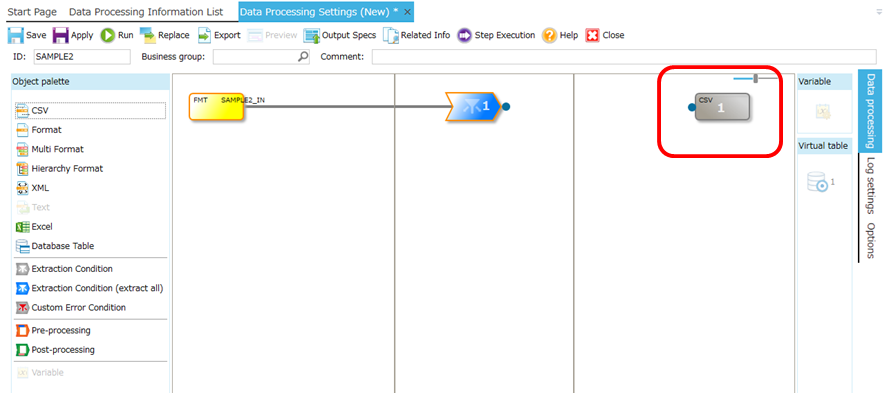
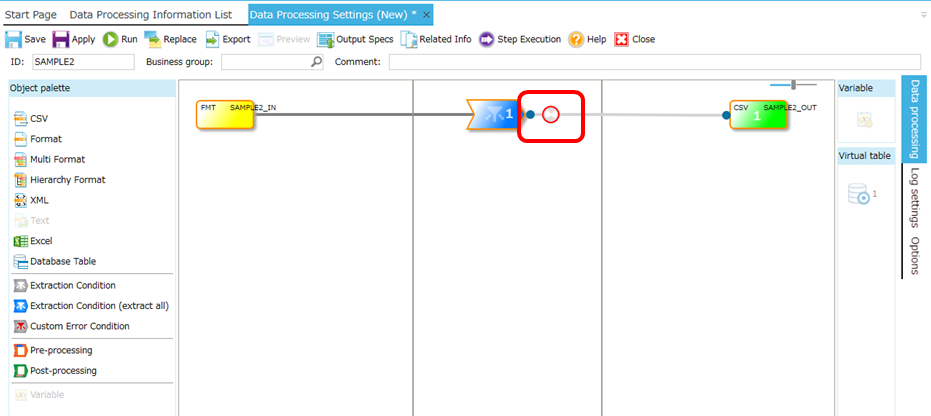
(4) Select the extraction conditions icon
Next, specify the extraction condition
settings to be used to extract the data.
When you finish specifying the settings in
the Input Settings screen, new
extraction condition information is created.
Double-click
the extraction conditions icon.
(5) Specify extraction conditions.
In the Condition Setting Details screen, specify the settings shown in the following
screenshot, and then click the OK
button to save the settings.
For this example, specify an extraction condition to extract data for which the value for the field Store No. is equal to the value specified for a command argument at the runtime of the command.
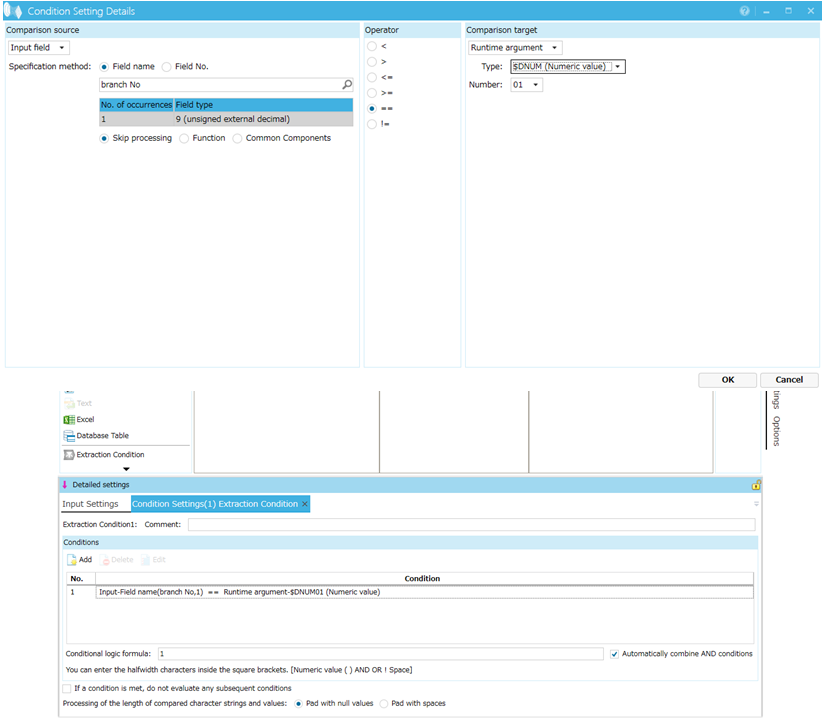
The extraction condition settings are now complete.
(6) Select the output file icon.
Next, specify the settings for the output file.
Double-click the output file icon.
(7) Specify adapter information.
In the Output Settings screen, click the Layout tab and specify the settings as shown in the following screenshot. Then click the Apply button to save the settings.
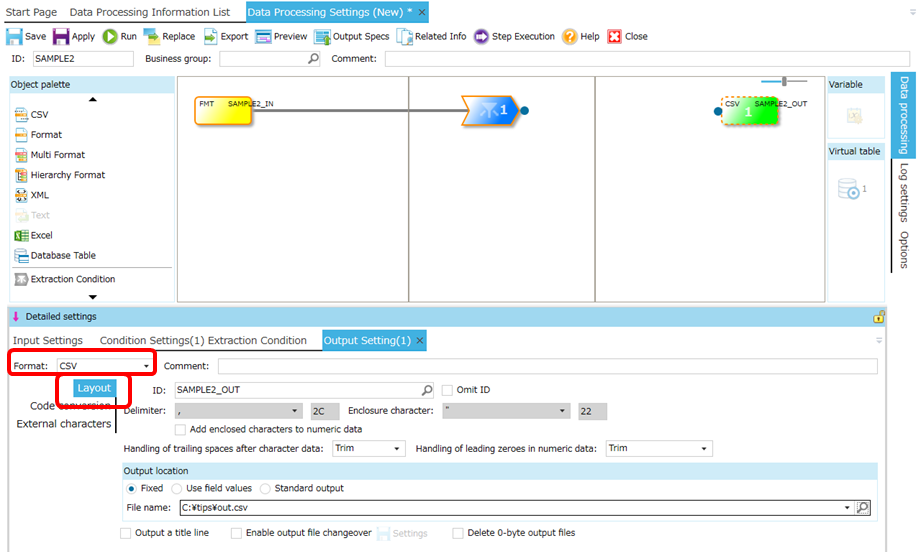
The settings for the output file are now complete.
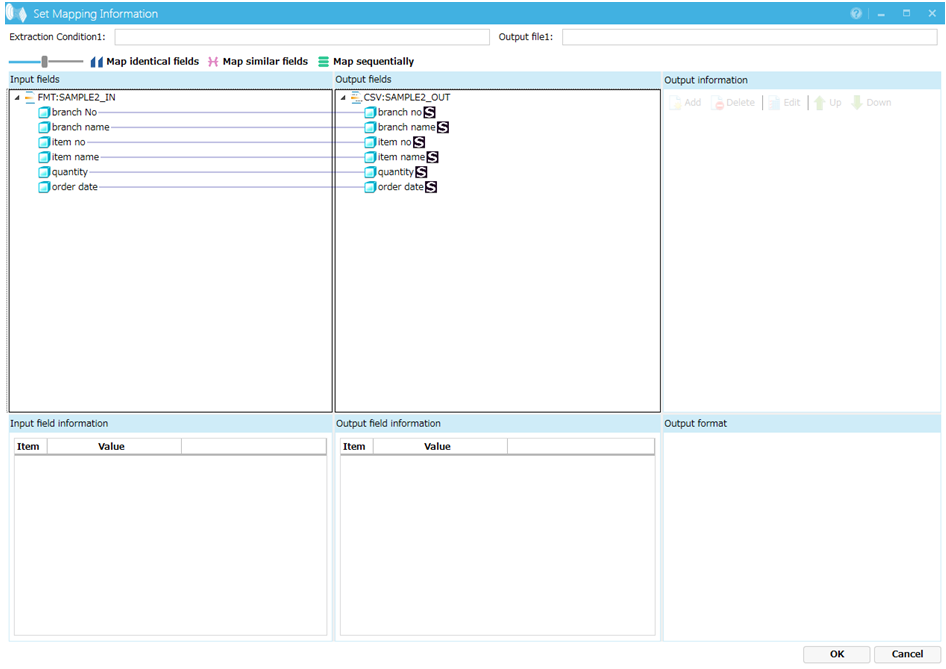
(8) Select the mapping icon.
Next, define the mapping processing to be used between fields in the input file and fields in the output file.
Connect the extraction condition and the output condition, and double-click the mapping icon.
(9) Map the input and output fields.
In the Set Mapping Information screen, connect the input fields and output fields with mapping lines as shown in the following screenshot, and click the OK button to save the settings.
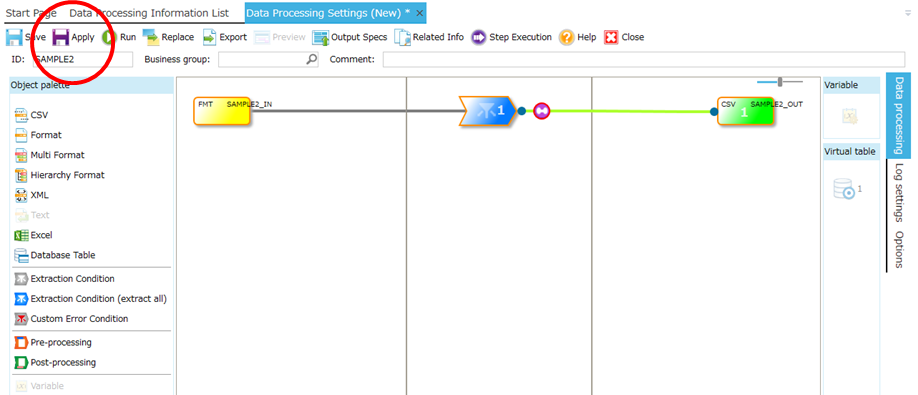
(10) Apply the data processing information.
Finally, in the Data Processing Settings screen, click Apply.
This completes the data processing information settings.
Checking the Output File
(1) Execute the utled command.
Now, let's check to be sure that the data processing requirements for this example are fulfilled. Remember, in this example, you needed to extract only the data for store number 105, the Ebisu store, from the order data in a fixed length file, and output that data to a separate CSV file.
Execute the following command:

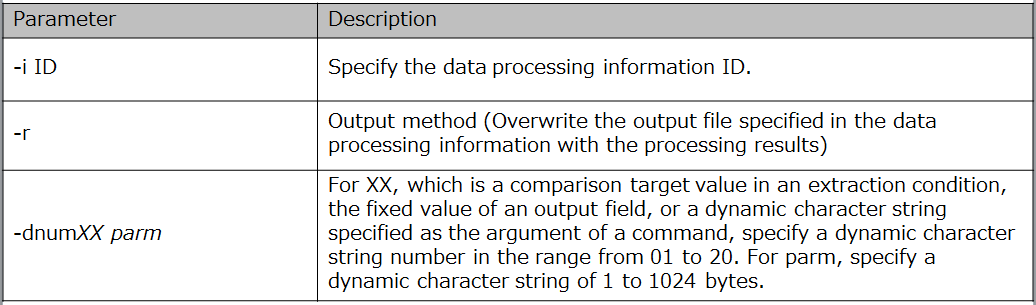
After processing successfully ends, check the output file.
(2) Check the output file.
In the folder C:\work\SAMPLE2\ which you specified in step (7) of Task 3, a file named out.csv is output.
- Check this file.
- When you executed the command, you specified -dnum01 105, so only the data for which the value for Store No. is 105 is output to the CSV file.

Conclusion
So, what do you think?
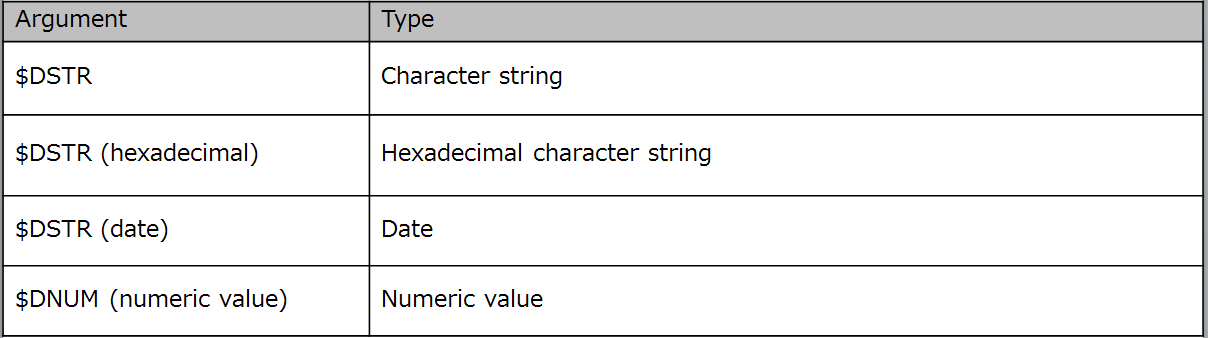
In this example, we specified a numeric
value field for a dynamic extraction condition, but you can also specify a character
string, a hexadecimal character string, or a date.
If you want to change this extraction
condition, you can change the values for Comparison
target - Type in the Extraction
Condition Settings screen, as shown in step (5) of Task 3.