Technical
Tips
How to Install HULFT8 for Windows
Introduction
- This tip is for your reference during the HULFT 8 for Windows (HULFT8) environment creation (installation) procedure.
- We hope this will help you not only to install the trial version, but also to prepare for participation in seminars and other activities.
- Please note that myHULFT registration is required to use the trial version.
- We will also follow the procedure in this tip.
Overview
This tip is about installation only, and does not address topics such as HULFT file transfers and functions. If you would like to learn more about those aspects of HULFT, please see here.
The following environments and products are
used for this tip.
Note: If your OS, hostname, or any other information is different, please replace the terms and names used in the tip with the appropriate equivalent for your system.
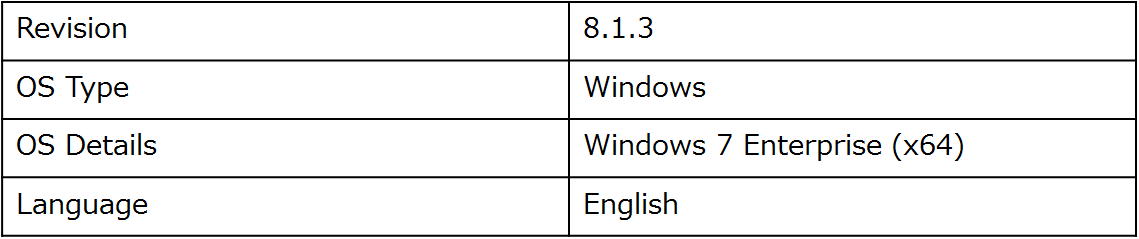
Installation Environment Information

Installation Product Information (Trial Version)

Note: The available trial version is usually the latest version of HULFT. At the time of the writing of this article, the latest version is version 8.1.3.
- Step 1: Prepare the Environment (Install the Required Software)
- Step 2: Obtain the Installer, Product Key, and License Key
- Step 3: Install HULFT8
- Step 4: Set Up a Communication Port for HULFT8 (Specify Firewall Settings)
- Step 5: Confirm that HULFT8 Starts
- Extra: Useful DOS Commands
Note: If you already have the installer, license, and product key, proceed to Step 3.
Step 1: Prepare the Environment (Install the Required Software)
When you use HULFT products, prerequisite software is required. The software that you need depends on the installation environment and OS.
Note: For information about recommended
memory size and other system specifications, see
HULFT website or Operating Environments in the Readme file.
The following information is current as of the writing of this article.
- Confirm the latest requirements for the HULFT8 Operating Environments.
Compatible Operating Systems (OSs)

Required Software
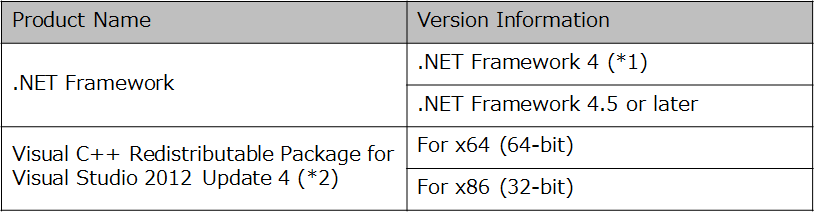
*1
You cannot operate HULFT with only .NET
Framework 4 Client Profile.
You must install a version of .NET
Framework 4 that includes the .NET Framework 4 Extended component.
You must also install the .NET Framework 4
update program, KB2468871.
- After you install the update program for
.NET Framework, you might need to restart your computer.
- Depending on your OS, you might need to
enable .NET Framework.
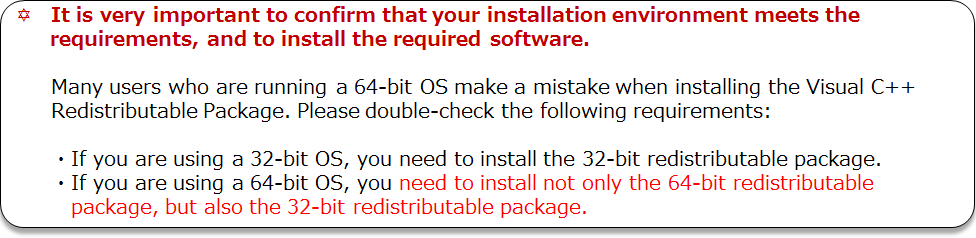
*2
If you are running a 32-bit version of
Windows, you must install the Visual C++ Redistributable Package for x86.
If you are running a 64-bit version of
Windows, you must install both the Visual C++ Redistributable Package for x64
and the Virtual C++ Redistributable Package for x 86.
- After you install the Visual C++
Redistributable Package, you might need to restart your computer.
- The Visual C++ Redistributable Package is
stored in the folder ISSetupPrerequisites in the installer.
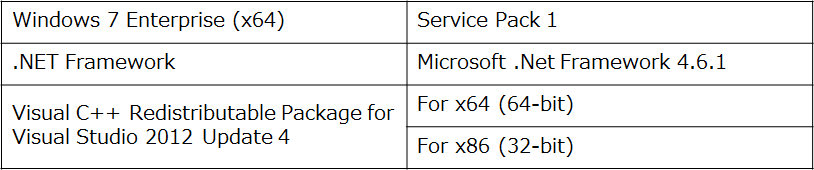
For this example, I installed the following software in the HULFT installation environment:
Step 2: Obtain the Product Installer, Serial Number, and Product Key
You can obtain installation media, Serial Number, and Product Key by going to HULFT.com and logging in to myHULFT.
- Information about myHULFT registration is not included in this article. For how to register, see the following:
-
myHULFT (Login Page)
- myHULFT Overview
Note: The following explanation assumes that you have completed myHULFT registration.
Step 2-1: Log in to myHULFT
myHULFT is the customer site that allows you
to use HULFT products and related services more conveniently.
This
site allows you to perform tasks such as using the trial version or viewing
product information. Anyone can register, and the registration process is very
simple.
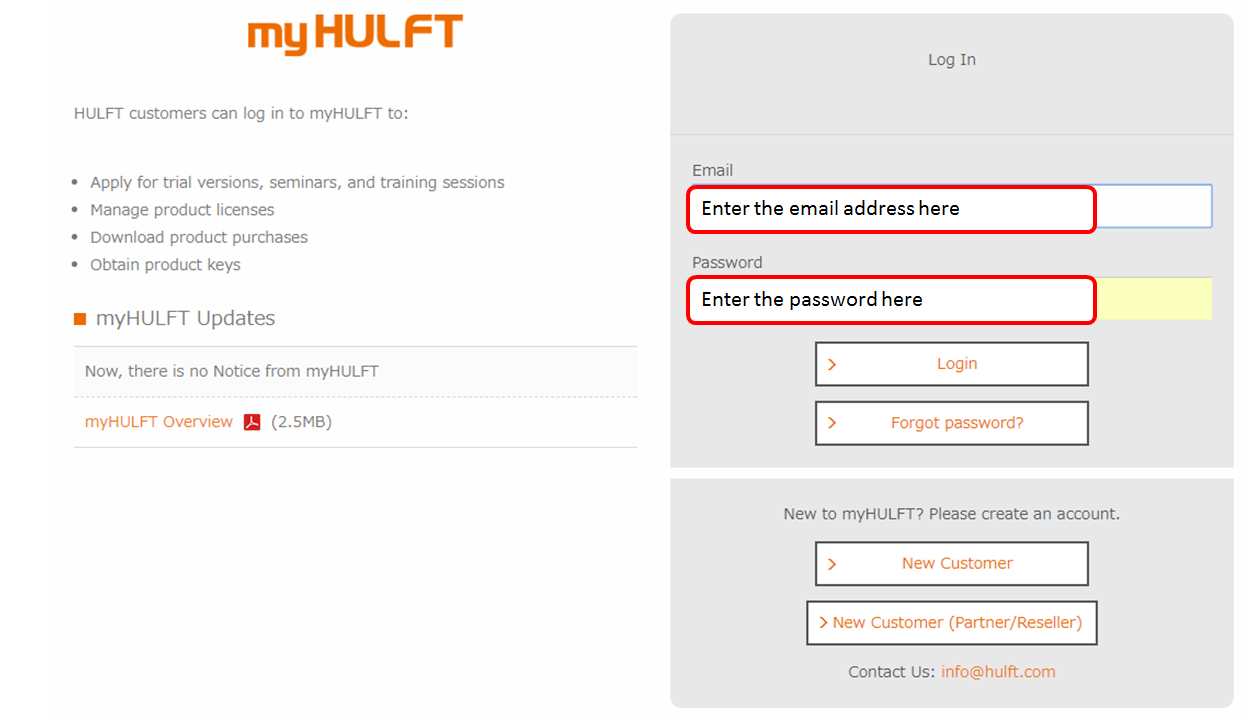
Now, we will obtain the installer, Serial Number, and Product Key to be used for installation from myHULFT.
Enter
the email address and password that you used for registration, and log in.
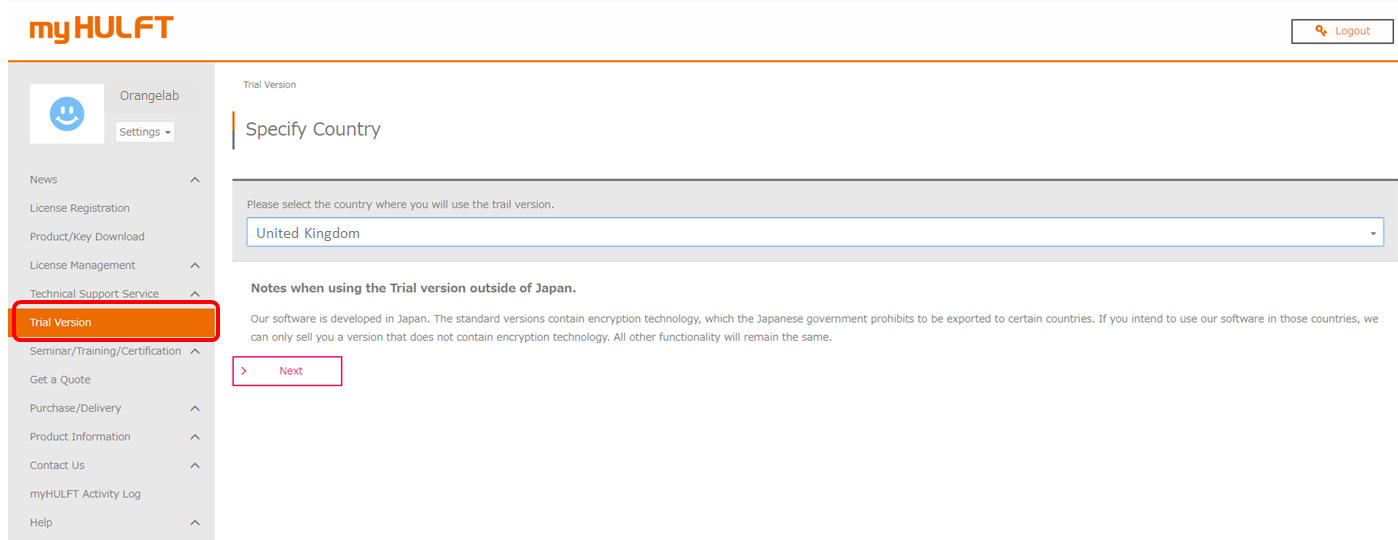
Step 2-2: Apply to Use the Trial Version Product
From the menu, choose Trial Version.
Follow the instructions on the screen to issue a license and download installation media.
When you complete the above procedure, instructions for starting to use the trial version will be sent to the email address that you used for registration. This email will be sent from a no-reply address, and will contain "myHULFT" in the subject line.
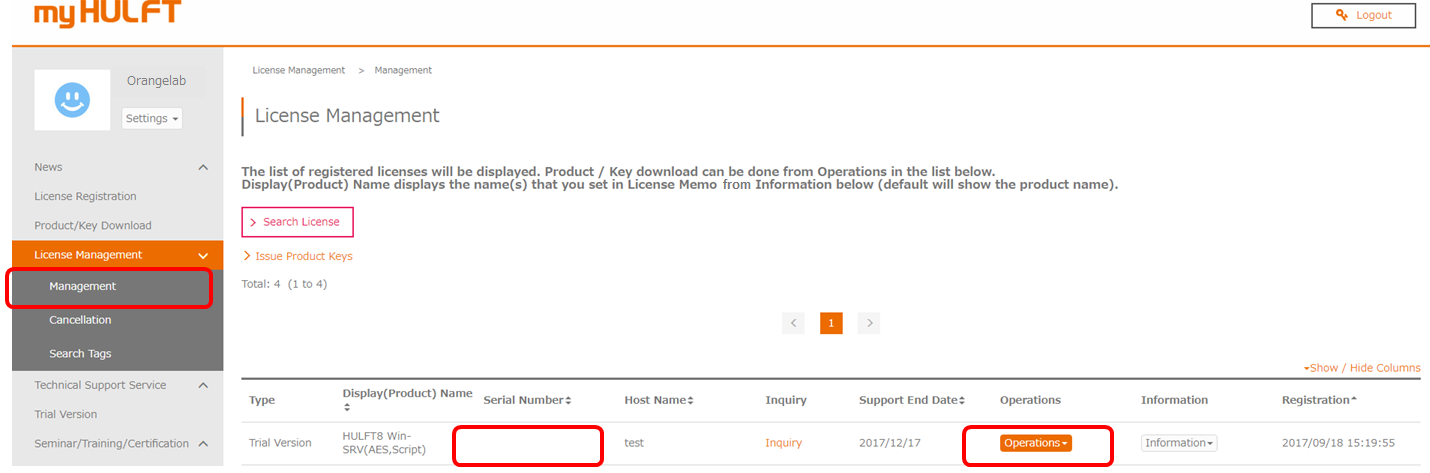
Step 2-3: Download the Trial Version Product from the License Management Menu
- From the menu, select License Management and Management, then download the trial version you registered.
- From the Operations drop-down menu, select Download.
Note: You can download the trial version in ISO (*.ISO) or ZIP (*.zip) format. For this example, I will download the ZIP file.
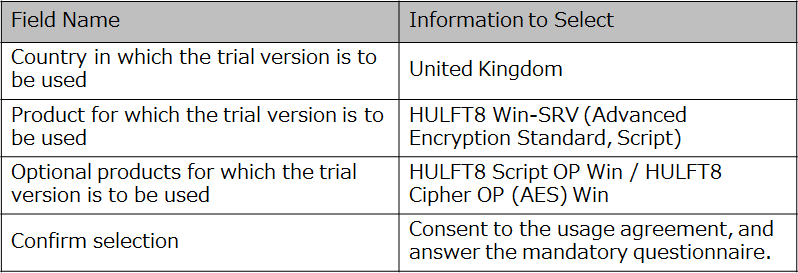
Step 2-4: Issue Product Key
From the menu Management in License Management, select Issue Produce Keys.
You can specify values for the following
fields. For this example, I specified the values as below.
When the Product Key is successfully
issued, the Serial Number and Product Key are displayed on the screen.
Note: It is recommended that you download
the Serial Number and Product Key (for example, as a PDF file or a CSV file)
for future reference.
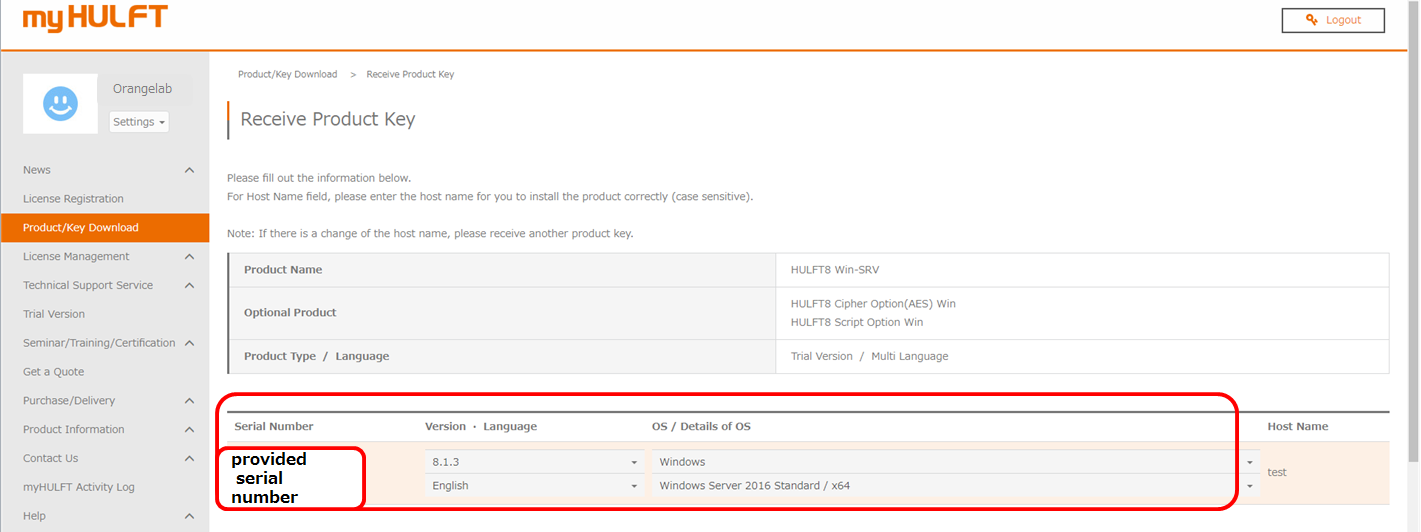
Note: The Serial Number will be output to
the area that is enclosed here by a red frame.
Please be sure to select the correct
information about the environment in which you want to install HULFT before
issuing a license.
Step 3: Install HULFT8
There are no major differences between the installation procedures to be used for the ISO file and for the ZIP file. For this example, I will use the ZIP file to explain the procedure.
Step 3-1: Unzip the ZIP File
The first thing to prepare
is to unzip the ZIP file that you downloaded to the desktop.
Note: You can unzip the file to any
location, but it must be a location from which .exe files can be executed.
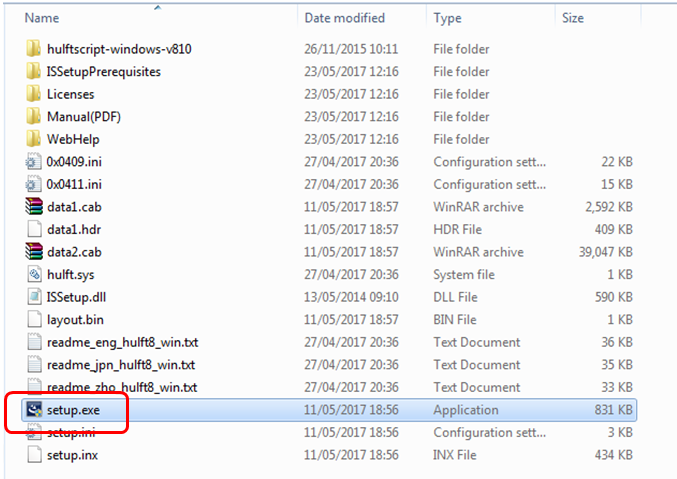
Step 3-2: Open the Installer
When you unzip the ZIP file, a folder named hulft-windows-v813 will be created. Open this folder and execute setup.exe.

Step 3-3: Perform Installation Setup
To perform installation setup, follow the steps on the screen, and click Next or Yes to continue.
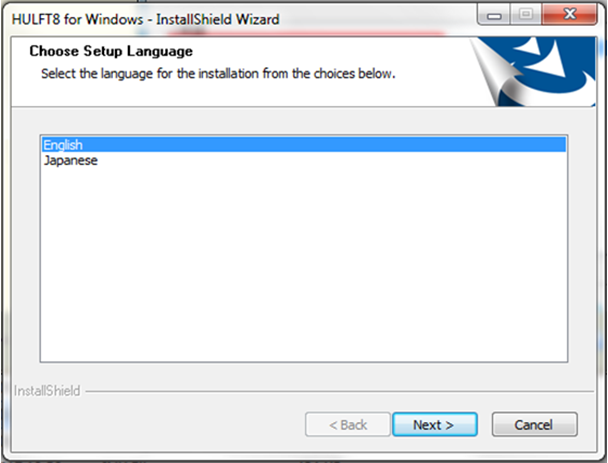
1. Select English for the setup language.
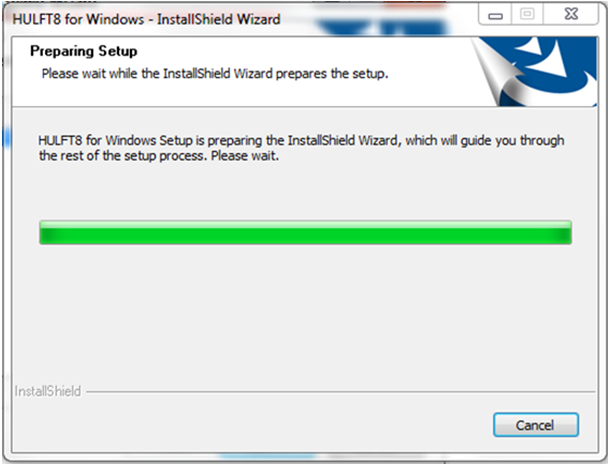
2. The installer prepares for setup. Wait until this preparation is complete.
Note: Depending on factors such as your computer's memory usage, it may take a while before the preparation is complete.
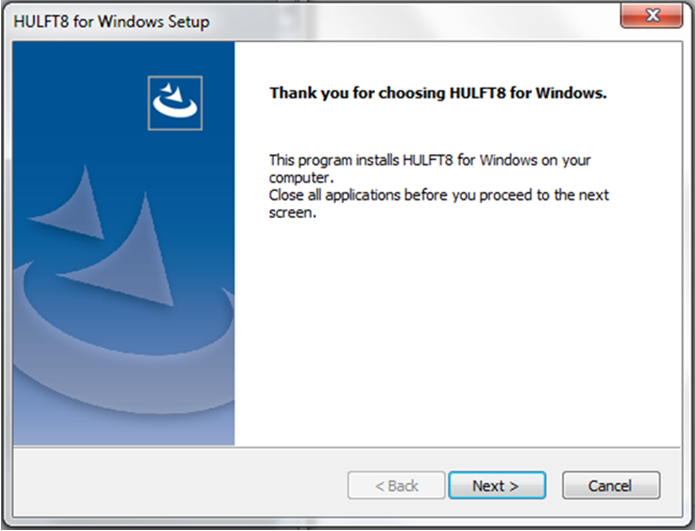
3. Click Next to continue with the installation.
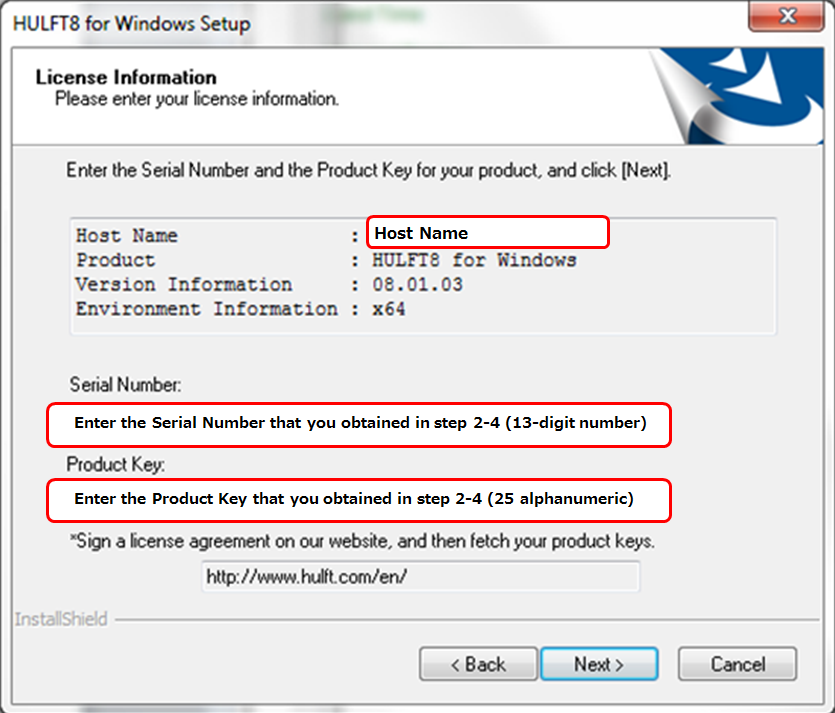
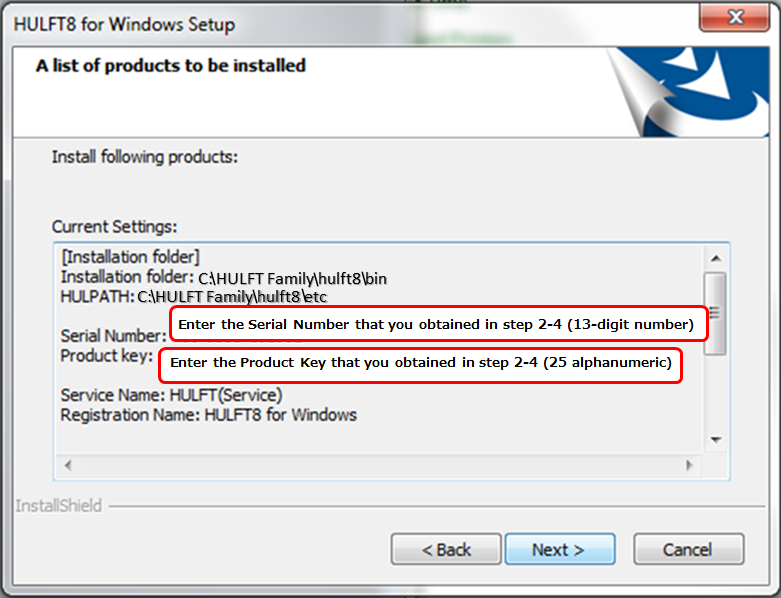
4. Enter the serial number and the product key that you obtained in step 2-4.

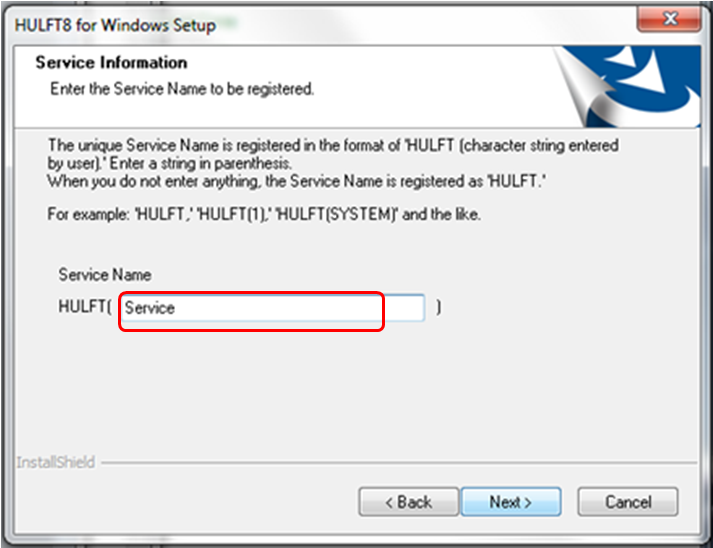
5. Specify the service name to be registered in the system.
"HULFT" is fixed. However, you can specify the part of the service name that appears after "HULFT". In this example, I have entered the service name as shown in the following screenshot. The service name is registered as "HULFT (Service)".
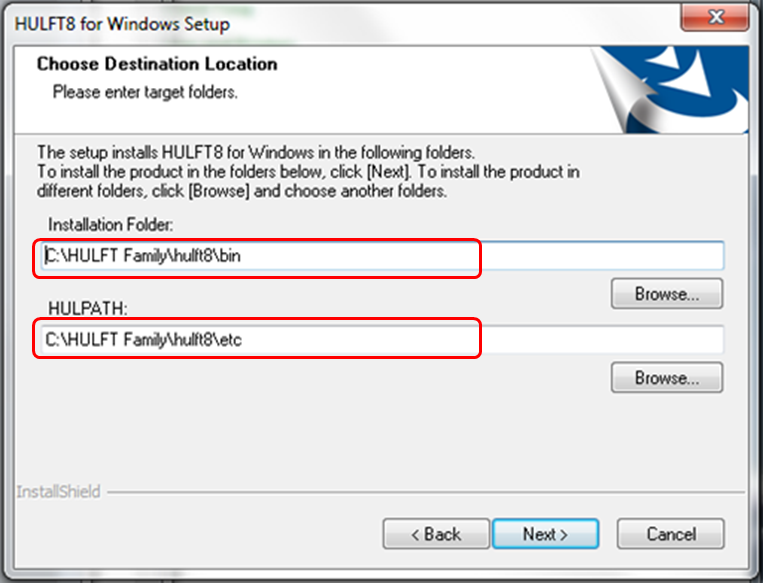
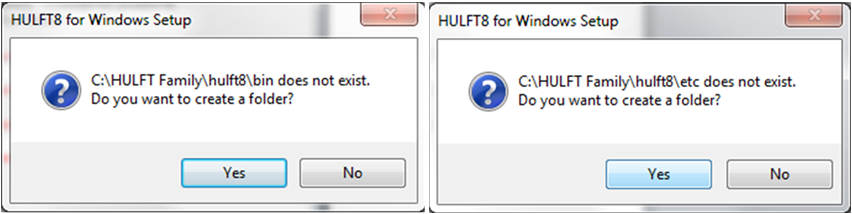
6. Specify the installation folder.
For this example, I have left the Installation Folder and the HULPATH folder as the default value.
7. The following screens appear, and you are prompted to create the Installation Folder and the HULPATH folder.
Create these folders, and move on to the next step.
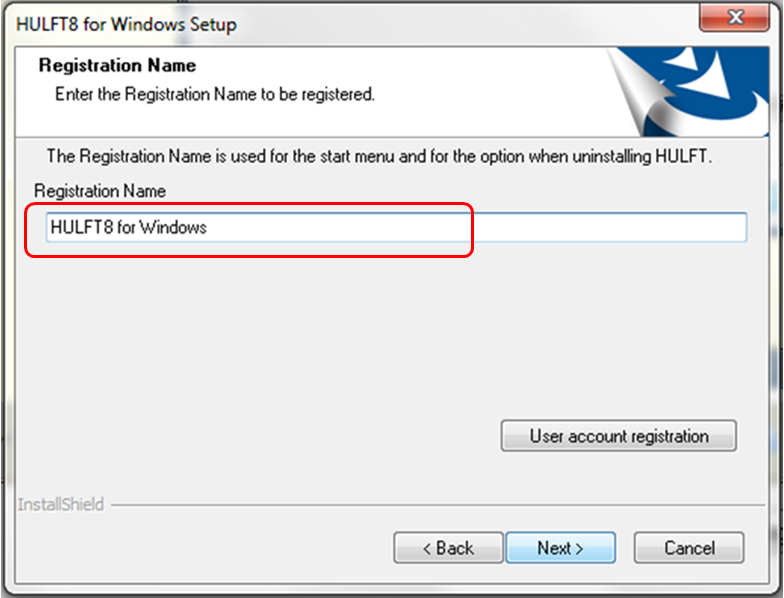
8. Specify the name that is to be registered in the Start menu.
For this example, I use the default name as it is.
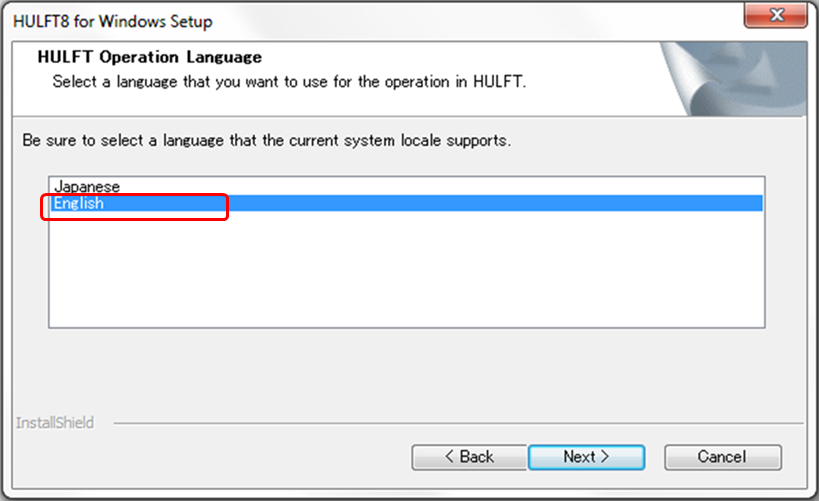
9. Specify English for the HULFT Operation Language.
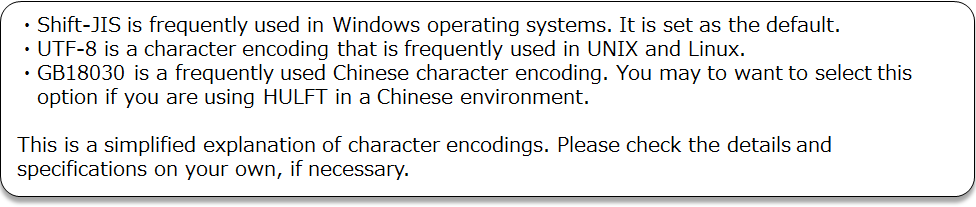
10. Specify the Code Set to be used for transfer.
Because we are using Windows, the default is UTF-8.

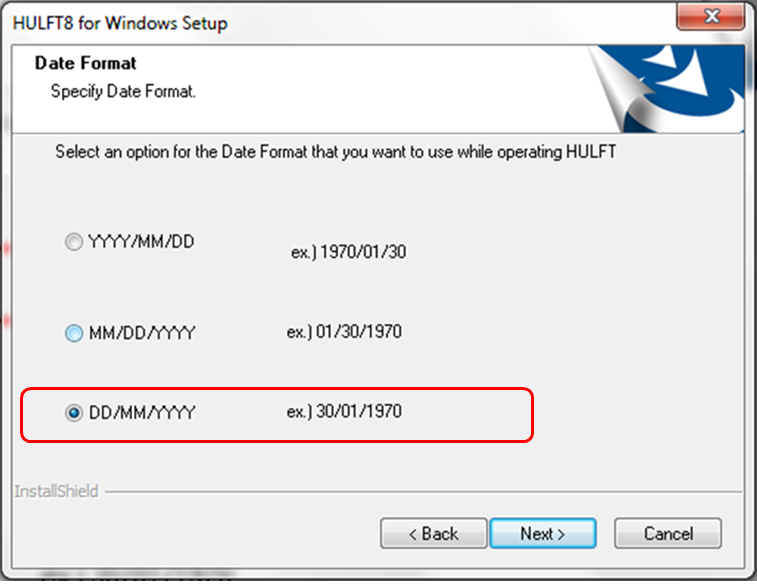
11. Select the date format that you want to use for HULFT.
For this example, we select DD/MM/YYYY(D).
12. Confirm the installation information, and if there is no problem, proceed to the next step.
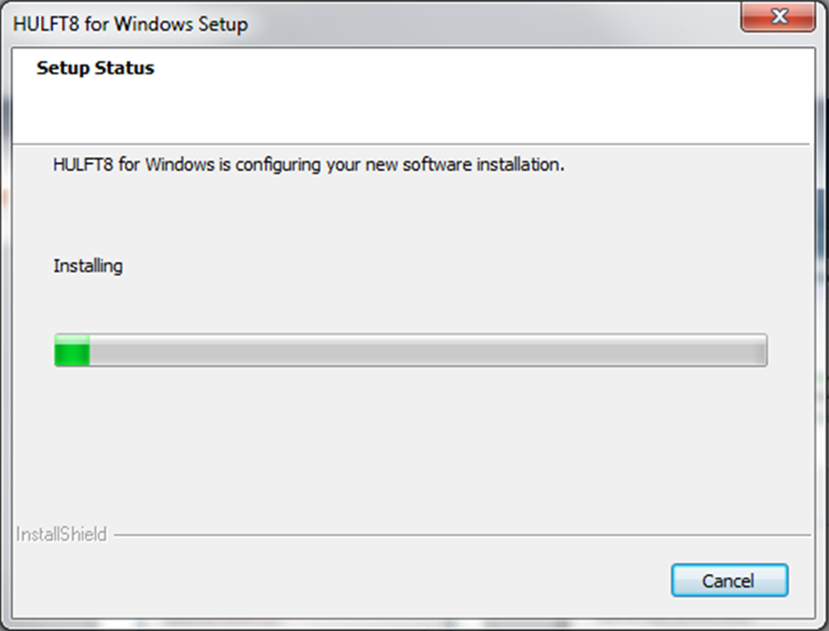
13. The system is configured by using the information that you specified. Wait until system configuration is complete.
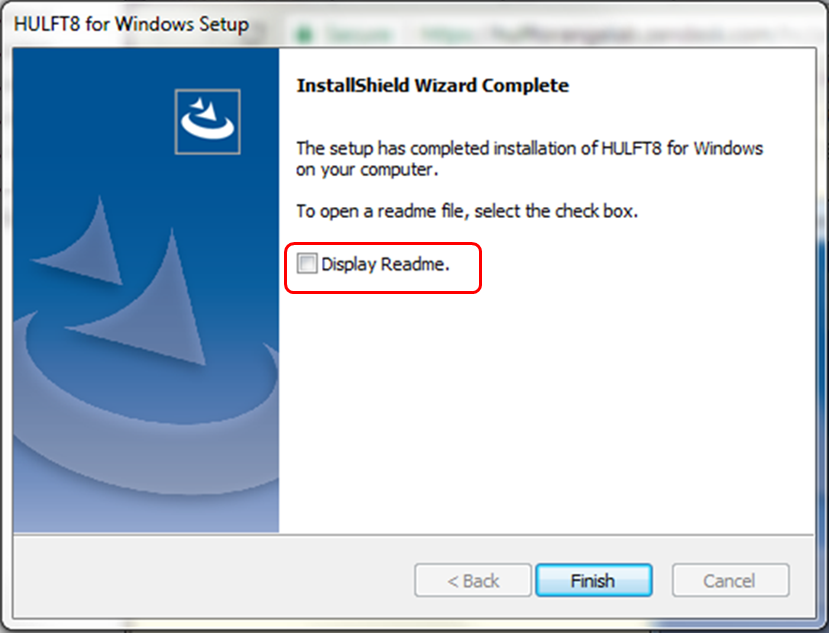
14. The installation finishes, and the
Installation Complete screen appears.
Select the Display Readme check box and complete the installation.
Note: For this example, we cleared this check box, but you can leave it selected if you prefer.
Step 4: Set Up a Communication Port for HULFT8 (Specify Firewall Settings)
HULFT file transfers use a communication
port.
If the firewall is enabled, you might not be
able to use the communication port, and as a result, you might not be able to
perform file transfers.
Now, I will use the Windows Firewall as an
example to explain how to allow the program to use the communication port.
Note: The specific procedure and methods for allowing programs varies depending on the security software that you use. Please refer to the following procedure and specify similar settings in your security software.
Step 4-1: Specify Windows Firewall Settings
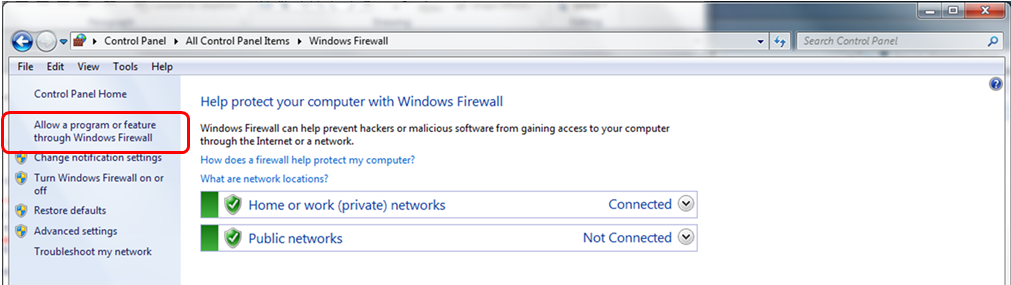
1. From the Start menu, select Control Panel, and then click Windows Firewall.
2. In the Windows Firewall screen, click Allow a program or feature through Windows Firewall.
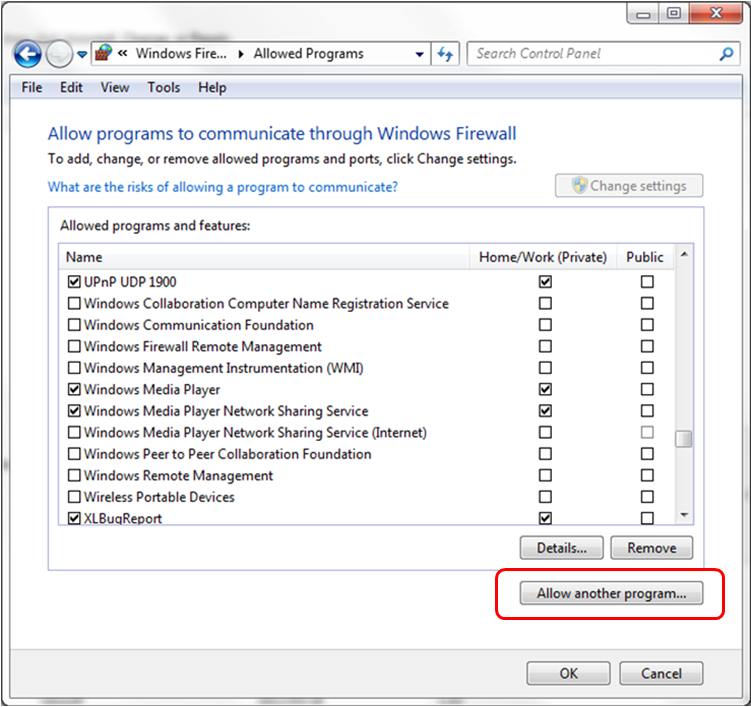
3. The allowed programs screen opens. Click the Allow another program... button at the bottom of the screen.
4. In the Add an program dialog box, click the Browse... button and select the following files in the HULFT installation folder to add them to the list of allowed apps.


Step 4-2: Confirm Installation
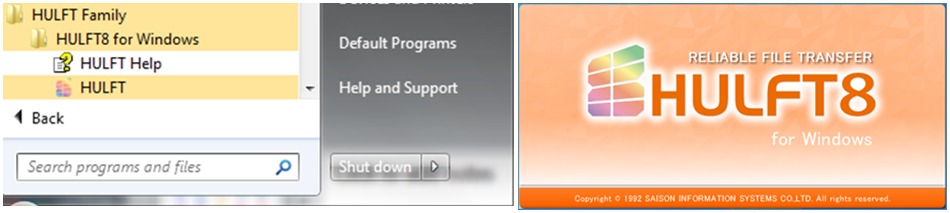
When installation of HULFT8 is complete,
HULFT is added to the Start menu.
Right-click HULFT, and select Run as
administrator. The startup logo screen appears.
Note: If you do not run HULFT as an administrator, you might not be able to perform Step 5-1: Manually Start the Services.
Step 5: Confirm that HULFT8 Starts
Step 5-1: Manually Start the Services
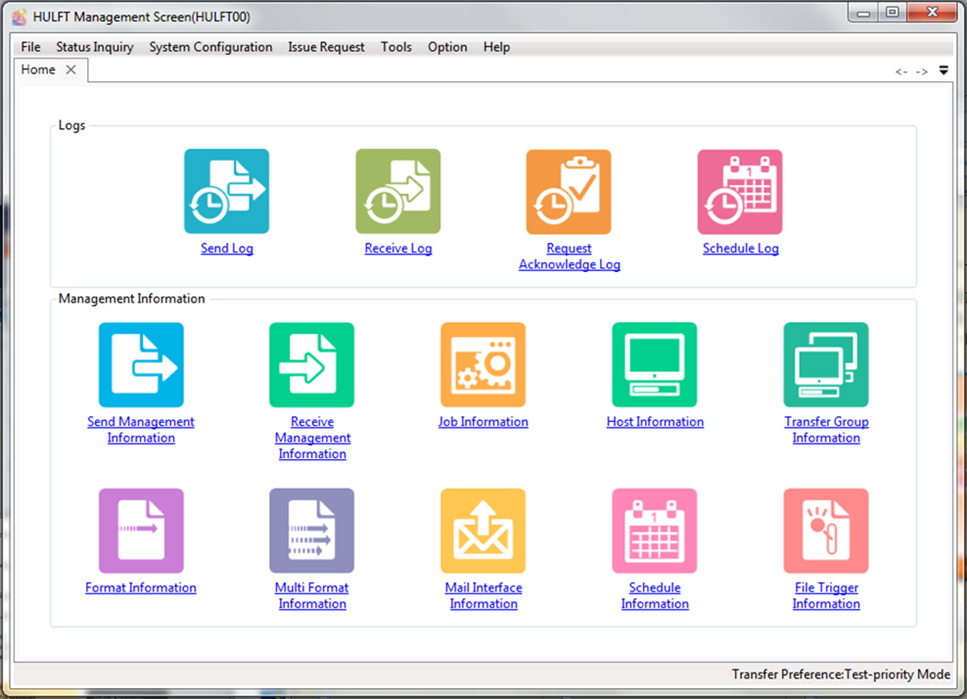
1. If all steps up to step 4-2 have been successfully completed, the startup logo screen will be followed by the Start Page, which is shown below.
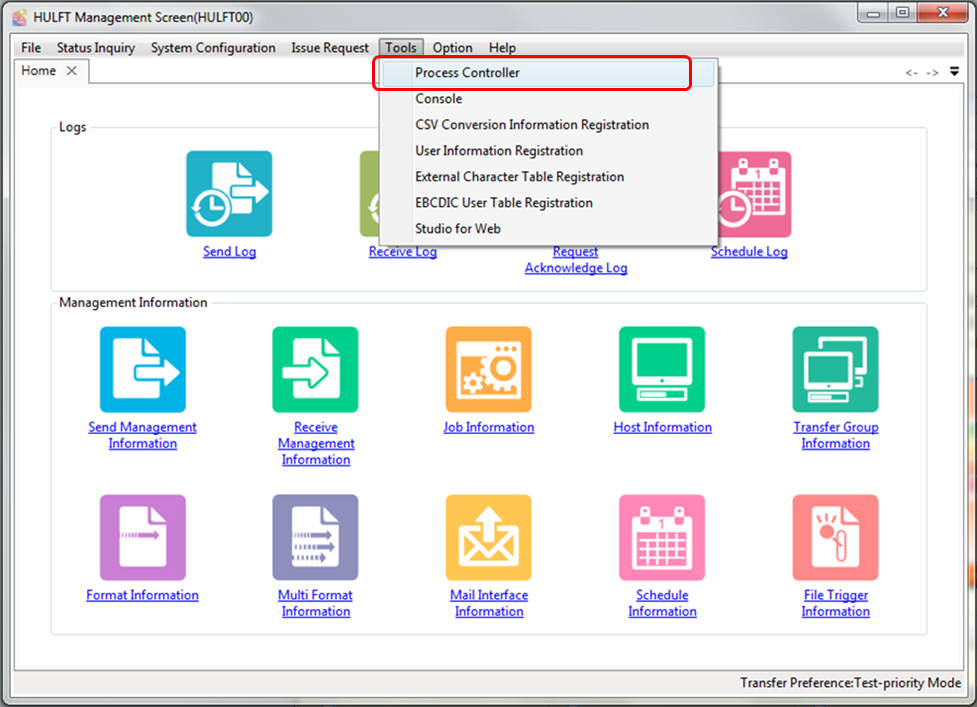
2. In the menu, select Tools and then Process Controller.
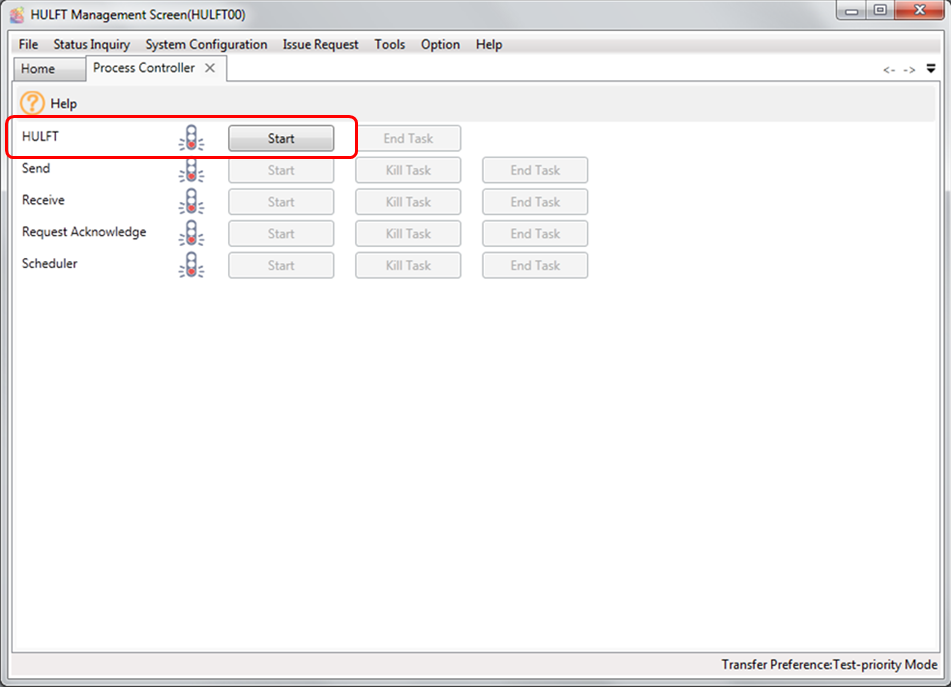
3. If you started HULFT without restarting
your computer after installation, all of the programs (services) are stopped,
as shown in the screenshot.
Click the Start button for the HULFT
service.
Note: If you restarted your computer after installation, the services start up automatically. In this case, the Process Controller screen should display as it does in step 5-2.
Step 5-2: Confirm that the Services Are Running
When all of the programs (services) have started, the screen should be shown as below.
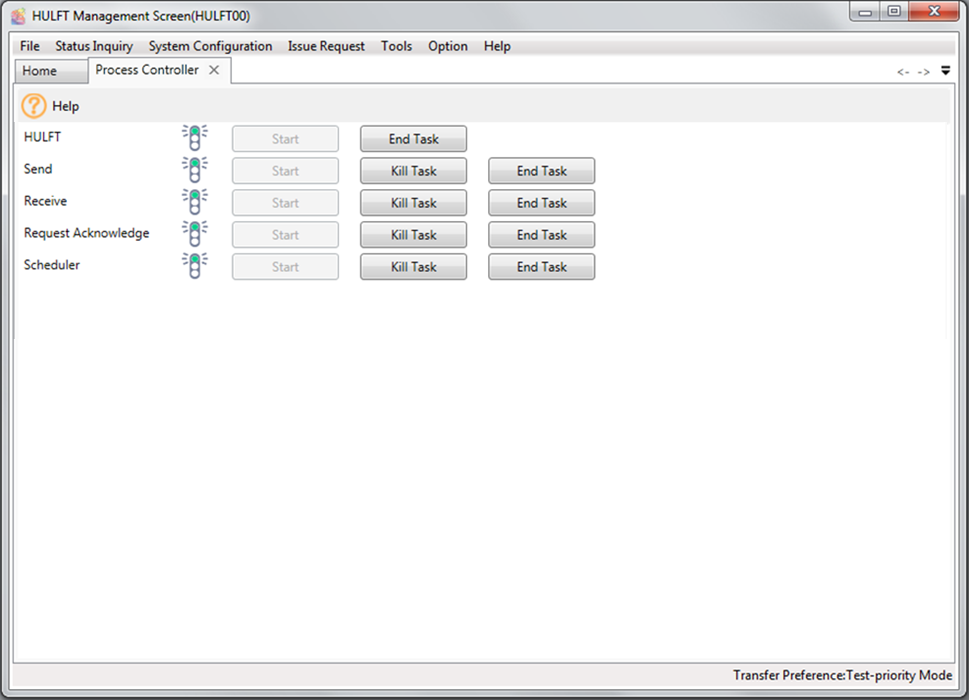
This concludes the normal startup of all of the HULFT programs (services).
Extra: Useful DOS Commands
So far, in this article, I have introduced
the detailed procedure for downloading and installing HULFT, and starting the
HULFT services.
Now,
I would like to show you a few of the useful commands that you can use in the
command prompt.
Host information: Check your own hostname.
Open the command prompt and enter
"hostname". You can check the host name of the terminal on which you
executed the command.
The following is an example of the command
prompt when the host name is displayed:

Host information: Check whether HULFT can communicate with a host.
Open the command prompt and execute a ping
command for the host with which you want to communicate. You can check whether
HULFT can communicate with the host.
Without going into too much detail, the ping
command sends a packet to the specified host, and checks whether the host
responds.
The following is an example in which a ping
command was executed, but the specified host could not be found:

Conclusion
In this tip, we introduced the procedure for installing HULFT. However, unexpected problems are not addressed in this procedure may arise as a result of installation conditions such as the combination of the OS and product version that you are using.
If you have any problems with HULFT
operations or settings, you can solve these problems in the following ways:
- Check the Installation Manual, which is
located in the HULFT installation folder.
- Contact us via the myHULFT contact
page. myHULFT was introduced in step
2.
We hope you find this information helpful.