Technical
Tips
How to Perform a Full Backup of HULFT
Introduction
In this tip, we'll talk about how to fully back up and restore HULFT.
By performing a full backup, you can restore the HULFT environment and recover from situations such as hard disk failure.
Performing a Full Backup and Restoration of HULFT for UNIX/Linux
Use a Linux or UNIX command to archive the HULFT installation directory.
Let's try performing a full backup of HULFT.
1. Confirm that the HULFT resident daemons are running.
[root@localhost backup]# ps -ef | grep hulft
root 3466 1 0 16:23 pts/0 00:00:00 /opt/ hulft /800/bin/hulsndd
root 3468 1 0 16:23 pts/0 00:00:00 /opt/ hulft /800/bin/hulrcvd
root 3470 1 0 16:23 pts/0 00:00:00 /opt/ hulft /800/bin/hulobsd
root 3471 3470 0 16:23 pts/0 00:00:00 /opt/ hulft /800/bin/hulobsd
root 3473 2965 0 16:23 pts/0 00:00:00 grep --color=auto hulft
2. Stop all HULFT resident daemons.
[root@localhost backup]# $HULEXEP/utlkillsnd
[root@localhost backup]# $HULEXEP/utlkillrcv
[root@localhost backup]# $HULEXEP/utlkillobs
[root@localhost backup]# ps -ef | grep hulft
root 3529 2965 0 16:27 pts/0 00:00:00 grep --color=auto hulft
3. Confirm that the directory specified in the FIFO Path is excluded from backup.
<<Start-up Related Settings>> ESC: Cancel
TAB: Select
Work File Generation Path : /home/osada/HULFT/v810/tmp
FIFO Path : /home/osada/HULFT/v810/tmp
Command Acknowledge Port No. : 32810
Receive Port No. : 30810
Request Acknowledge Port No. : 31810
Send Process Multiplex Level : 10
Receive Process Multiplex Level : 0
Pid File Generation Path : /home/osada/HULFT/v810/etc
------------------------------------------------------------------------------
This field specifies the path in which temporary files created by HULFT
are stored.
HULFT may temporarily process sending data and receiving data
to create a work file.
Make sure that the unused area of this partition is sufficient.
Specify this field in an alphanumeric string within 200 bytes.
4. Use the tar command to archive the HULFT installation directory to hulft800.bk.
[root@localhost backup]# tar cvfp hulft800.bk /opt/hulft/800
tar: Removing leading `/' from member names
/opt/hulft/800/bin/
/opt/hulft/800/bin/exgcsv
/opt/hulft/800/bin/huljob
/opt/hulft/800/bin/hulobsd
/opt/hulft/800/bin/hulrcvd
- * Note: You can retain permissions when archiving files by specifying the -p option for the tar command.
5. Use the tar command to restore the archived file by specifying the restore destination.
[root@localhost backup]# tar xvfp hulft800.bk -C /
opt/hulft/800/bin/
opt/hulft/800/bin/exgcsv
opt/hulft/800/bin/huljob
opt/hulft/800/bin/hulobsd
opt/hulft/800/bin/hulrcvd
opt/hulft/800/bin/hulrjob
opt/hulft/800/bin/hulsnd
opt/hulft/800/bin/hulsndd
opt/hulft/800/bin/hulsndrc
6. Restart the HULFT resident daemons.
[root@localhost 800]# $HULEXEP/hulsndd
[root@localhost 800]# $HULEXEP/hulobsd
[root@localhost 800]# $HULEXEP/hulrcvd
[root@localhost 800]# ps -ef |grep hulft
root 4473 1 0 17:29 pts/0 00:00:00 /opt/ hulft /800/bin/hulsndd
root 4475 1 0 17:29 pts/0 00:00:00 /opt/ hulft /800/bin/hulobsd
root 4476 4475 0 17:29 pts/0 00:00:00 /opt/ hulft /800/bin/hulobsd
root 4478 1 0 17:29 pts/0 00:00:00 /opt/ hulft /800/bin/hulrcvd
root 4480 2965 0 17:29 pts/0 00:00:00 grep --color=auto hulft
[root@localhost 800]#
Performing a Full Backup and Restoration of HULFT for Windows
In the Windows version, use a command to completely copy the HULFT installation directory.
Let's try performing a full backup of HULFT.
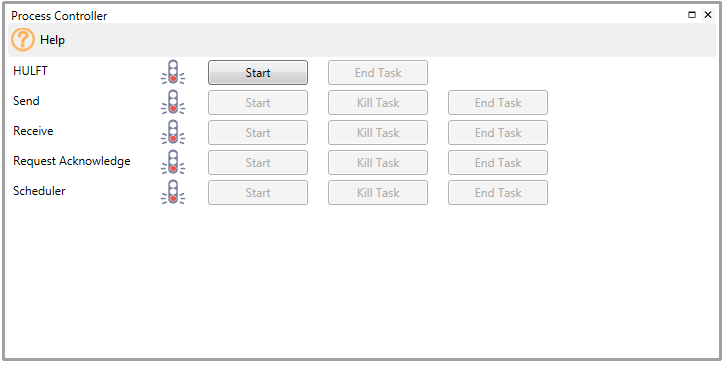
1. Stop all HULFT processes and services.
C:\Users\Administrator>net stop HULFT(800)
The HULFT(800) Service is stopping….
The HULFT(800) Service was stopped successfully.
2. Use xcopy to completely copy the HULFT installation directory.
C:\>xcopy "C:\HULFT Family\hulft8\*" "C:\backup\" /e /i /k /o
C:\HULFT Family\hulft8\bin\C4S.dll
C:\HULFT Family\hulft8\bin\help.exe
C:\HULFT Family\hulft8\bin\hmifiles.dll
C:\HULFT Family\hulft8\bin\hulapi.dll
C:\HULFT Family\hulft8\bin\hulapi64.dll
C:\HULFT Family\hulft8\bin\Hulcon.log
C:\HULFT Family\hulft8\bin\hulconv.exe
C:\HULFT Family\hulft8\bin\hulft.ini
C:\HULFT Family\hulft8\bin\hulft.sys
C:\HULFT Family\hulft8\bin\hulftrt.dll
C:\HULFT Family\hulft8\bin\hulftrt64.dll
C:\HULFT Family\hulft8\bin\hulinst64.dll
C:\HULFT Family\hulft8\bin\hulobs.exe
C:\HULFT Family\hulft8\bin\hulrcv.exe
C:\HULFT Family\hulft8\bin\hulsch.exe
C:\HULFT Family\hulft8\bin\hulsdd.exe
C:\HULFT Family\hulft8\bin\hulsndrc.exe
C:\HULFT Family\hulft8\bin\hulsrvc.exe
C:\HULFT Family\hulft8\bin\hulwin.exe
C:\HULFT Family\hulft8\bin\hulwin.exe.config
C:\HULFT Family\hulft8\bin\hulwin.ini
C:\HULFT Family\hulft8\bin\MonoCrypt.dll
C:\HULFT Family\hulft8\bin\schcancel.exe
C:\HULFT Family\hulft8\bin\schloglist.exe
C:\HULFT Family\hulft8\bin\schrmlog.exe
C:\HULFT Family\hulft8\bin\Setup.xml
C:\HULFT Family\hulft8\bin\utladmfileadjoin.exe
C:\HULFT Family\hulft8\bin\utlalivecheck.exe
C:\HULFT Family\hulft8\bin\utlbreak.exe
C:\HULFT Family\hulft8\bin\utlchgunicode.exe
C:\HULFT Family\hulft8\bin\utlcomp.exe
3. Restore all of the copied files.
C:\>xcopy "C:\backup\*" "C:\HULFT Family\hulft8\" /e /i /k /o /y
C:\backup\bin\C4S.dll
C:\backup\bin\help.exe
C:\backup\bin\hmifiles.dll
C:\backup\bin\hulapi.dll
C:\backup\bin\hulapi64.dll
C:\backup\bin\Hulcon.log
C:\backup\bin\hulconv.exe
C:\backup\bin\hulft.ini
C:\backup\bin\hulft.sys
C:\backup\bin\hulftrt.dll
C:\backup\bin\hulftrt64.dll
C:\backup\bin\hulinst64.dll
C:\backup\bin\hulobs.exe
C:\backup\bin\hulrcv.exe
C:\backup\bin\hulsch.exe
C:\backup\bin\hulsdd.exe
C:\backup\bin\hulsndrc.exe
C:\backup\bin\hulsrvc.exe
C:\backup\bin\hulwin.exe
Note: Make sure that the path of the destination directory for the restored files is the same as the path of the installation directory prior to backup.
4. Start HULFT services or processes.
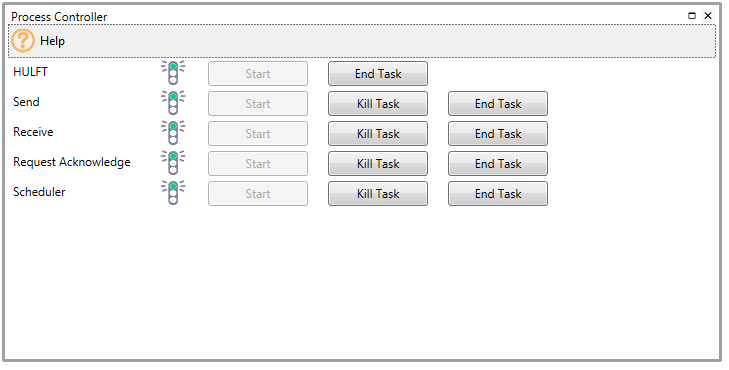
C:\Users\Administrator>net start HULFT(800)
The HULFT(800) Service is starting.
The HULFT(800) Service was started successfully.
Note: You cannot start HULFT in a new environment when no services have been registered.
Register services by using the utlservice command.
Notes When Performing a Full Backup and Restoration
For Linux/UNIX
- Be sure to stop all HULFT resident daemons before performing a backup and restoration.
- Be sure to exclude from the backup all files and folders in the directory specified as the FIFO Path for system environment settings.
- Be sure to retain file permissions when performing a backup and restoration.
For Windows
- Make sure to stop all HULFT processes and services, including screens such as management screens, before performing a backup and restoration.
- You cannot restore the files to a HULFT environment that is different from the HULFT environment at the time you performed the backup.
- Make sure to retain file permissions when performing a backup and restoration.
Conclusion
So, what do you think?
You can perform a full backup and restoration of HULFT with nothing more than your OS's basic commands.
The process is simple compared to most other software, and can be carried out in a short time. Therefore, the chance of human error and the effect on the overall system are reduced.
We hope those of you who have hesitated to back up HULFT will take this opportunity to give it a try.