Technical
Tips
How Want to Convert a Receive File to CSV Format
Introduction
Did you know that HULFT has a function that can convert receive files to CSV files?
When you execute a format transfer, HULFT can convert files to CSV format, based on the information registered in CSV Conversion Information on the receiving host.
For this tip, let's assume that you're using a format transfer to send sales data from branch stores that use a legacy system to an open system. You want to convert the data files to CSV and then use those CSV files to put the data into a database. Well, you can do that using the CSV conversion function.
Flow of Tasks for Converting Receive Files to CSV
The following items must be specified in the HUFLT System Environment Settings in order to dynamically specify receive file names:
Dynamic Parameter: Enable Dynamic Specification
Message Dynamic Parameter Specification: Always Replace Messages and Variables
When the above specifications are complete, apply the settings by restarting HULFT.
Set Up Code Conversion in Send Management Information
After the file has been received, the sales data is converted to CSV based on the CSV Conversion Information.
To convert a receive file to CSV, you must specify the following settings.
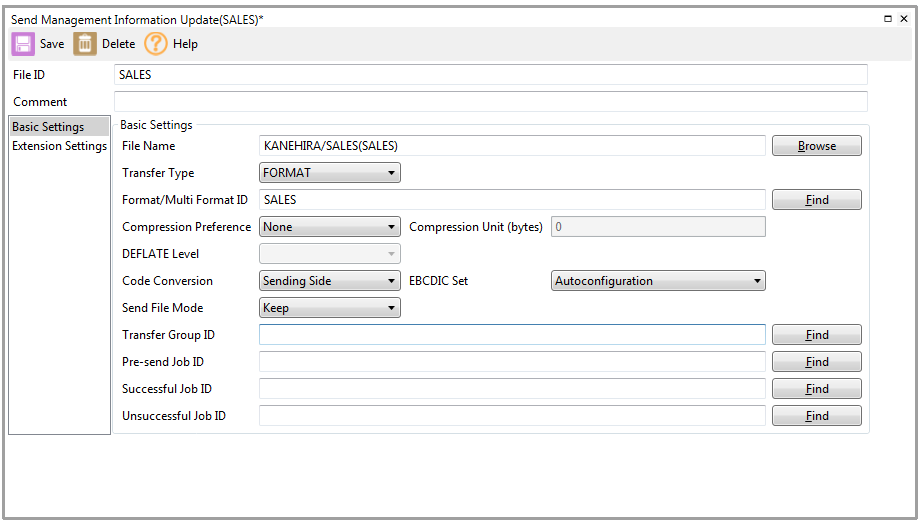
In Send Management Information, for Transfer Type, specify FORMAT or MULTIFORMAT.
For Format/Multi Format ID, specify the format information.
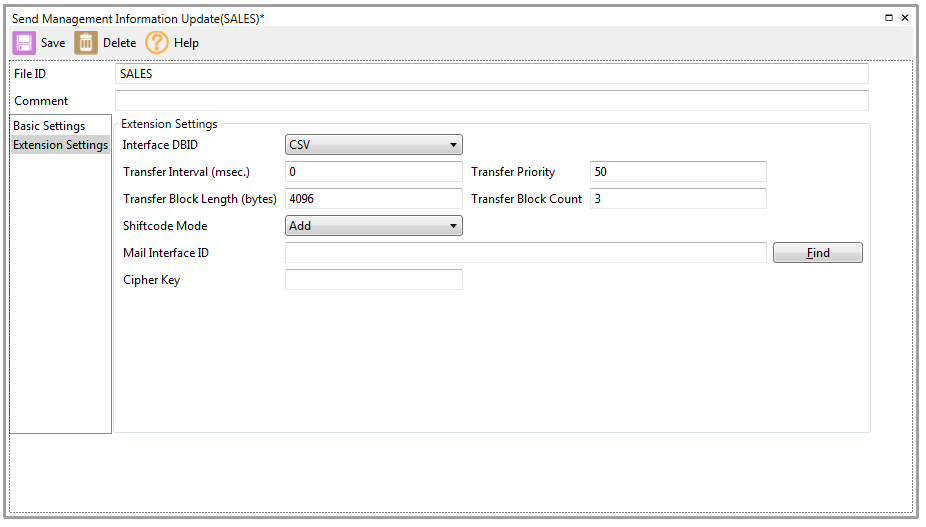
In Send Management Information, for Interface DBID, specify CSV.
Register the CSV Conversion Information in HULFT on the receiving host.
Let's Try Converting a Receive File to CSV
Let's try an actual CSV conversion by following the steps for specification listed in "Flow of Tasks For Converting Receive Files to CSV".
The operating environment is as follows:
| Sending Host | Receiving Host | |
|---|---|---|
| OS | i5OS | Windows7 |
| HULFT | HULFT731 | HULFT800 |
| File ID | SALES | SALES |
The contents of the file to be sent are as follows:
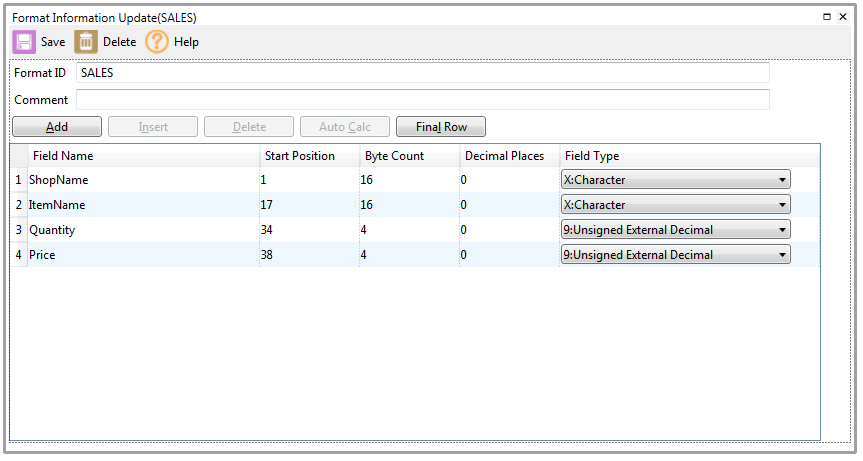
| Branch name (16 bytes) | Product name (16 bytes) | Quantity (4 bytes) | Unit price (4 bytes) |
|---|---|---|---|
| Ikebukuro | Notebook | 1000 | 0100 |
| Nerima | Ballpoint pen | 0100 | 0250 |
| Itabashi | Plastic file | 0200 | 0100 |
| Urawa | Glue | 0050 | 0120 |
| Fujimino | Business card file | 0010 | 0200 |
| Tokorozawa | Mouse | 0005 | 3500 |
| Asakadai | Batteries | 0020 | 0150 |
| Kawagoe | Stapler | 0005 | 0200 |
| Fujisawa | Calculator | 0003 | 2000 |
Let's try it now.
1. Specify the Format Information in the following way, to match the contents of the files to be sent.
2. In Send Management Information, for Transfer Type, specify FORMAT. For Format/Multi Format ID, specify the Format ID you created.
3. In Send Management Information, for Interface DBID, specify CSV.
4. Register the CSV Conversion Information in HULFT on the receiving host.
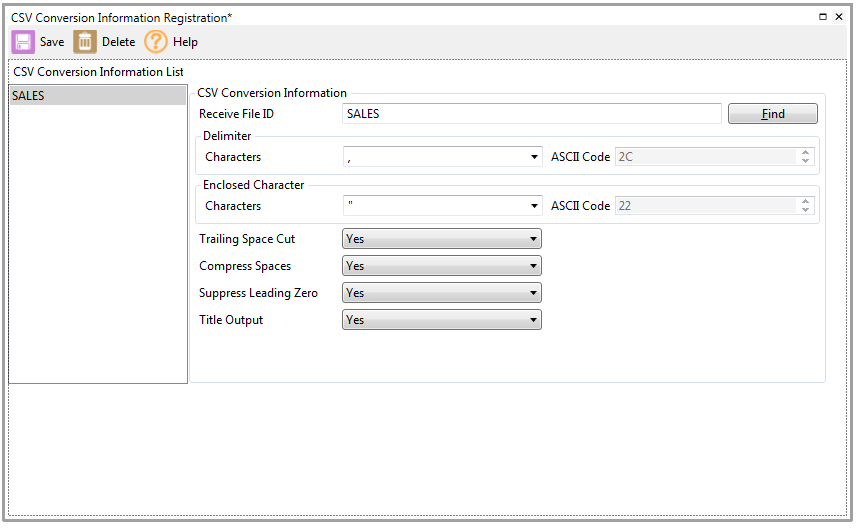
- Receive File ID
Specify the File ID of the receive file you want to convert to CSV. - Delimiter
Specify the character to be used to separate fields. - Enclosure Character
Specify the character to be used to enclose fields. - Title Output
Set the Format Information fields to be output as a header on the first line.
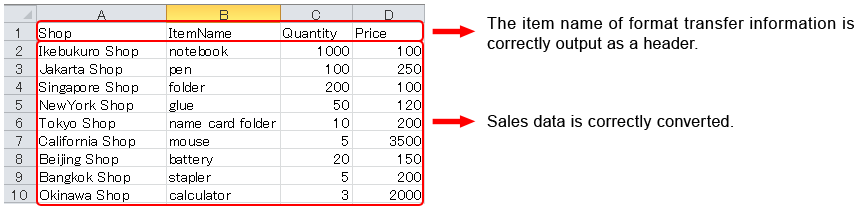
5. When you send the file, a file named receive-file-name.csv is created in the same directory as the receive file.

6. Open the CSV file and confirm that it was converted correctly.
Conclusion
So, what do you think?
CSV files are supported by many types of spreadsheet and database software, so they're often used to share data between different software programs.
By using the CSV Conversion Information on the receiving host, HULFT can help you meet your business's needs by performing CSV conversion when you transfer files. Because you don't need to set up your own CSV conversion tool in advance, this function is especially convenient for users who want to perform data conversion immediately.
Please take this opportunity to try the CSV conversion function.