Executing Manager installation
This section explains the installation procedure of Manager.
(1) In Windows
If you perform the following installation procedure, the server configuration will be as follows:
|
Software |
Item |
Setting value |
|---|---|---|
| Manager |
Installation folder* |
C:\HULFT Family\hulftiot-manager\manager |
| Service name |
|
|
| Registered name (the name that appears in [Programs and Features]) | IoT Manager | |
| Port number | 8765 | |
|
HULFT |
Installation folder |
C:\HULFT Family\hulftiot-manager\hulft |
|
Service name |
|
|
| Registered name (the name that appears in [Programs and Features]) | HULFT8 (IoT Manager) | |
| Port number | 30000 | |
| PostgreSQL |
Installation folder |
C:\HULFT Family\hulftiot-manager\manager\postgresql |
|
Service name |
|
|
| Registered name (the name that appears in [Programs and Features]) | IoT Manager | |
|
Database name |
hulftiot |
|
|
Port number of database |
5432 |
|
* |
: |
The environment settings file (application.properties) is deployed in this folder. This is an environment settings file storage folder. |
Installation procedure
Perform the following procedure as a user who has administrative privileges:
1. Execute Install.exe file.
Execute the Install.exe file in the working folder for installation (C:\temp\Manager_for_Windows). The IoT Manager Setup screen appears. If the setup screen does not appear, see Troubleshooting Manager installation.
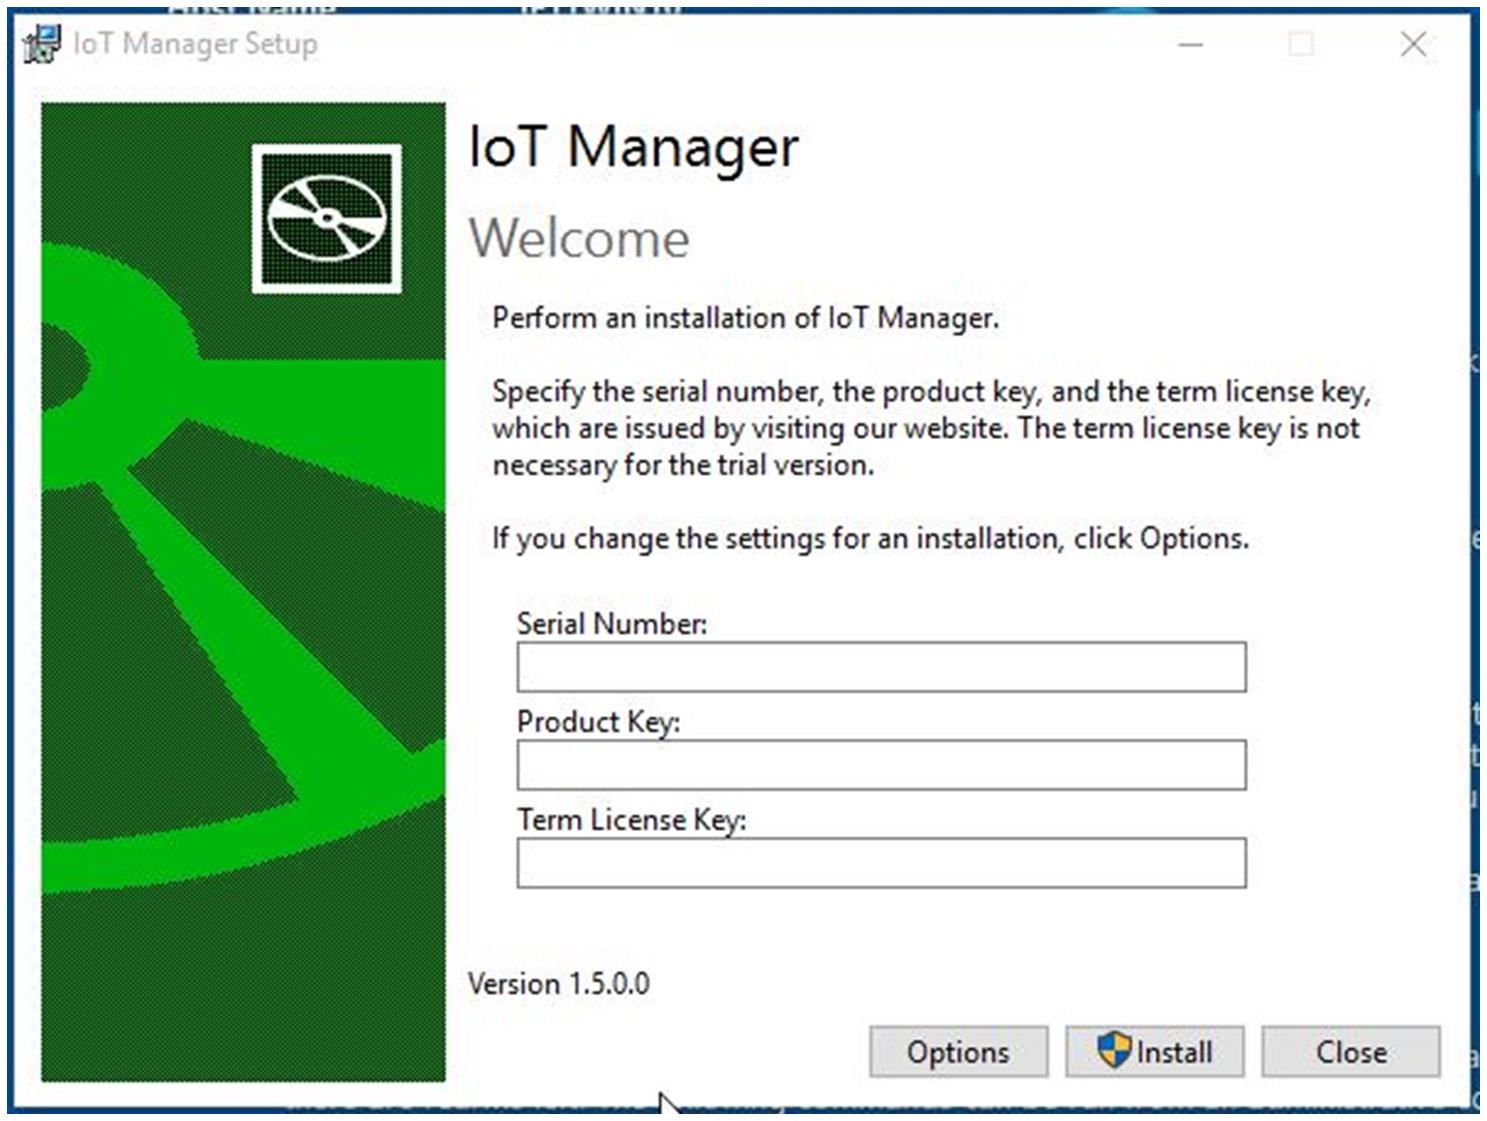
2. On the setup screen, input the following information that you have prepared in advance.
-
Input item Product version Trial version Serial number ü ü Product key ü ü Term License Key ü ü
:
This parameter is necessary.
blank
:
This parameter is not required.
3. Click [Install].
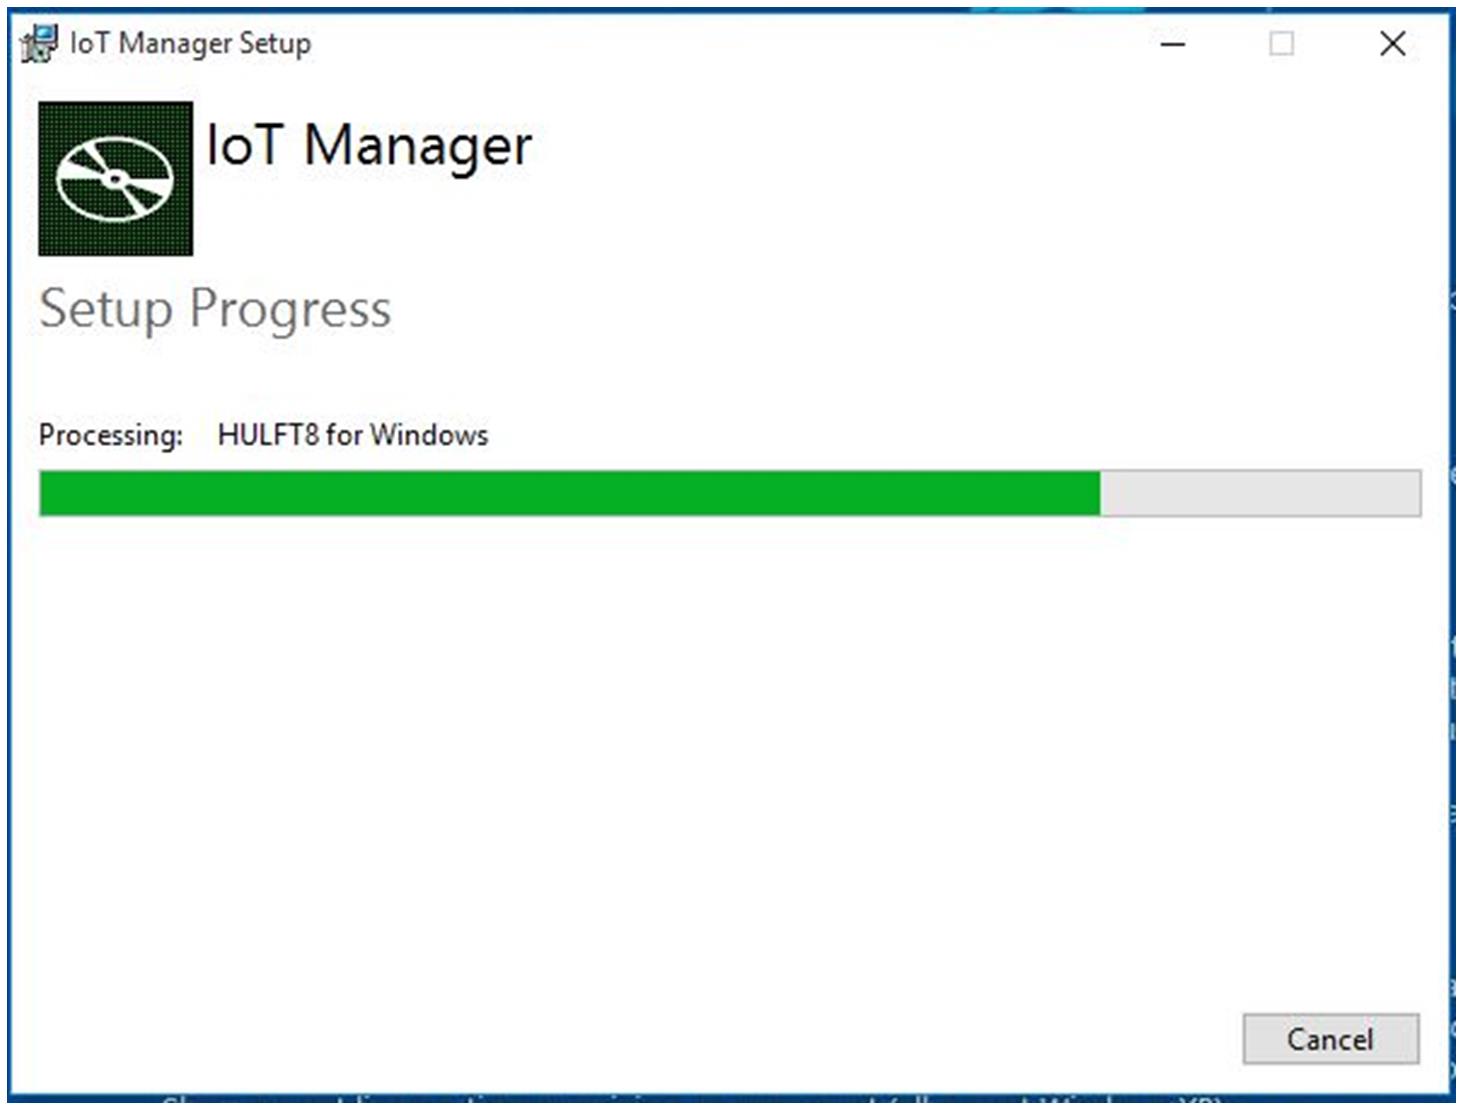
The installation starts after the screen that indicates the setup progress appears.
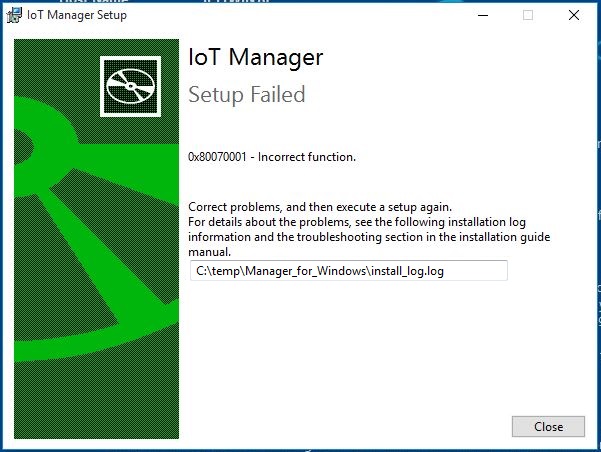
If the installation failed, the following screen is displayed. The path of the installation log file is displayed. See Troubleshooting Manager installation in the "Installation Guide".
When the installation finishes, a message appears.
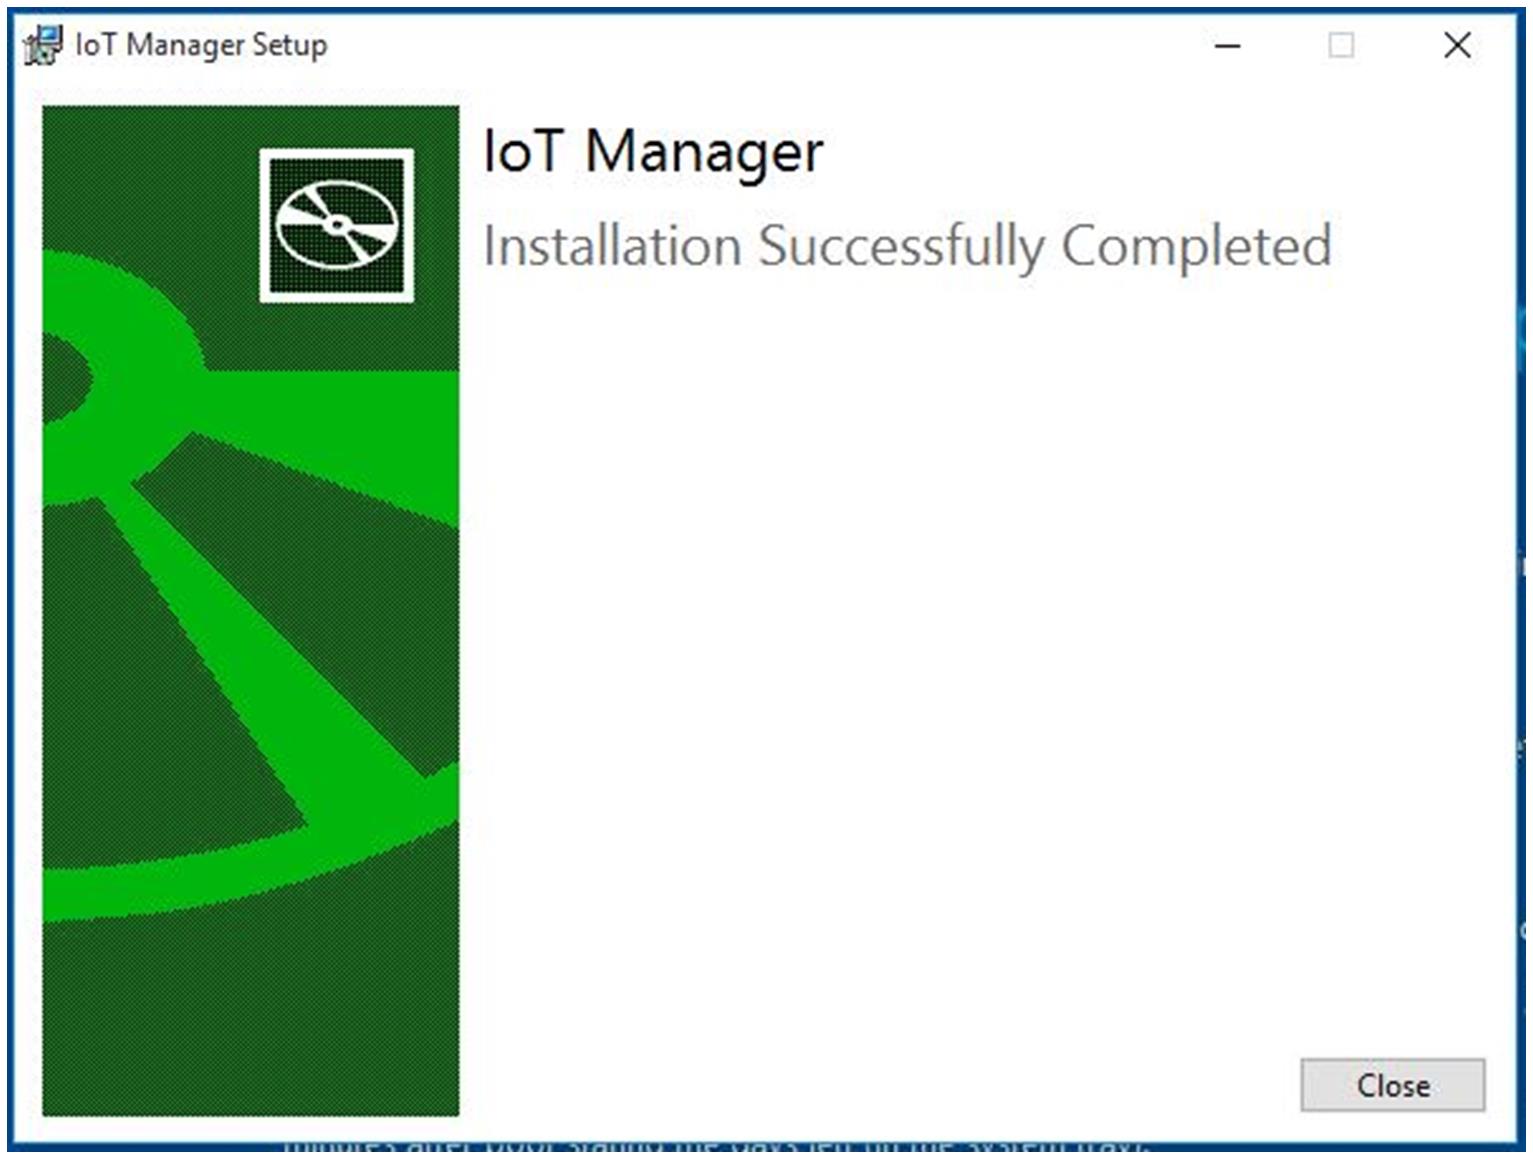
4. Click [Close].
5. Confirm services.
When the installation is completed, Manager service and HULFT service start automatically. Confirm that these services have started.
The following procedure is an example to confirm the start of services in Windows Server 2012 R2. Execute by a user who has administrative privileges.
-
Double-click "Administrative Tools" on the Windows start screen.
- Double-click "Services" on the opened window.
-
Confirm that the status of the following services is "Start".
- Manager service:
- HULFT service:
- Manager service:
Installation is now complete. You can delete the working folder for installation.
See also Points to be noted on operation.
(2) In Linux
If you perform the following installation procedure, the server configuration will be as follows:
|
Software |
Item |
Setting value |
|---|---|---|
|
Manager |
Installation directory1 |
/opt/hulftiot-manager/manager |
|
Service name |
In Red Hat Enterprise Linux 7 hulftiot-manager.service |
|
|
In Amazon Linux hulftiot-manager |
||
| Port number | 8765 | |
|
HULFT |
Installation directory |
/opt/hulftiot-manager/hulft |
|
Service name |
In Red Hat Enterprise Linux 7 • hulftsnd-iot.service (service for a send daemon) • hulftrcv-iot.service (service for a reception daemon) • hulftobs-iot.service (service for a request acknowledge daemon) |
|
|
In Amazon Linux hulft-iot2 |
||
| Port number | 30000 | |
| PostgreSQL |
Installation directory |
/opt/hulftiot-manager/manager/postgresql |
|
Service name |
In Red Hat Enterprise Linux 7 pgsql-iot.service |
|
|
In Amazon Linux pgsql-iot |
||
|
Database name |
hulftiot |
|
|
Port number of database |
5432 |
|
※1 |
: |
The environment settings file (application.properties) is deployed in this directory. This is an environment settings file storage directory. |
|
※2 |
: |
Hulft-iot controls three types of the daemon (send daemon, reception daemon, and request acknowledge daemon). |
Installation procedure
Perform the following procedure as a user who has administrative privileges:
1. Move to the working directory for installation.
Execute the following command to move to the working directory for installation.
cd /tmp/Manager_for_Linux |
2. Execute the install.sh file.
Execute the install.sh file in the /tmp/Manager_for_Linux directory.
- Execution syntax
-
- -s SERIALNUMBER
- Specify the serial number.
- -p PRODUCTKEY
- Specify the product key.
- -t TERMLICENSEKEY
- Specify the term license key.
Parameter Product version Trial version -s SERIALNUMBER ü ü -p PRODUCTKEY ü ü -t TERMLICENSEKEY ü ü
:
This parameter is necessary.
blank
:
This parameter is not required.
- Execution example
|
|
3. Confirm the execution result.
When the installation finishes, a message appears. Use the following commands to show the result of the installation.
- The following command shows whether HULFT is installed:
- The following command shows whether PostgreSQL is installed:
- The following command shows whether Manager is installed:
|
|
|
Installation is now complete. You can delete the working directory for installation.
If the installation failed, see Troubleshooting Manager installation in the "Installation Guide".
See also Points to be noted on operation.