Setting file transfer and creating receiving directory
To set up file transfer, perform the following procedure:
- (1) Creating a unit
- (2) Creating a profile and transfer settings
- (3) Allocating the created unit and the profile to Agent
- (4) Creating the receiving directory
1. Display the operation screen of Manager
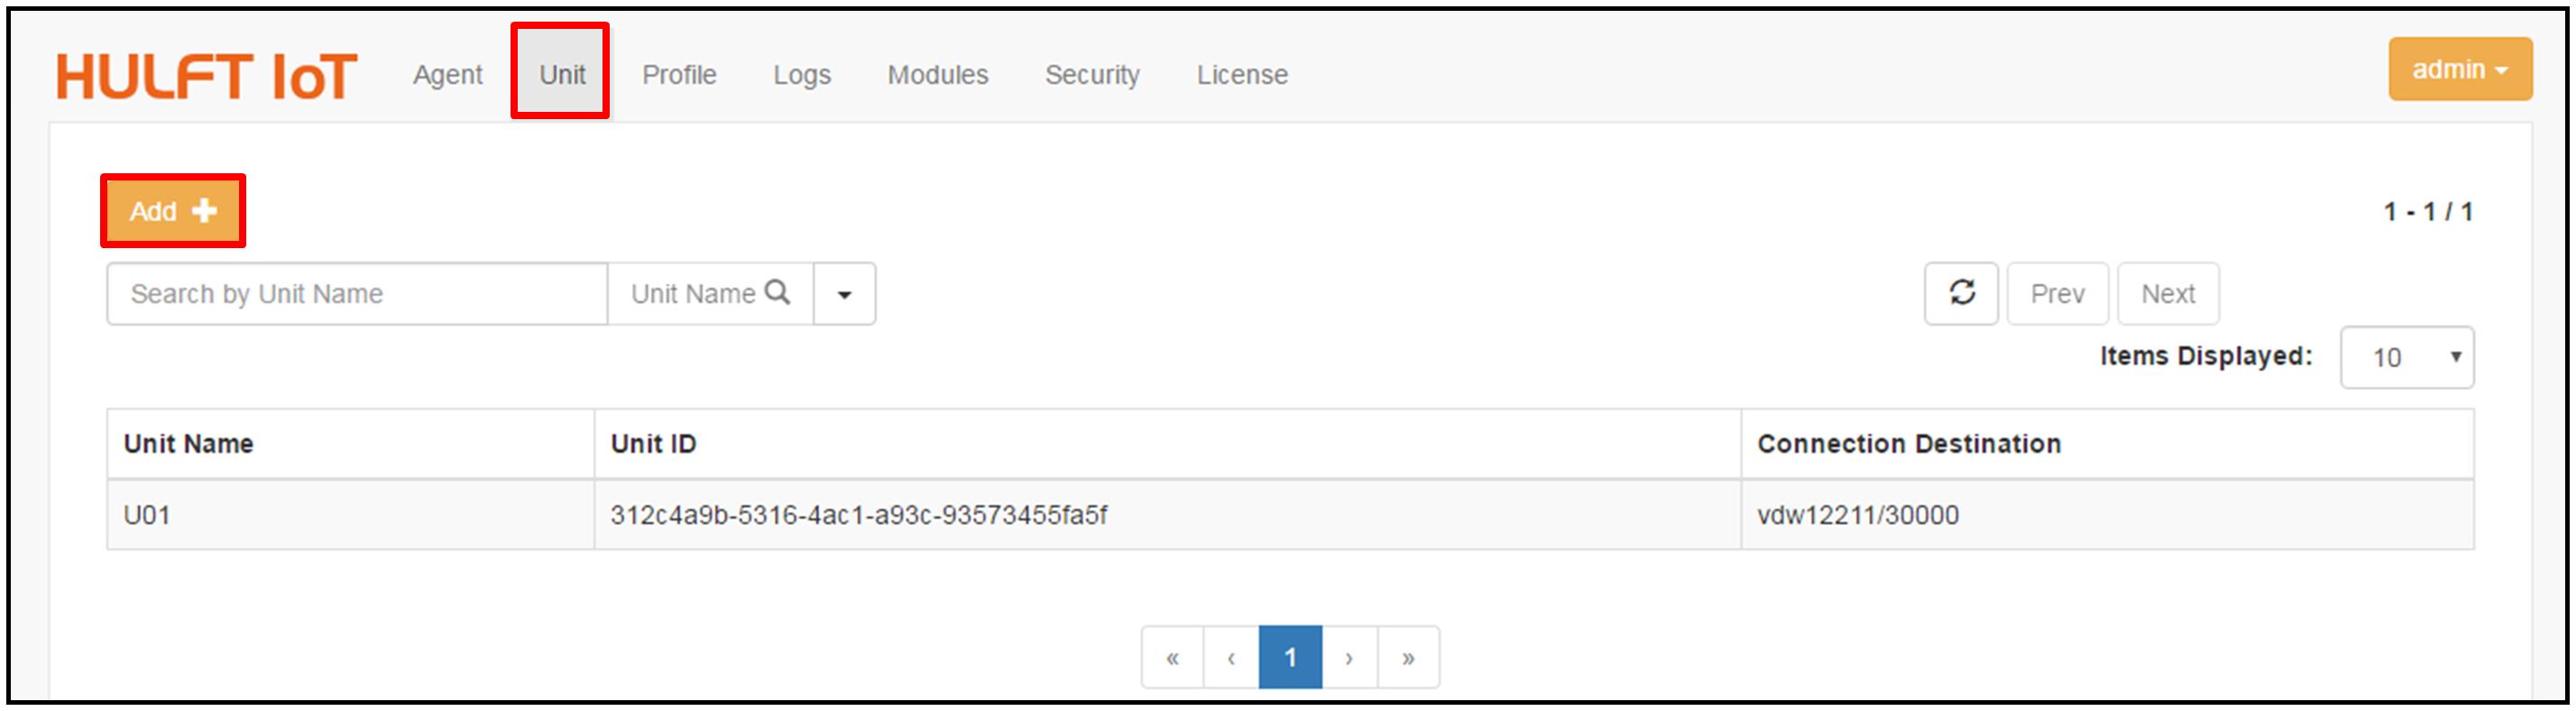
2. On the operation screen of Manager, select [Unit], and then on the Unit List screen, click [Add].
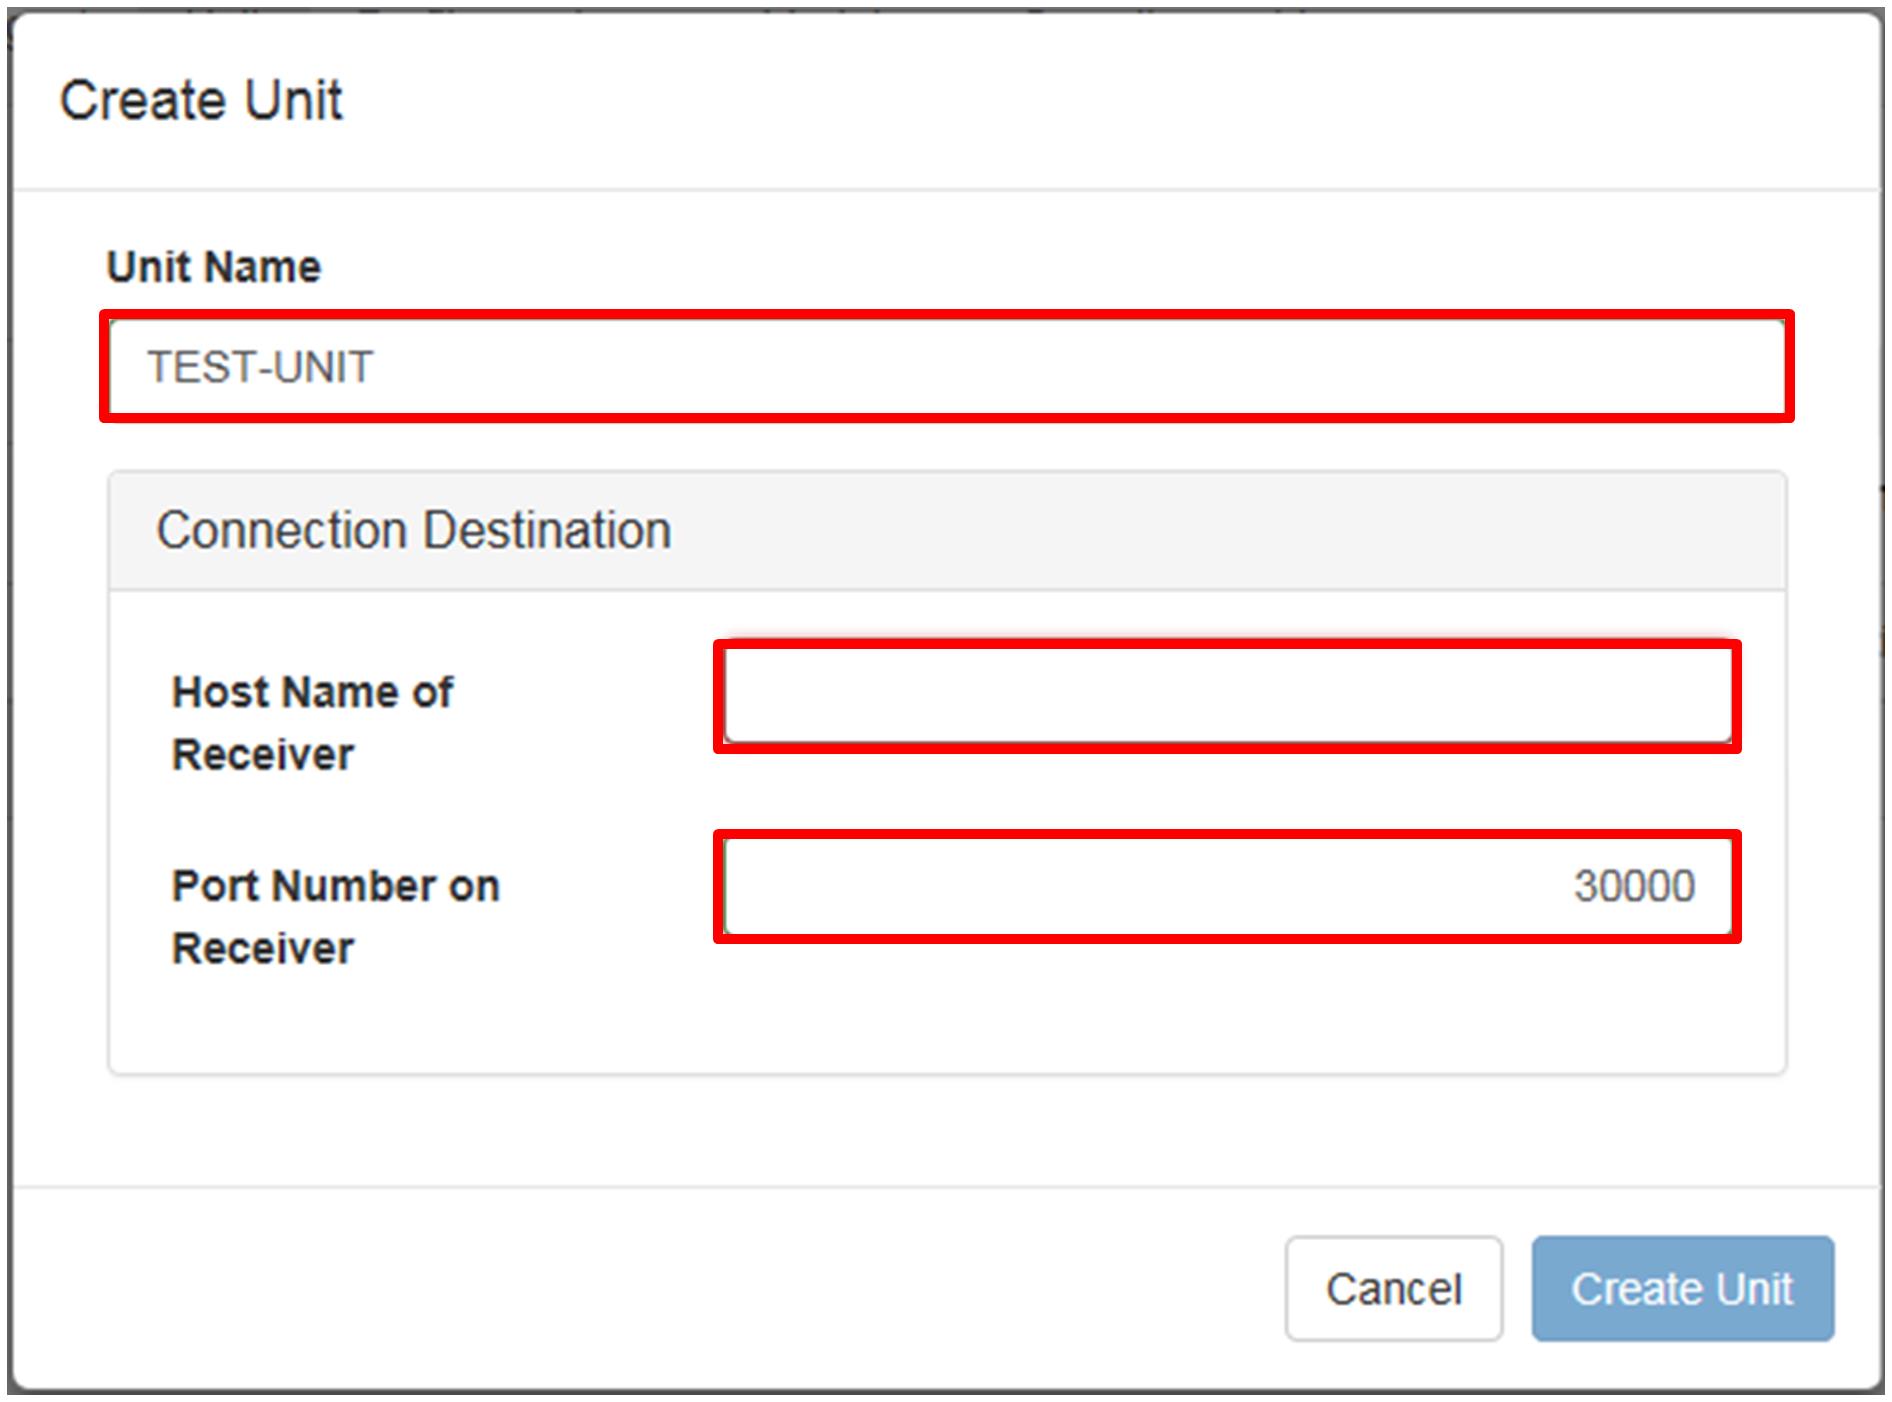
3. On the Create Unit screen, enter "TEST-UNIT" in the Unit Name field.
4. Enter the host name of the server on which Manager starts, which you acquired in advance, to the Host Name of Receiver field.
5. Enter "30000" in the Port Number on Receiver field.
6. Click [Create Unit].
Check the information about the registered unit, which appears on the Unit List screen.
(2) Creating a profile and transfer settings
You must set up a "profile" that defines the transfer settings necessary for file transfers.
1. From the operation screen of Manager, select [Profile], and then on the Profile List screen, click [Add].
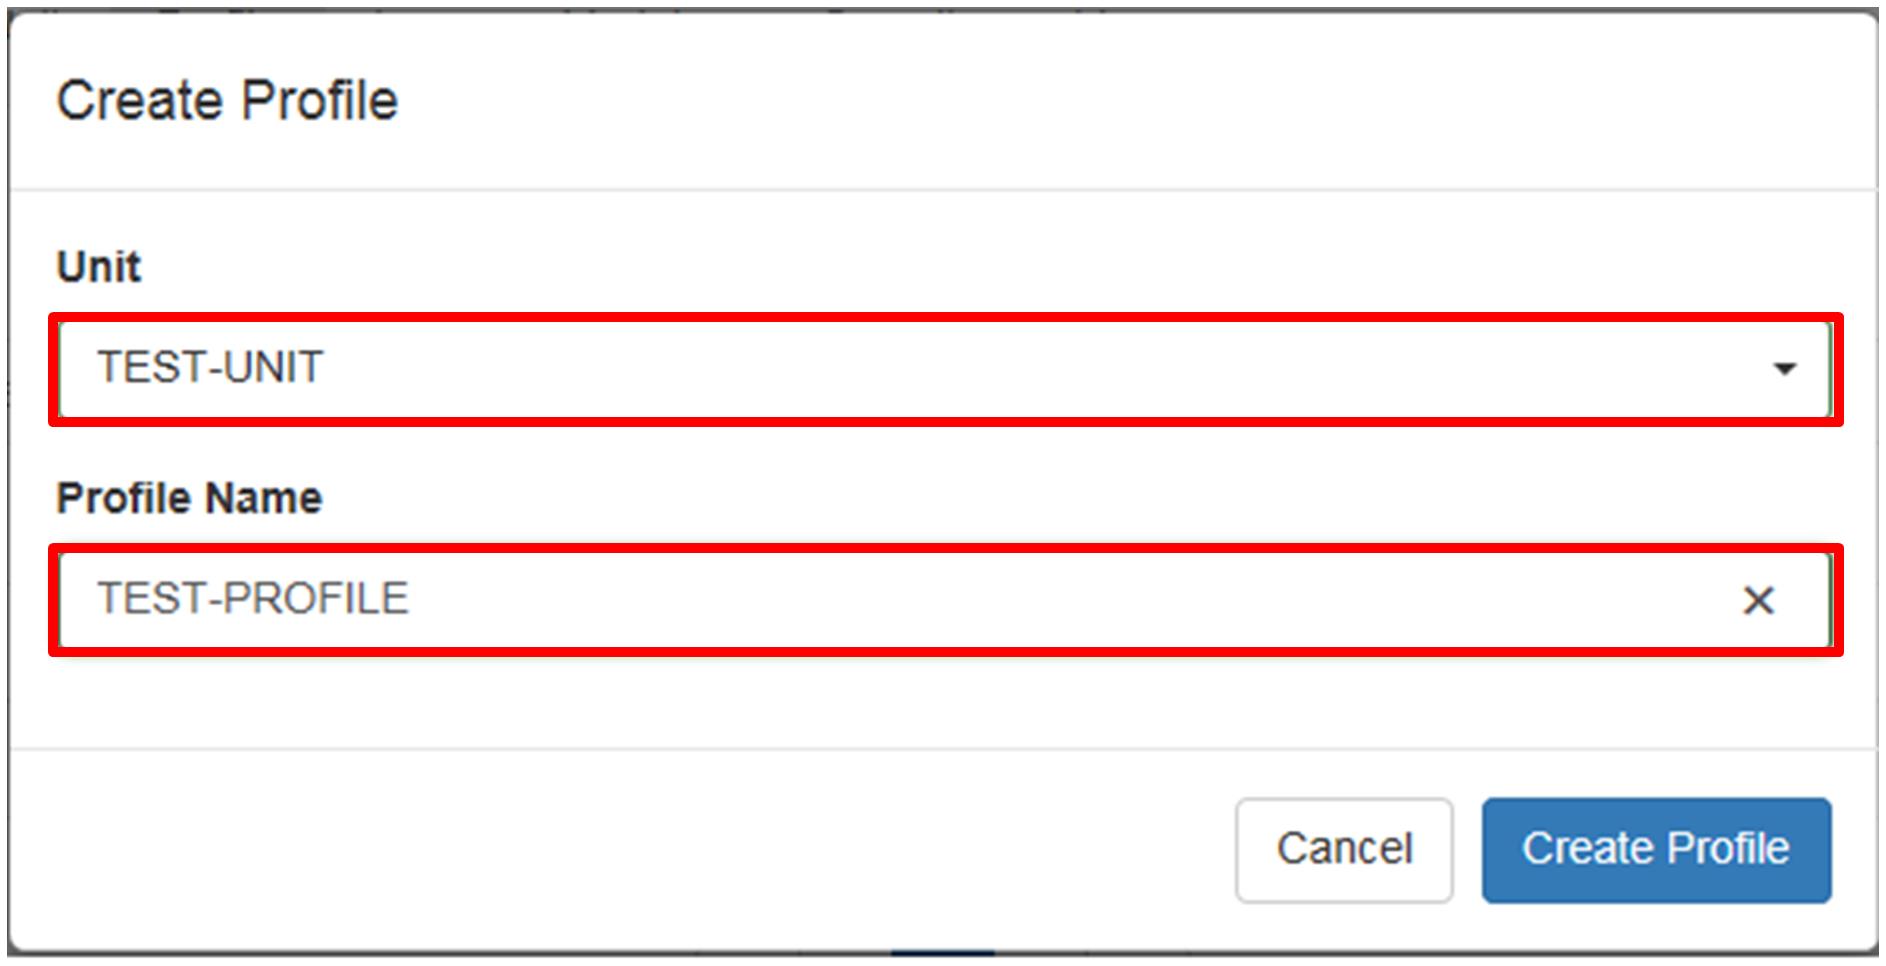
2. On the Create Profile screen, select [TEST-UNIT] in the Unit field.
3. Enter "TEST-PROFILE" in the Profile Name field.
4. On the Create Profile screen, click [Create Profile].
Information about registered profiles appears on the Profile List screen.
5. On the Profile List screen, click the profile information.

6. Under [Transfer Settings] on the [Basic Settings] tab of the Profile Details screen, click [Add].
7. On the Transfer Settings screen, enter information to the following fields. Make the other fields remain default.
- Settings Name
Specify "Transfer Settings for Communication Test".
- File ID
Specify "TEST".
- From
Specify fields as the following table.
| Field name | Value | |
|---|---|---|
| Monitoring | Monitored File Name |
• When you monitor a file on Windows C:\temp\monitored\test.txt • When you monitor a file on Linux /tmp/monitored/test.txt |
| Monitoring Size |
1 B |
|
- To
Specify how to handle the files that are received from Agent on the receiver.
| Field name | Value | |
|---|---|---|
| Receive Destination | Receiving File Name |
• When you receive a file by using Windows C:\temp\received\result.txt • When you receive a file by using Linux /tmp/received/result.txt |
8. Click [Save].
(3) Allocating the created unit and the profile to Agent
By allocating a profile in which transfer settings are specified to Agent, the unit is allocated to Agent automatically.
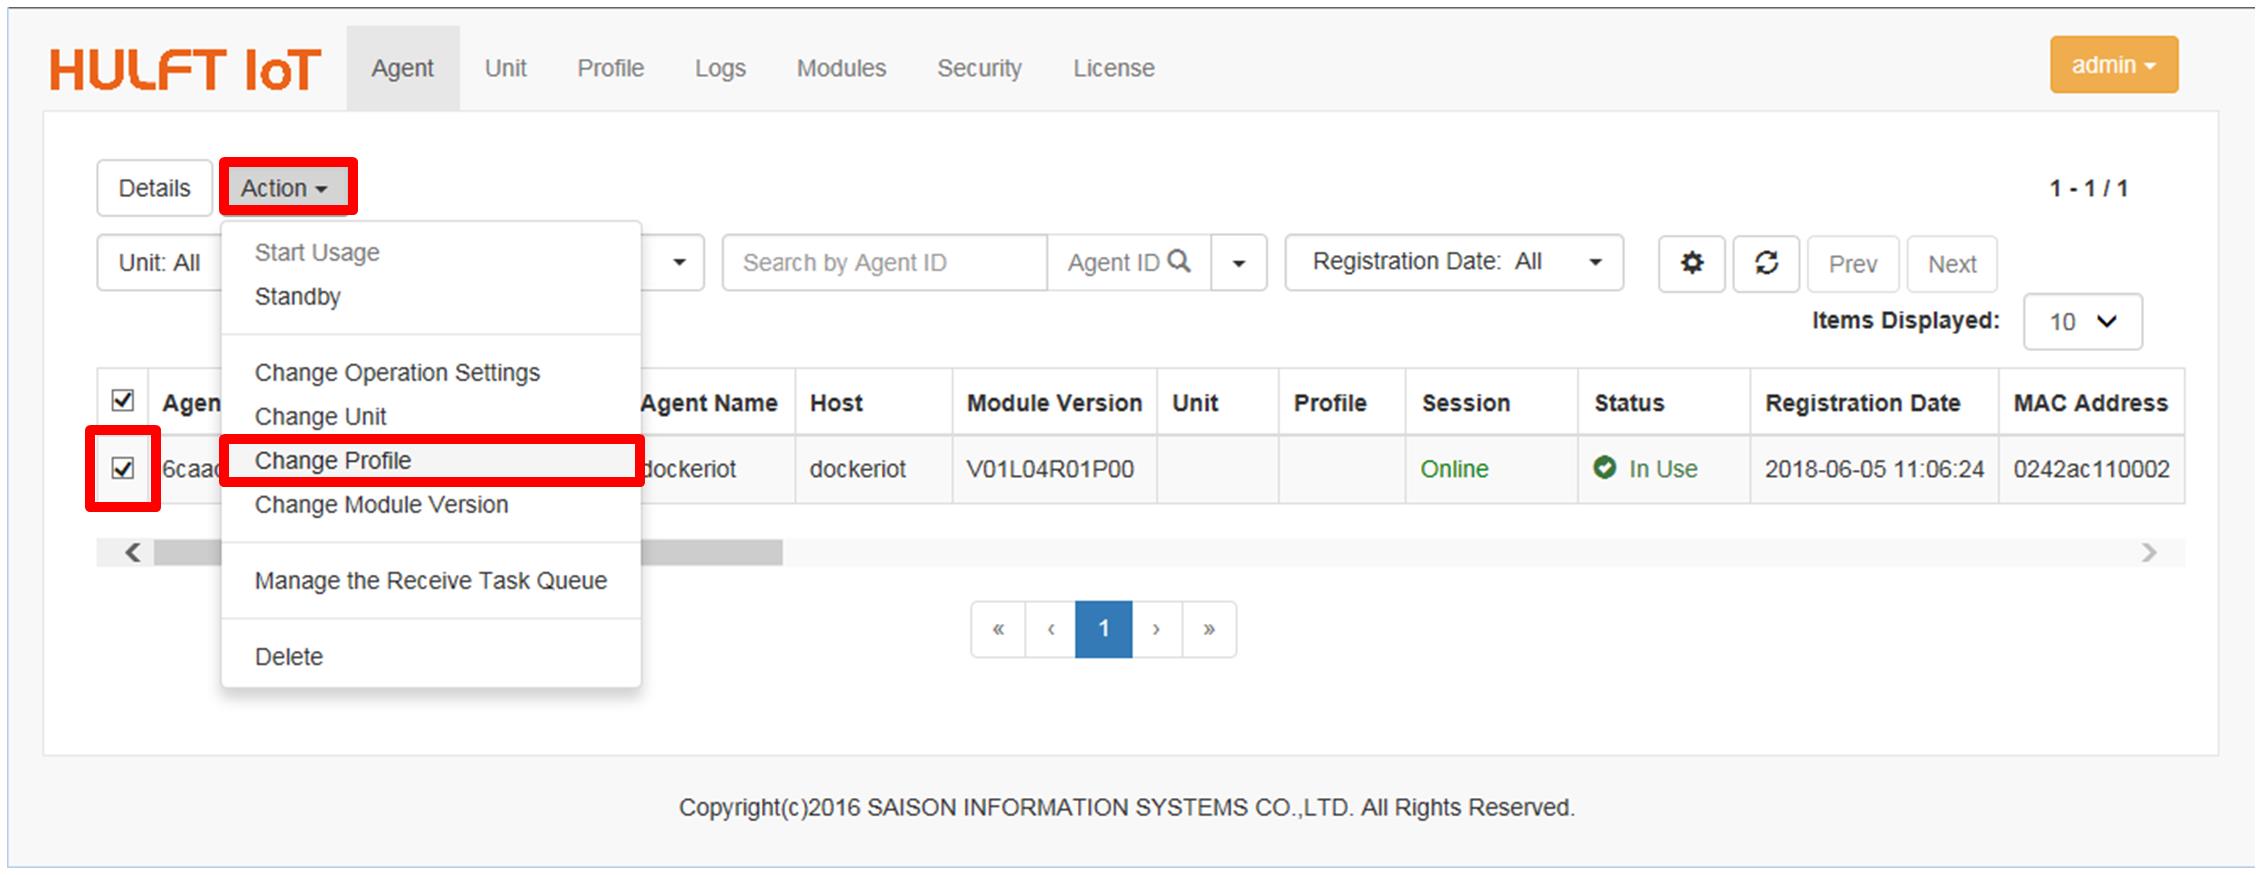
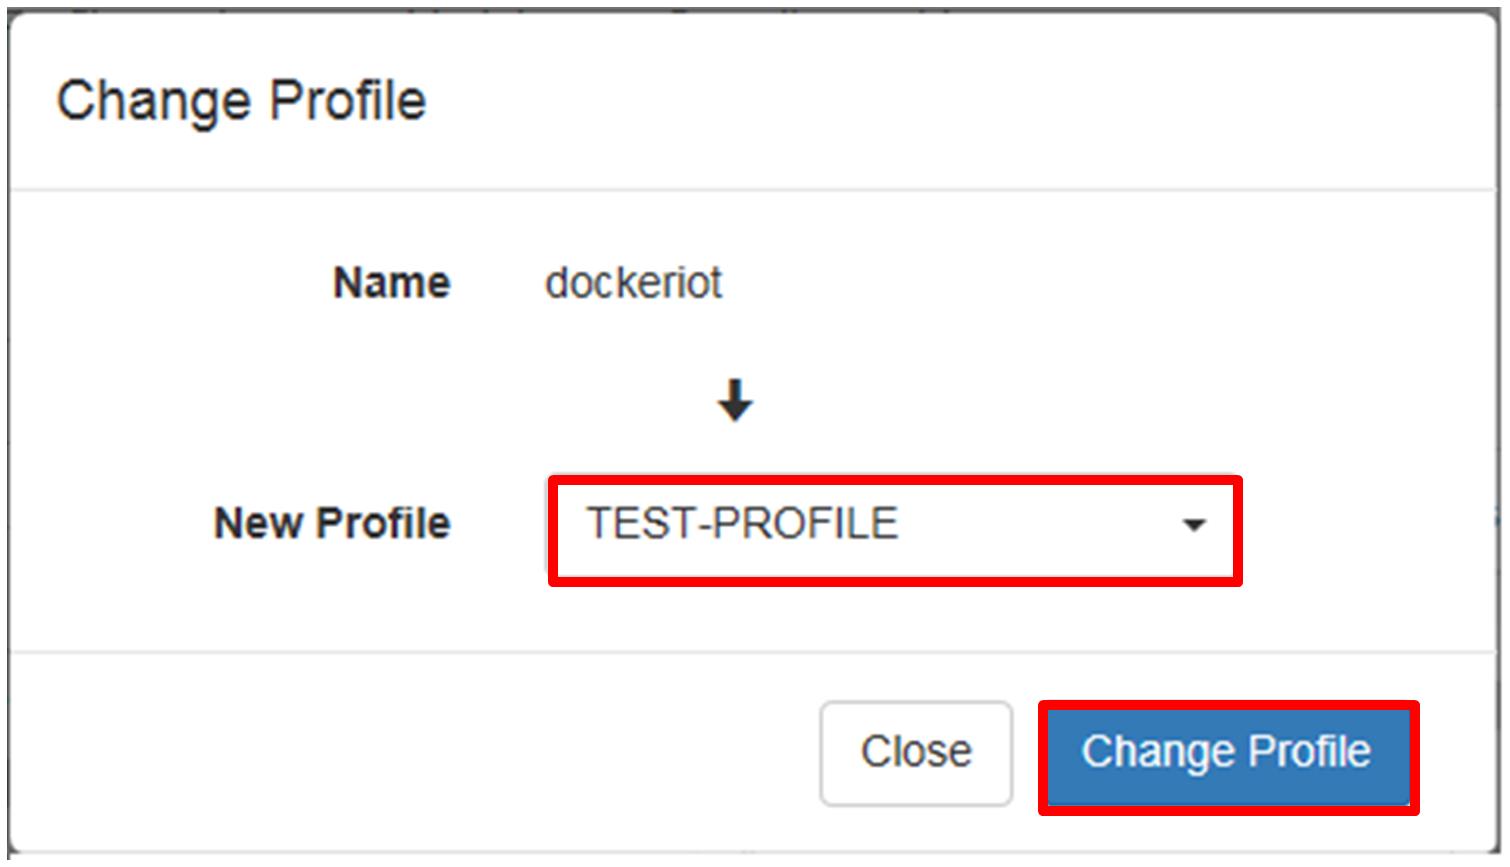
1. On the Agent List screen, select an Agent instance, and then from the [Action] menu, click [Change Profile].
2. On the Change Profile screen, select [TEST-PROFILE] in the New Profile field.
3. Click [Change Profile].
The registered information for an Agent instance whose profile settings have been changed appears on the Agent List screen.
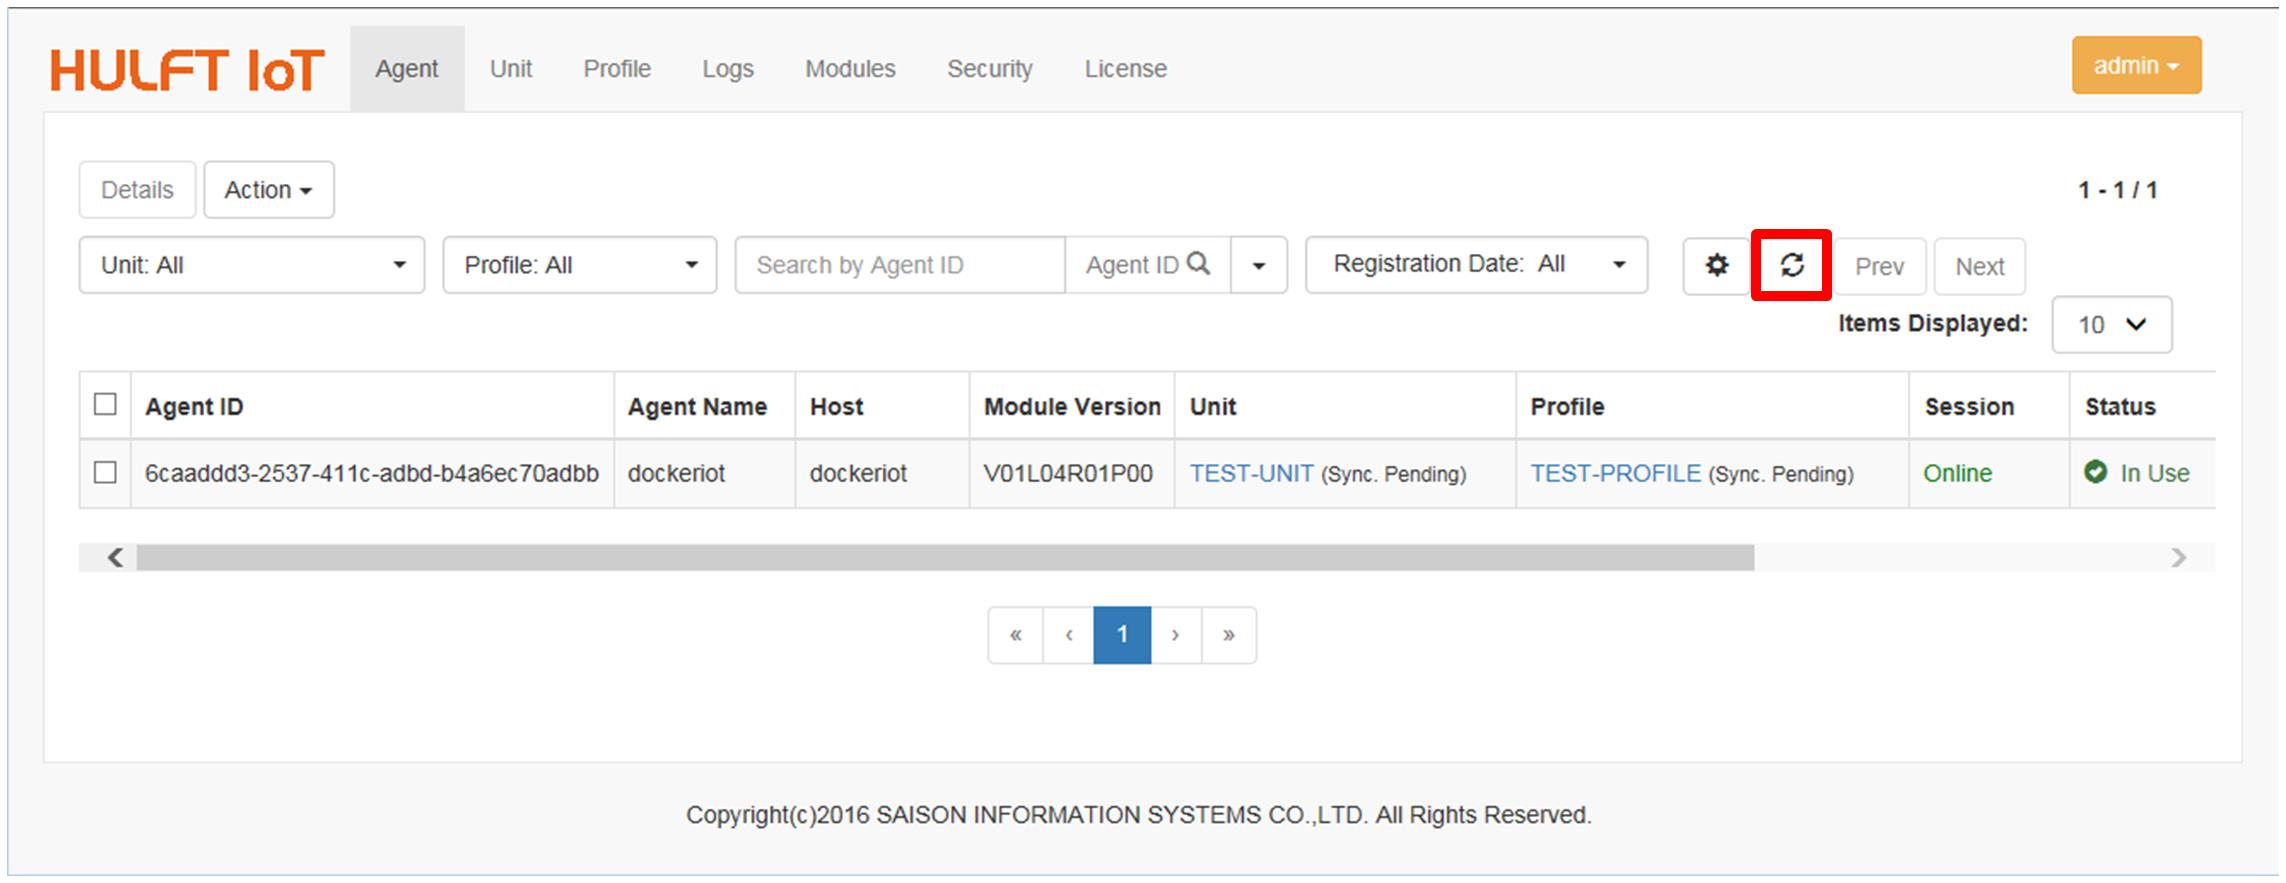
The displayed (Sync. Pending) in the Unit column and the Profile column will disappear in one minute. To refresh the displayed contents, click the button on the left side of [Prev] button.
(4) Creating the receiving directory
At last, create a directory on the application server to receive a file from IoT equipment.
This is the directory that you set to store the result.txt file at step 7 in (2) Creating a profile and transfer settings.
- The folder for receiving a file (in Windows)
-
Create the following folder:
C:\temp\received
- The directory for receiving a file (in Linux)
-
Create the following directory:
/tmp/received