Basic knowledge for creating scripts
You can create scripts using Designer. Designer has the screen structure as shown below. Refer to "The Basic Knowledge of Service" in HULFT Script HELP for details.
Screen structure of Designer
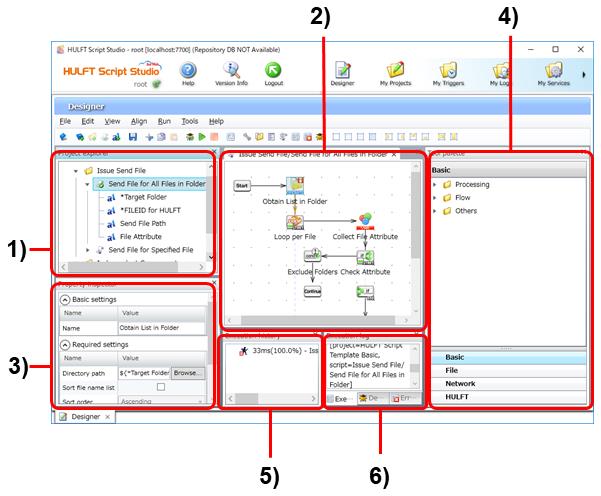
Figure 3.2 Designer in HULFT Script Studio
1) Project Explorer
This area shows the created projects and scripts, and the script variables to be used for scripts in a tree structure.
2) Script Canvas
This area shows the flow of the script that is selected in Project Explorer.
The script flow starts with the Start component icon, goes through various component icons, and ends with the End component icon or break component icon.
To create a flow, drag a component icon with a mouse and drop it onto the next component icon.
3) Property Inspector
This area shows the setting fields for the component icon that is selected in Script Canvas.
Change the fields as necessary.
4) Tool Palette
Various component icons that are required for creating a flow are registered here.
To add a component icon to Script Canvas, drag a component icon that is shown in Tool Palette with a mouse and drop it onto Script Canvas.
5) Execution History
When a script is run as a test, this area shows the processing time and processing ratio for each component icon.
6) Execution Log
This area shows the execution results of the script.
Before registering a script as a service, you can run the script on Designer and check the execution results.
Overall flow of script creation with Designer
The overall flow of script creation with Designer is shown below.
1. Open or create a project and script.
Click File > New > Project, or click File > Open project.
2. Create a flow in Script Canvas.
Load required component icons from Tool Palette to Script Canvas using drag and drop. Connect component icons using drag and drop to create a flow.
3. Run the script and check operation.
Click Run. Check Execution History and Execution Log.