For DataSpider Studio for Web, see here.For DataSpider Studio for Web, see here.
| Item name | Description | Remarks |
|---|---|---|
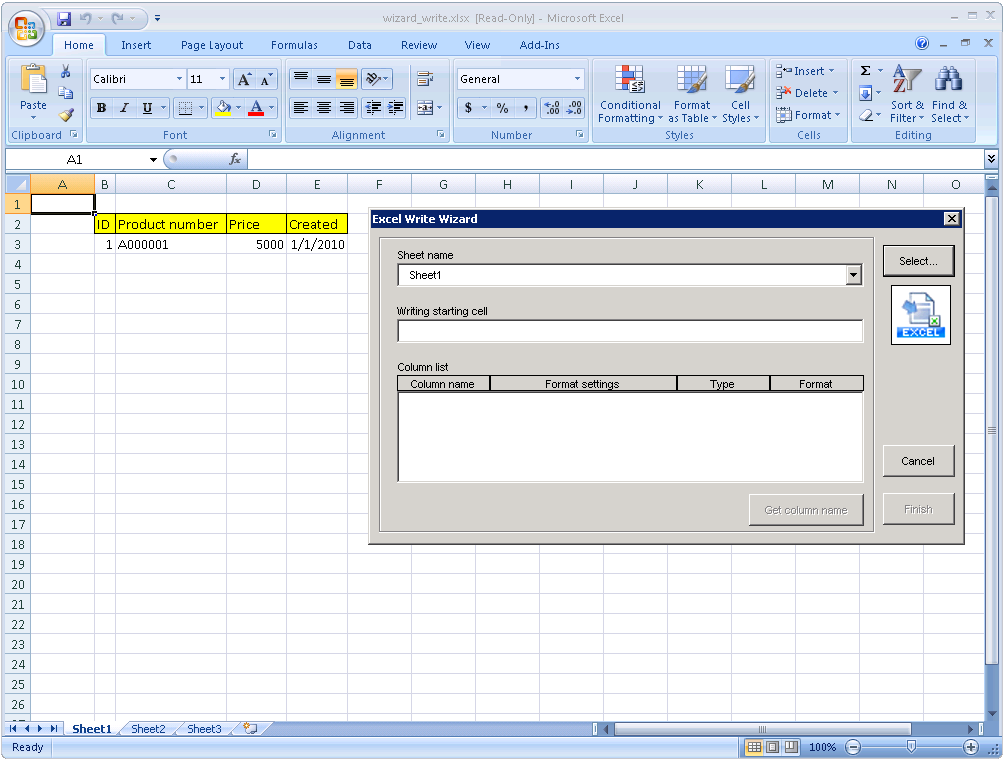
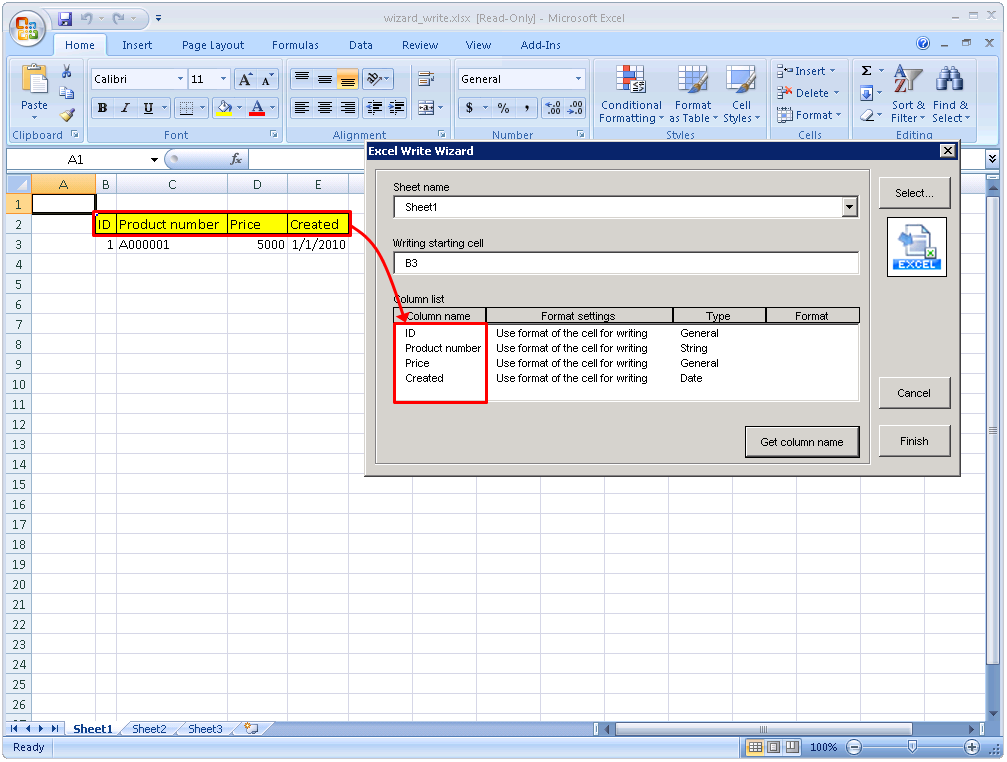
| Sheet name | The name of the selected sheet. The sheet shown in Excel application changes when the sheet name on the setting screen of "Excel Write Wizard" is modified. |
|
| Writing starting cell | The writing starting cell selected in Select range of writing is displayed. |
|
| Column list | Column name/Format settings/Type selected in "Select range of writing" is shown.
Selected column name is shown after "Get column name". |
|
| Get column name | "Get column name" dialog appears. |
|
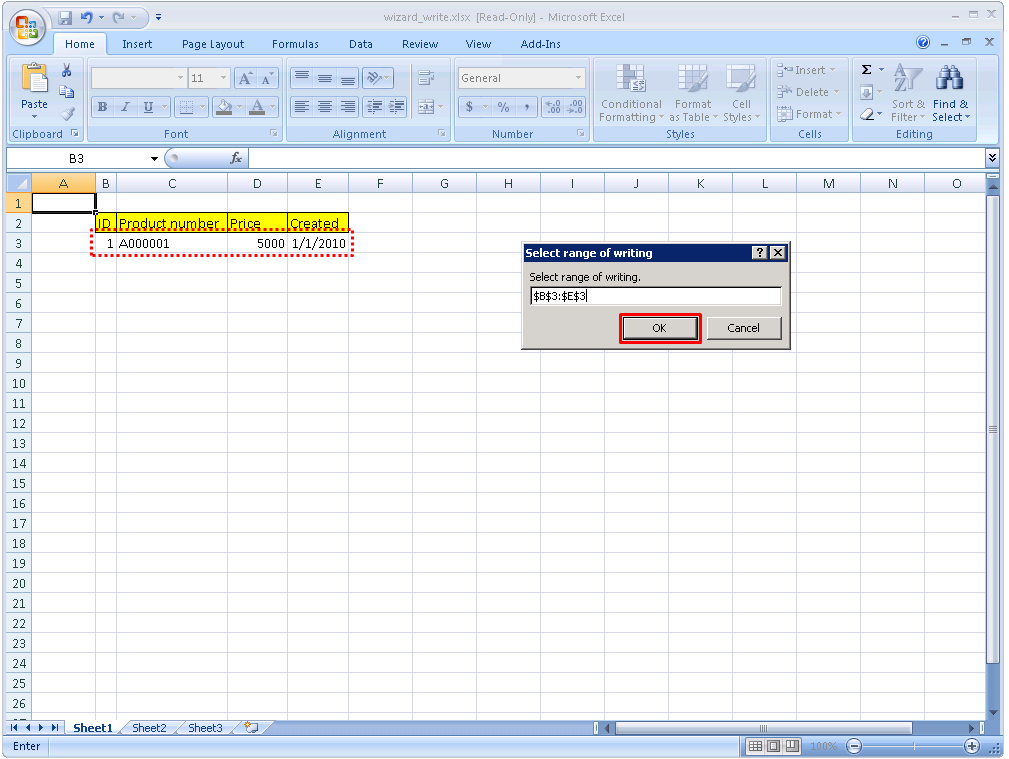
| Select | "Select range of writing" dialog box appears. | |
| Cancel | "Excel Write Wizard" dialog closes. |
|
| Finish | Close [Excel Write Wizard] setting screen and Excel application to reflect the setting items on the properties of Write operation. |
|
 Because rows to write depends on input data, range of row can not be specified.
| Item name | Setting value |
|---|---|
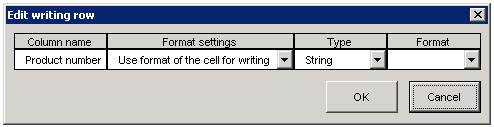
| Writing starting cell | The starting cell of the selected writing range |
| Column list / Column name | The value of the first row in the selected writing range |
| Column list / Format settings | [Use format of the cell for writing] |
| Column list / Type | The format of the cells in the first row of the selected writing range |
| Column list / Format | Empty string |
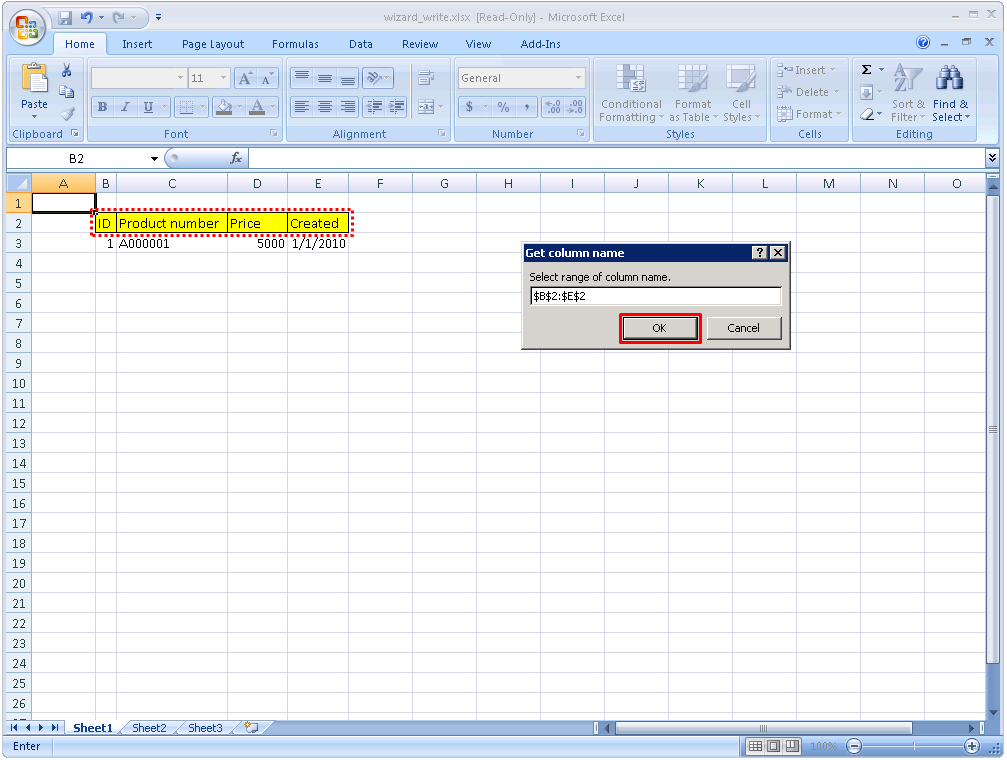
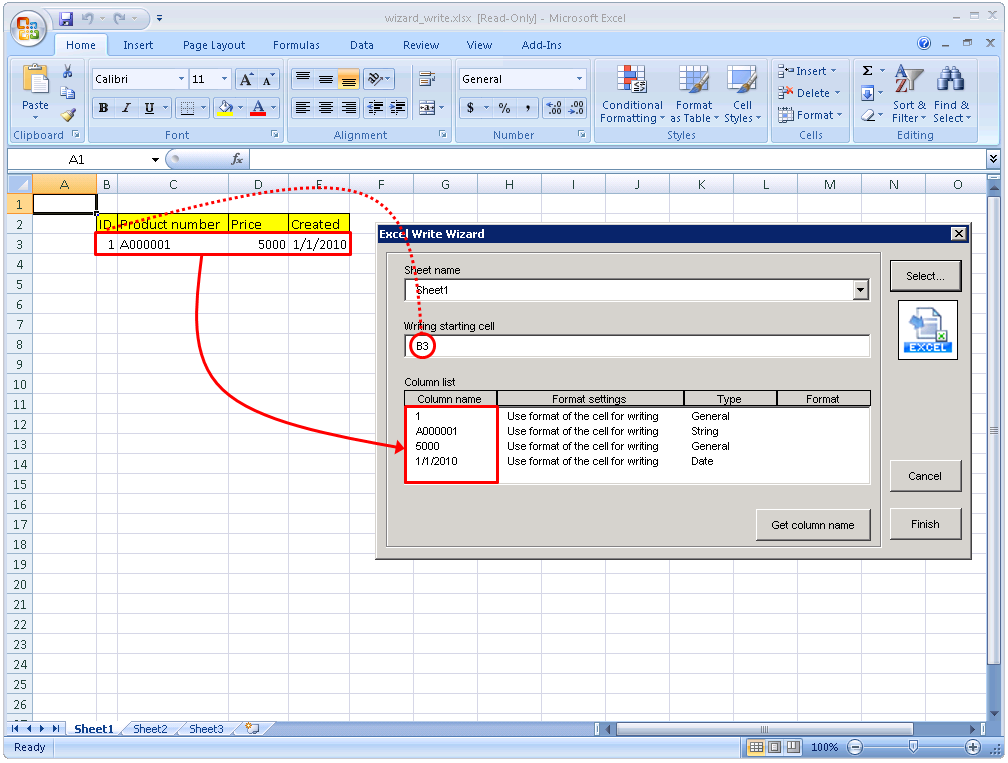 Column name can be specified by one row of cells that has the same column number with the selected range in [Select range of writing] dialog.
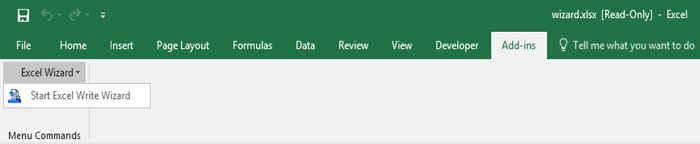
 When pressing the [x] button "Start Excel Wizard" dialog of Designer, "End Excel Wizard" dialog box appears.
For details about how to install VBA, refer to Document in Excel.For details about how to install MSXML 6, refer to the Microsoft downloading site.
When pressing the [x] button "Start Excel Wizard" dialog of Designer, "End Excel Wizard" dialog box appears.
For details about how to install VBA, refer to Document in Excel.For details about how to install MSXML 6, refer to the Microsoft downloading site.