Execute puttygen.exe and start PuTTYgen.
Open "Key" from menu and select "SSH-2 RSA key" or "SSH-2 DSA key".
 Encryption method other than "SSH-2 RSA key" or "SSH-2 DSA key" is not supported.
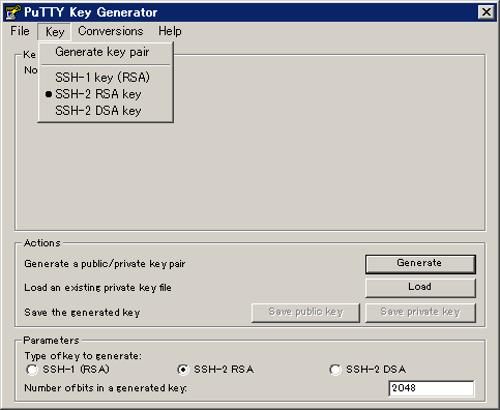
Enter optional bit length to "Number of bits in a generated key"(Above "2048" is recommended).
bit length effects encryption strength. The bigger the bit length value is the stronger the encryption is.
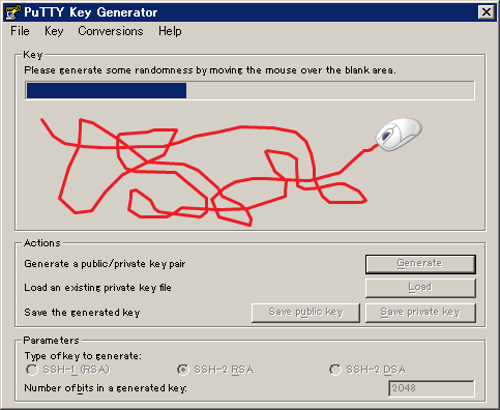
Click generate button. If "Please generate some randomness by moving the mouse over the blank area." shows up, move the mouse on PuTTYgen window and generate necessary random numbers.
Enter optional passphrase to "Key passphrase" and "Confirm passphrase".
If passphrase is not set to private key, input is not necessary.
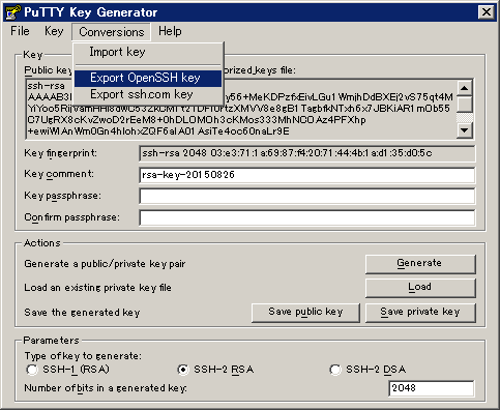
Select "Conversions" - "Export OpenSSH key" from menu and save after specifying any output destination.
Private key saved by not selecting "Conversions" - "Export OpenSSH key", or private key saved by clicking "Save private key" button is not supported.
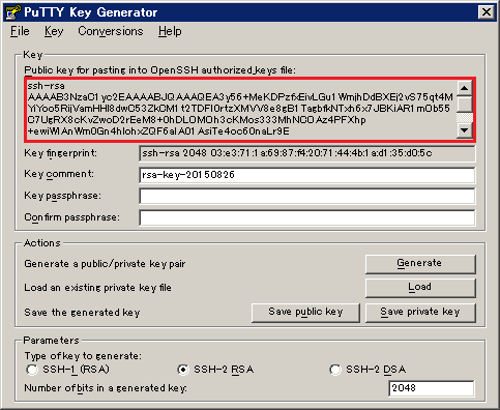
Public key contents will be showed to "Public key for pasting into OpenSSH authorized_keys file". Copy public key contents accordingly to the necessity and save to optional file.
Public key saved by clicking "Save public key" button is not supported.
Ends PuTTYgen.