Registering data processing information
Register the data processing information to set the rules for data processing.
Click the Data Processing icon in the Start page of the DataMagic Management screen to display the Data Processing Information List screen. Click the New button in the Data Processing Information List screen, and then enter the information as follows on the screen.
- Data processing ID
-
: sampleData
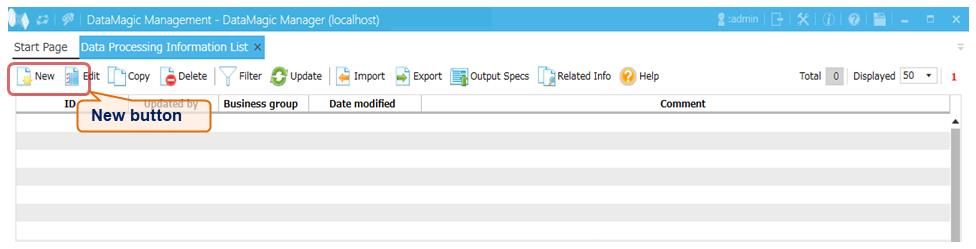
Figure 7.5 Data Processing Information List screen
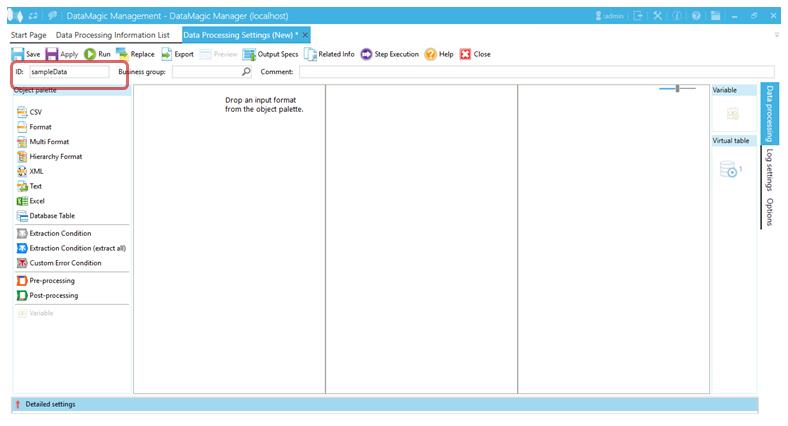
Figure 7.6 Registering data processing ID
Specify the input file, output file, and extraction condition as follows:
1. Specify the input file.
Drag and drop the CSV icon to the input file area. Double-click the dragged CSV icon to display the Input Settings screen.
Specify the following settings:
Settings
- Format
-
: CSV
- ID
-
: INCSV
- File name
-
: C:\HULFT Family\huledpro\data\INdata\sampleIN.csv
- Use header record
-
: ON Lines 1 to 1
- Other fields
-
: Default values
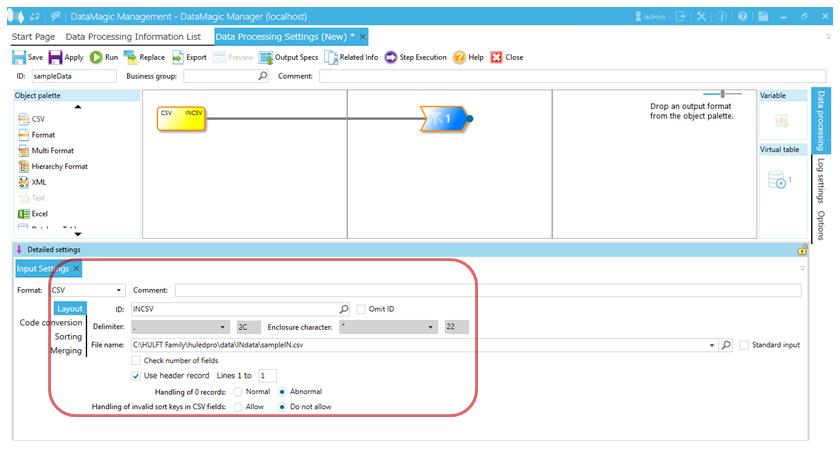
Figure 7.7 Input Settings screen
2. Specify a matching file.
Match the input CSV file with a CSV file.
Drag and drop the CSV icon to the input file area. When the icon is dragged, a CSV icon appears at lower right of the input file icon. Double-clicking the CSV file displays the Matching Settings screen.
Specify the following settings:
Settings
- Format
-
: CSV
- File name
-
: C:\HULFT Family\huledpro\data\INdata\samplematchIN.csv
- Omit ID
-
: Select the check box.
- Delimiter
-
: ,
- Enclosure character
-
: "
- Other fields
-
: Default values
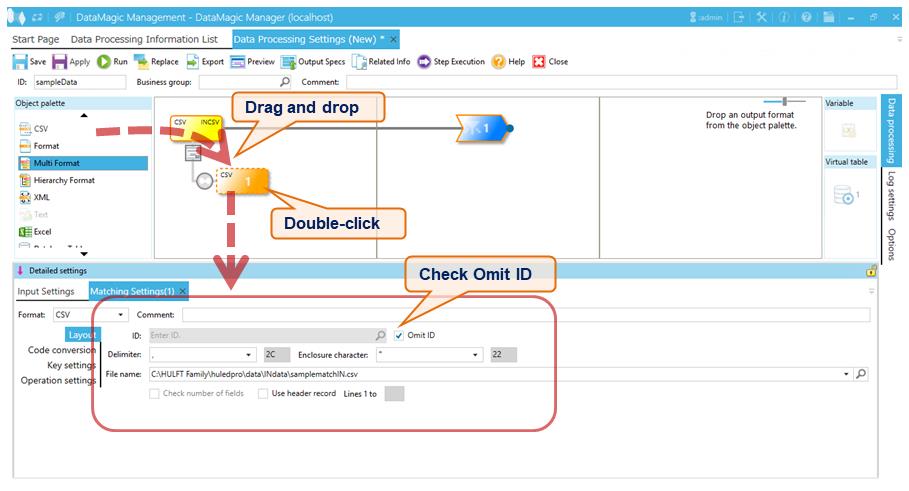
Figure 7.8 Matching Settings screen
3. Specify a matching condition.
Double-click the matching icon that is connected with the input file horizontally by a relation line to display the Matching Condition Settings screen.
Click the Add button in the Conditions to display the Condition Setting Details screen. Specify the following settings:
Settings
- Input field
-
: Select Field No. and specify "1"
- Operator
-
: Equals
- Matching Field (1)
-
: Type Character String, Field No. 1
Specify the above values and then click the OK button in the Condition Setting Details screen to add the condition.
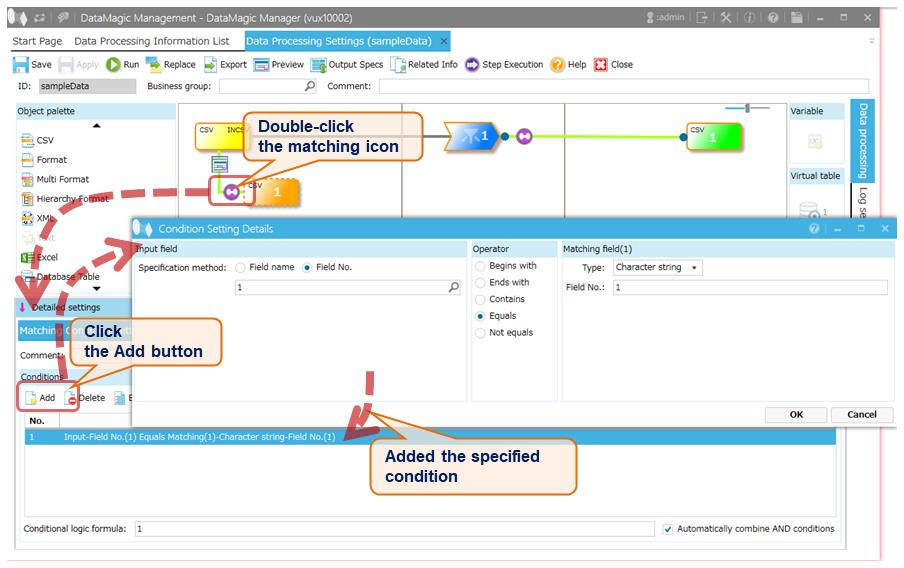
Figure 7.9 Matching Condition Settings screen
4. Specify the output file.
Drag and drop the CSV icon into the output file area. Double-clicking the dropped CSV icon displays the Output Settings screen.
Specify the following settings:
Settings
- Format
-
: CSV
- Omit ID
-
: Select the check box.
- Delimiter
-
: ,
- File name
-
: C:\HULFT Family\huledpro\data\OUTdata\sampleOUT.csv
- Enclosure character
-
: "
- Other fields
-
: Default values
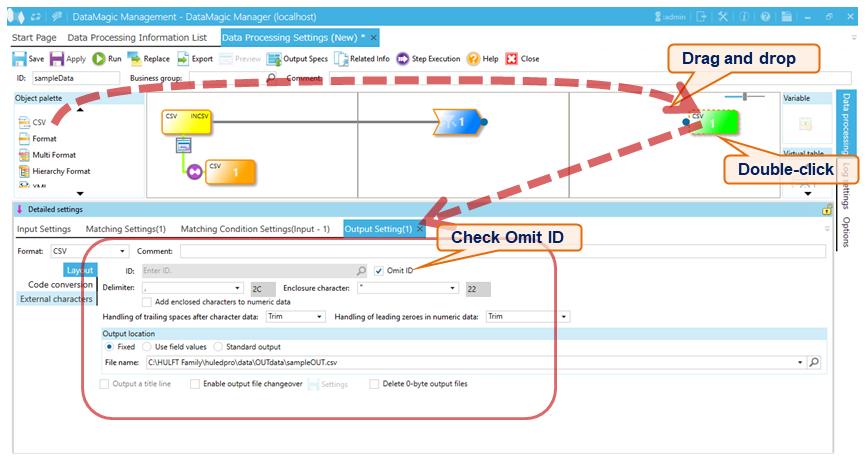
Figure 7.10 Output Settings screen
5. Associate the condition and the output file.
Click the Extraction Condition icon, and drag it to the Output icon on the right to create a connection.
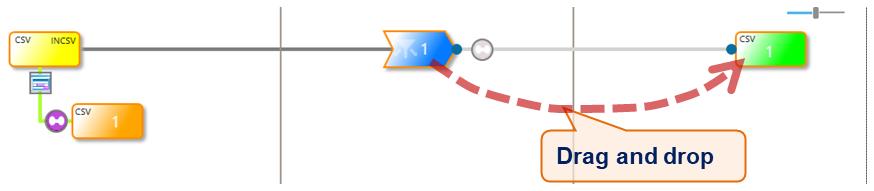
Figure 7.11 Mapping the extraction condition and output file
6. The Set Mapping Information screen is displayed.
Double-click the mapping icon created on the connection between the Extraction Condition and Output icons. The Set Mapping Information screen is displayed.
7. Confirm the displayed input side tree.
On the left of the screen, you will see the input tree as shown below.
If the tree is not displayed as follows, check the settings of the ID and the input file.
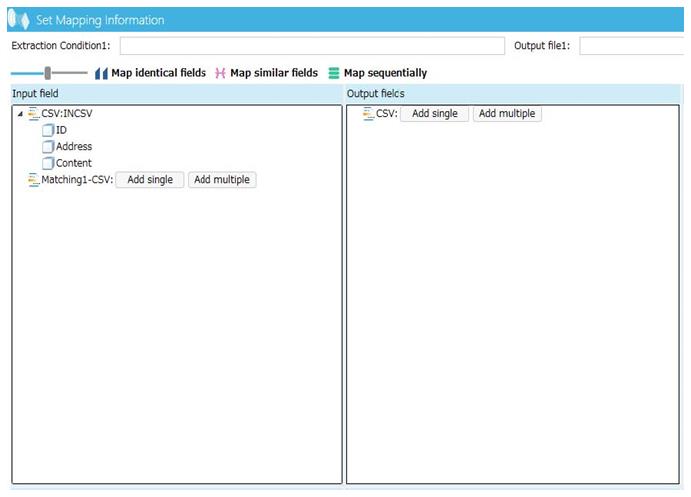
Figure 7.12 Input side tree
8. Create mapping fields.
Click the Add Multiple button at bottom of the tree on the input side (left side) to display the Additional Field Settings dialog box. Enter 2 in the No. of additional fields in the dialog box. Two fields are added to the tree.
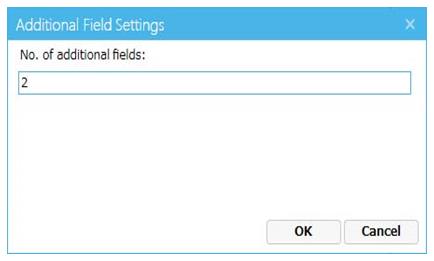
Figure 7.13 Additional Field Settings screen
9. Create the fields in the output side tree.
Click the Add Multiple button in the upper part of the output side tree (on the right) to display the Additional Field Settings dialog box. Enter 4 for No. of additional fields in the dialog box, and then click the OK button. The four fields are added to the tree.

Figure 7.14 Additional Field Settings screen
10. Connect the fields.
To connect the fields, drag the mouse from the field node in the tree on the left to the field node in the tree on the right. Create the following connections:
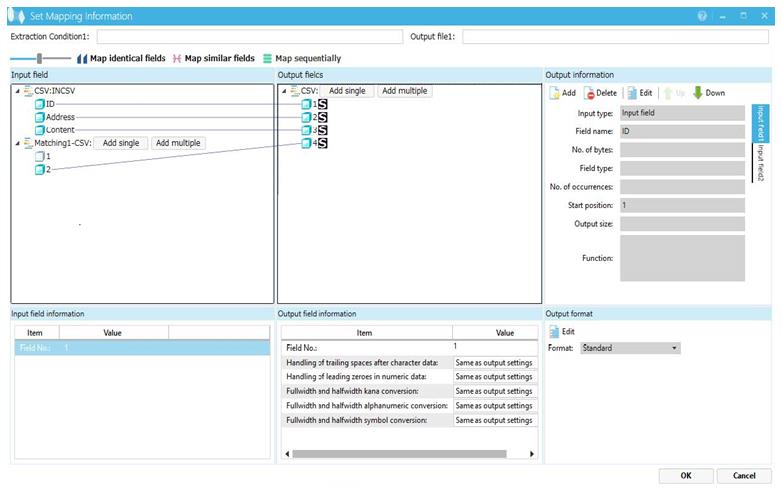
Figure 7.15 Input and output connections
11. Register the mapping data.
Click the OK button to register the mapping data.
12. Click the Apply button.
The data processing information that was specified is saved.
13. Change the destination file name for outputting errors.
Click the Log Settings tab on the right side of the Data Processing Settings screen to switch the screen. Specify the error output destination file for each data processing ID. Do not specify the values for the system environment settings.
If the Use the specified system environment settings check box is selected, clear it, and then enter the following file name in the File name of File and event logs:
- File name
-
: C:\HULFT Family\huledpro\data\log\ERROR.log

Figure 7.16 Registering the name of the error output destination file
The registration of the data processing information is now complete.