Installation procedure of DataMagic Server
To install DataMagic Server, run setup.exe contained in the Setup\Server folder in the provided media or downloaded module.
If you perform an update installation, services of HULFT-DataMagic Ver.2 and DataMagic Server grade that are subject to the update installation stop automatically.
(1) Select the language
Running setup.exe displays a screen for selecting the language. Select the language, and then click the Next button. The setup program is displayed in the selected language.
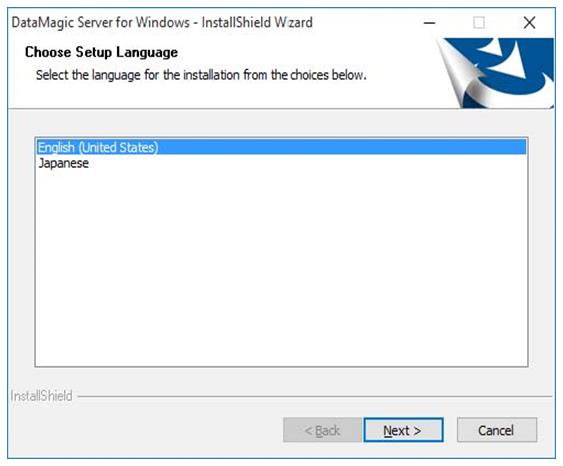
Figure 2.1 Choose Setup Language screen
-
The language selected in this screen will be used to display subsequent screens during the installation and DataMagic Server screens (such as the Trace Log screen).
-
After the installation finishes, you can change the language setting specified in this screen. If you change the language after installation, you must change the Language setting in the System Environment Settings screen or the Language field (huledlang) in the system environment settings file (huledenv.conf) accordingly.
-
In update installation, the language that you select in this screen overrides the language used prior to installation.
(2) Start the setup program
When the setup program starts, the following screen is displayed.
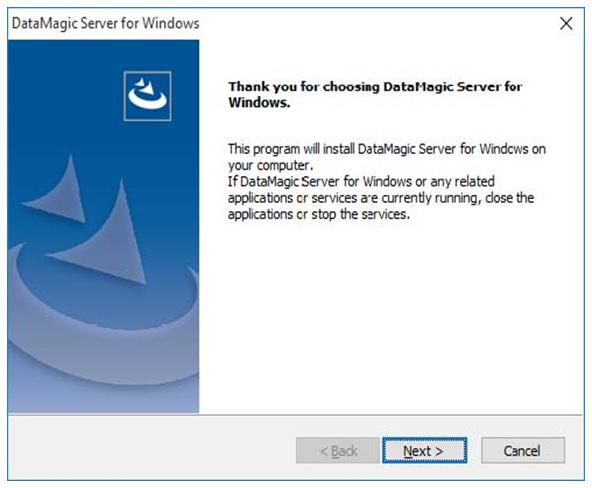
Figure 2.2 Start screen of the setup program
Click the Next button.
(3) Entering the serial number and product key
Enter the serial number and product key.
If the entered information is incorrect, you cannot go to the next step. Enter the correct product information, and then click the Next button.
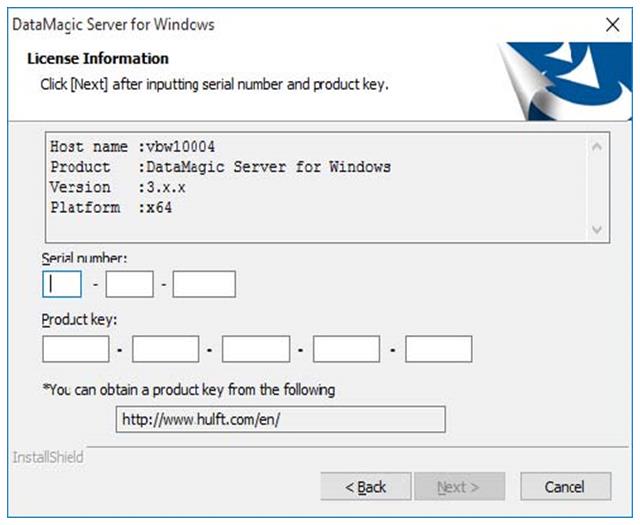
Figure 2.3 License Information screen
If you changed the host name, you should obtain the product key again.
(4) Select the installation type
If you are installing DataMagic Server for the first time, select New installation. If you are overwriting an existing instance of DataMagic Server, select Update installation.
To upgrade version from DataMagic Ver.2, to setup DataMagic Server once more, or update the product from DataMagic Desktop grade, select Update installation.
When you are finished selecting the installation type, click the Next button.
If you are installing the trial version, the Installation Type screen will not appear.
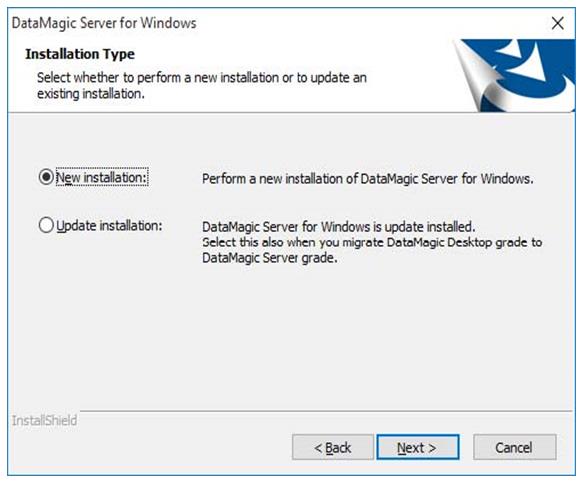
Figure 2.4 Installation Type screen
You can perform multiple installations of DataMagic Server. Even when DataMagic Server has already been installed, you can click New installation.
(5) Specify the installation folder
To change the installation folder or the shared data storage folder, click the Browse button.
Determine the folders, and then click the Next button.
-
In update installation, specify an existing folder as the installation folder.
-
In update installation, the shared data storage folder is not displayed.
- Installation folder
-
Specify the folder to which to copy the DataMagic configuration file.
The default value is %SystemDrive%\HULFT Family\huledpro.
- Shared data storage folder
-
Specify the folder that will store the DataMagic system operation information.
The default folder is %SystemDrive%\HULFT Family\huledpro\etc.
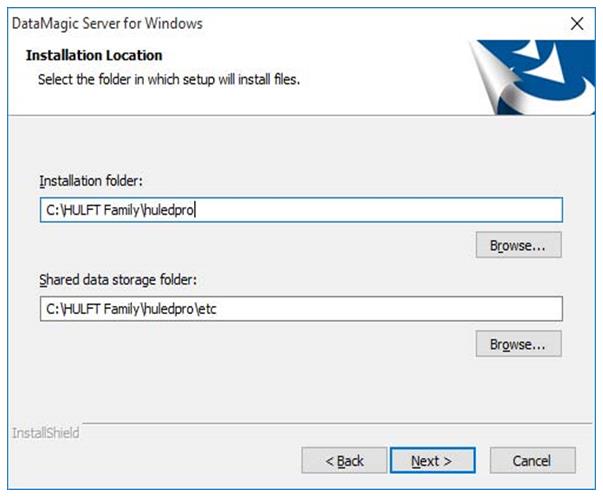
Figure 2.5 Installation location screen
(6) Enter work folders
Specify the folders for each operation. To change the folder for storing work files or the folder for storing trace logs, click the Browse button.
Determine the folders, and then click the Next button.
-
Specify these folders when performing a new installation or an update installation from an earlier version. When performing an update installation from an earlier version, you must specify existing folders to store work files and trace logs.
-
The screen for selecting the folders for each operation is not displayed when performing an update installation from HULFT-DataMagic Ver.2.
- Folder for storing work files
-
Specify the folder to which the DataMagic Server work files are to be stored.
The default is the work subfolder of the installation folder specified in the Installation Location screen.
- Folder for storing trace logs
-
Specify the folder that will store the DataMagic Server trace logs.
The default is the log subfolder of the installation folder specified in the Installation Location screen.
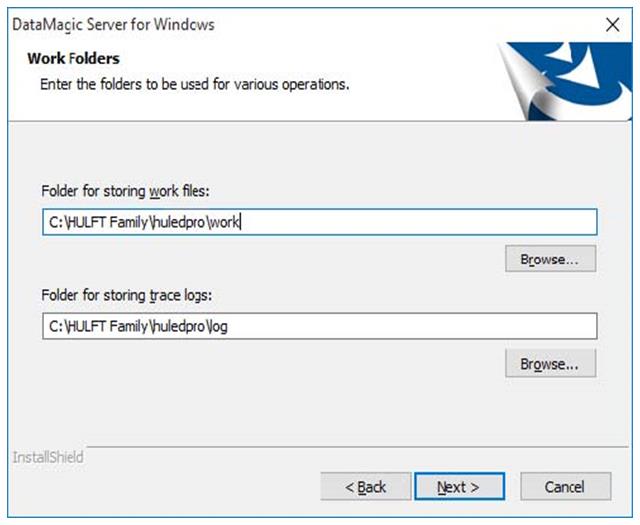
Figure 2.6 Work Folders screen
(7) Select the date format
Select the date format to be used in DataMagic Server.
-
YYYY/MM/DD Example: 1970/01/30
-
MM/DD/YYYY Example: 01/30/1970
-
DD/MM/YYYY Example: 30/01/1970
After selecting the date format, click the Next button.
-
The Date Format screen appears only during a new installation.
-
After the installation finishes, you can change the date format setting specified in this screen. If you change the date format after installation, you must change the Date format setting in the System Environment Settings screen or the date format fields (datefmt) in the system environment settings file (huledenv.conf) accordingly.
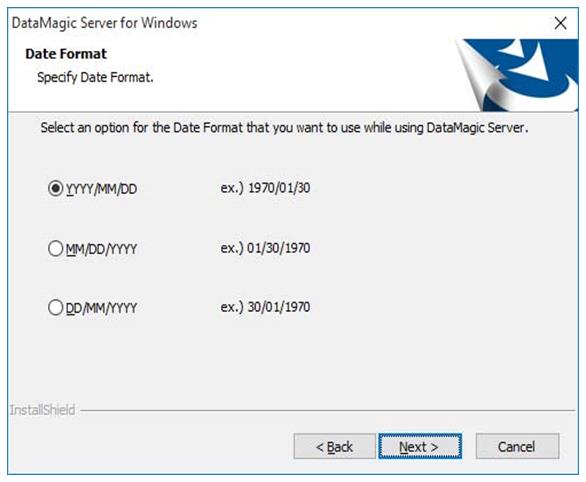
Figure 2.7 Date format screen
(8) Enter the service name
Set the service name.
The name must consist of half-width alphanumeric characters or spaces, and be no more than 30 bytes.
After you enter the name, click the Next button.
-
If you enter nothing, the service name will be DataMagic.
-
Set the name when performing a new installation or an update installation from HULFT-DataMagic Ver.1 or DataMagic Desktop.

Figure 2.8 Service Information screen
(9) Setting the program name
Set the name under which the program will be registered. This name will appear in the Start menu and Programs and Features.
After you enter the program name, click the Next button.
The default is DataMagic Server for Windows Ver.3.
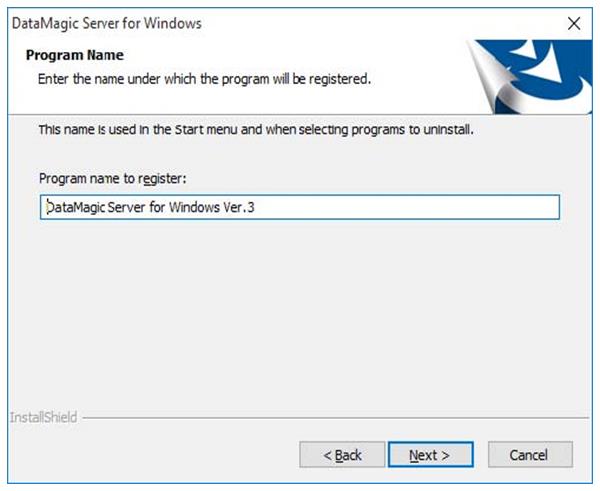
Figure 2.9 Program Name screen
An error occurs if you try to set a program name that has already been used. You cannot include full-width characters in the program name. The name must consist of half-width alphanumeric characters.
(10) Confirm the installation
Confirm the installation and click the Next button. The installation begins.
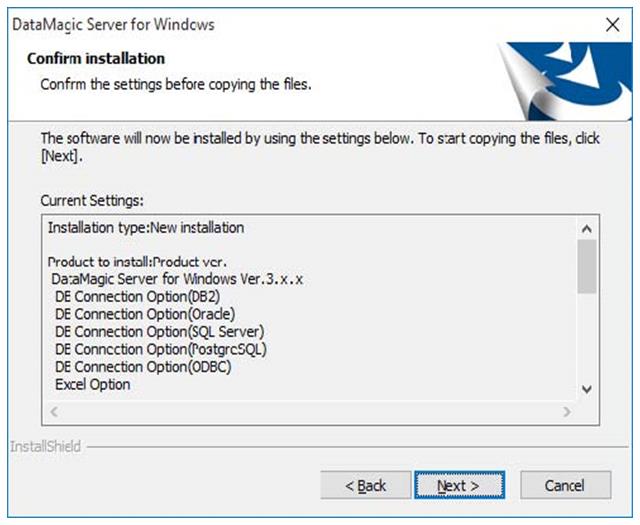
Figure 2.10 Confirm installation screen
(11) Installation processing
The installation of DataMagic Server continues while the following screen is displayed.
Before this screen is displayed, the system and environment are checked and updated.
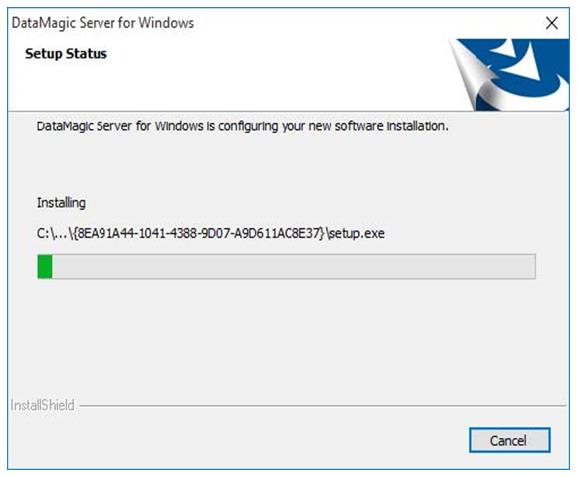
Figure 2.11 Setup Status screen
(12) Check whether to start the service
After the installation processing, a screen asking whether to start the DataMagic service is displayed. If you want to start the DataMagic service, click the Yes button.
If the service fails to start, check whether the Request acknowledge port No. is available. When DataMagic Server is installed for the first time, the port number for DataMagic Server is fixed to 36000 by default.
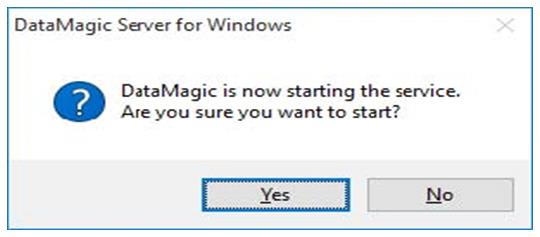
Figure 2.12 Screen for checking whether to start the DataMagic service
(13) Exit the setup program
When you click the Finish button, the setup program closes.
When the setup is finished, if you started the service in the screen for checking whether to start the service, DataMagic Server changes to an activated state.
Check the operating environment. For details, see DataMagic Operation Manual.
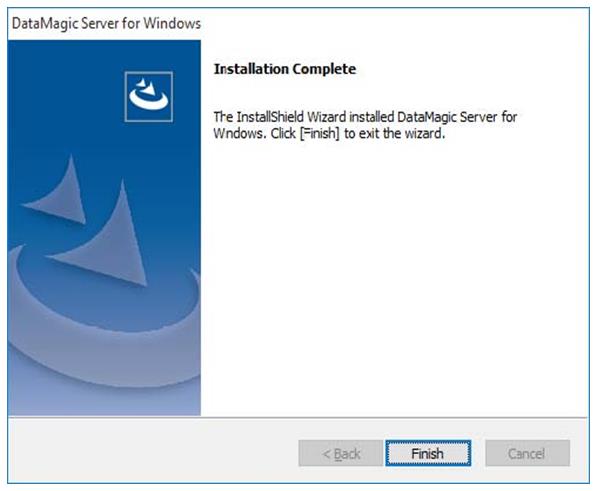
Figure 2.13 Installation Complete screen
The installation of DataMagic Server is now complete.
To use DataMagic Server for Windows, you need to install DataMagic Manager. DataMagic Manager is needed for making setting parameters of the executing data procession.
Follow the steps described in Installing DataMagic Manager to install DataMagic Manager.