Setting fields in the Excel import settings screen
In the Excel import settings screen, you can view the management Excel file and set up fields. This section describes how to set up fields in the Excel import settings screen.
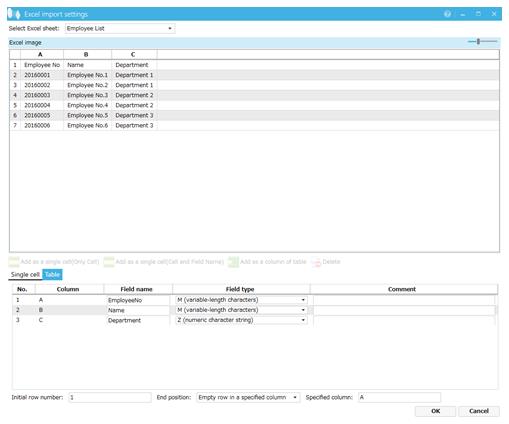
Screen 4.55 Excel import settings screen
1. In the Excel - Detailed Information screen, specify the management Excel file, and then click the Read Excel file button.
The Excel import settings screen appears.
2. In Excel image, specify a cell or a range in a table that is to be set as a field by using the mouse.
Use the mouse to specify a single cell or multiple cells.
3. Click the Add as a single cell(Only Cell) button, the Add as a single cell(Cell and Field Name) button, or the Add as a column of table button.
The range selected by using the mouse is specified as a field.
4. Confirm the field of a row (record) to be obtained, and then click the OK button.
The selected fields are set to a list of fields in the Excel - Detailed Information screen.
In the Excel import settings screen, the leftmost column of the selected row is treated as column A, and the next column to the right of column A is treated as column B, and so on. When a cell is set as a field name on the Excel - Detailed Information screen, a column letter is automatically assigned to the value of that cell. The following shows examples of values set in a cell or column depending on the status of the target cell:
-
If the target cell of the selected row is empty:
A column letter and a row number are set for the cell, and a column letter is set for the column. The field name is left blank.
-
If the target cell of the selected row is not empty:
A column letter and a row number are set for the cell, and a column letter is set for the column. The value of the cell is set for the field name.